Now that the dashboard was off and the new blower was installed I could turn to the ignition issue. I had proved that both the starter motor and the engine itself worked, so the issue had to be somewhere between the key and the starter. I looked around on the forums and saw it suggested that the most common cause of what I was seeing is a broken neutral safety switch. This is a simple switch connected to the gear selector that prevents cranking when the car is not in park. Unsurprisingly the switch itself is located in the gear selector housing. The entire assembly is a sort of wedge shaped plastic bit that is connected to the gear selector by a plastic lever with a hook on the end. When the transmission is in park the lever connects a circuit that allows current to flow to the starter. When it’s not, the circuit is broken and no crank. I undid the two screws holding it in place and lifted it out gingerly. Once on the bench I prised the tabs holding the metal cover on and took a look inside.
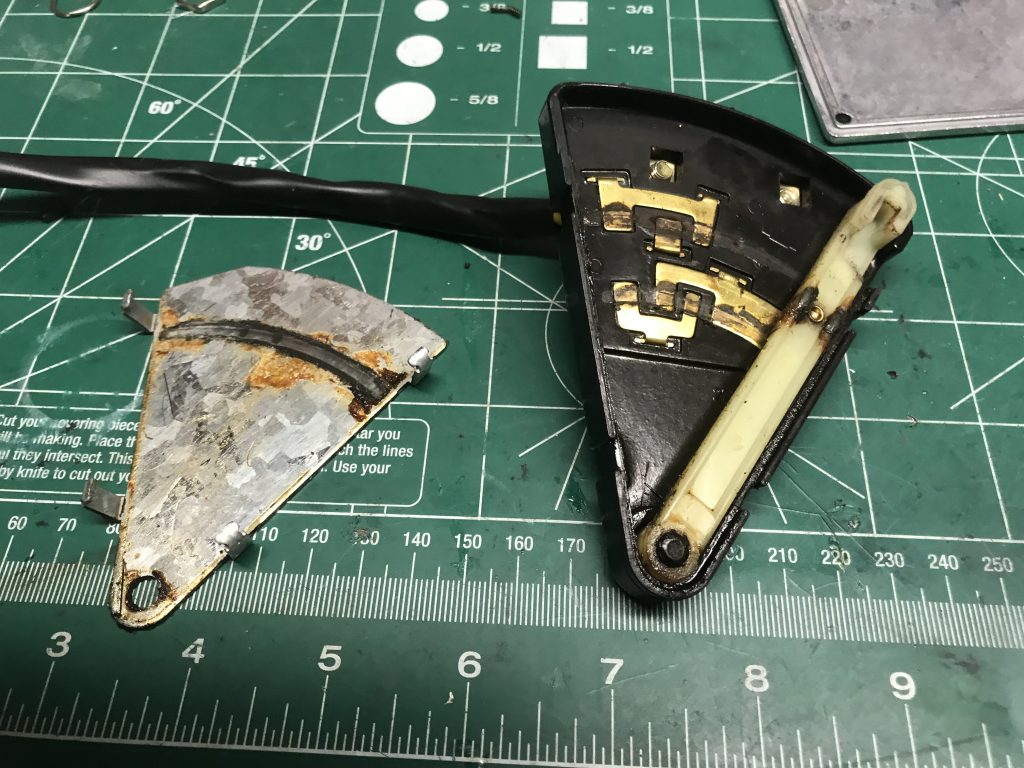
Cleaning the Neutral Safety Switch
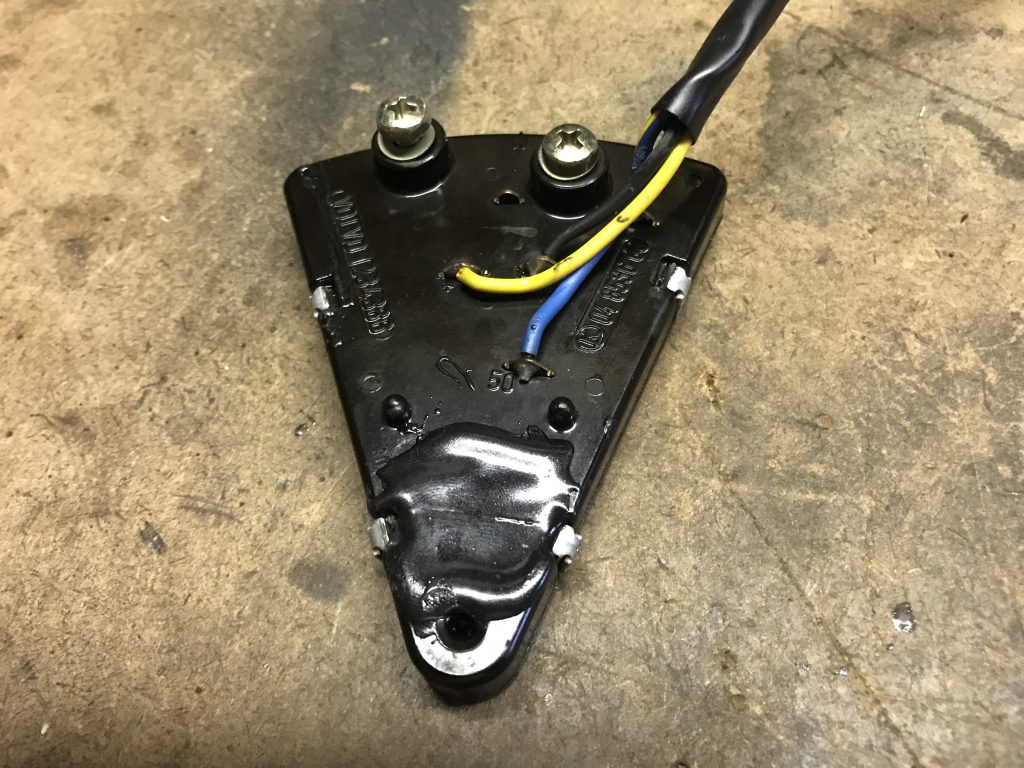
As you can see, the switch has two contacts. One is for when the gear selector is in park and the other for when it is in reverse. The reverse circuit turns the reversing tail lights on. The parts were quite dirty. I thought that perhaps all the gunk was somehow preventing the connection from being properly made. I wanted to give everything a proper cleaning. Ever so carefully I tried to pull the lever up and out, but only managed to break the bottom section of the wedge clean off. Volvo’s old plastic strikes again. Undeterred, I gave everything a scrub, lubricated the pivot point of the lever, and once again using JB Weld glued the broken pieces back together. When the epoxy set, I carefully secured the metal plate and tested the two circuits. All was well, so back in it went.
Finding the Problem
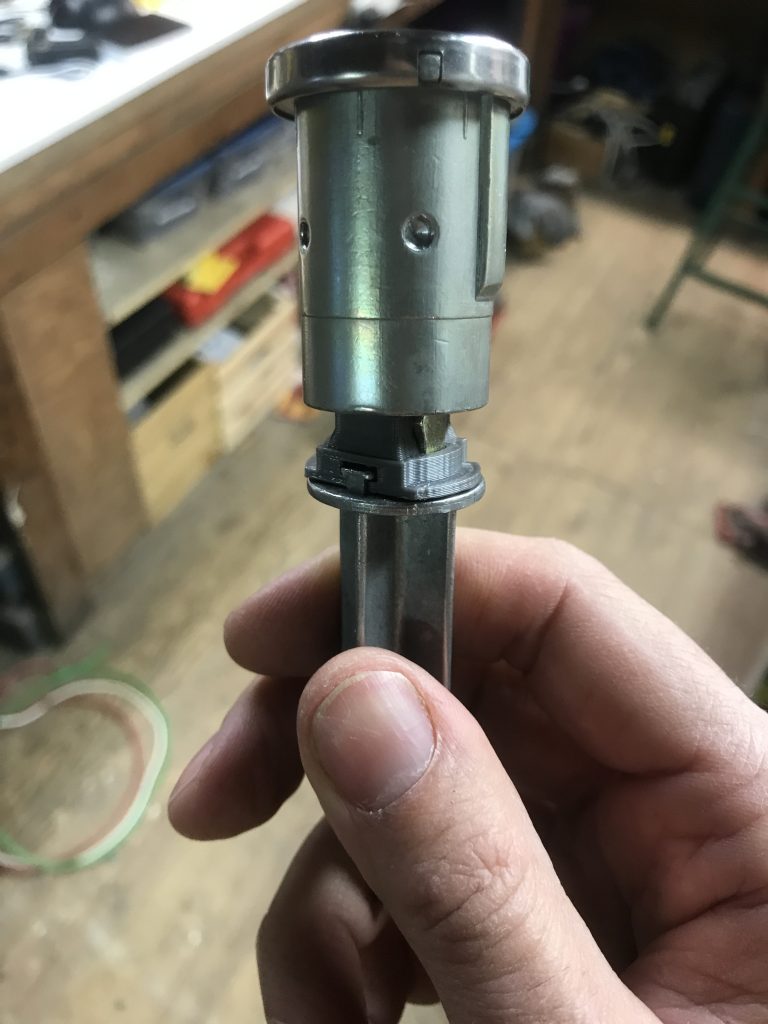
Having eliminated the neutral safety switch, the next suspect was the ignition switch, a part I had already replaced some time ago. Now that the dashboard was off, getting to the switch was much easier, and testing it was easier still. After removing it from the back of the lock cylinder I simple inserted a flat bladed screwdriver into the center, turned, and the engine started right up. I was a little disappointed that this was not the problem as the switch is an easy fix, but I wasn’t surprised as it was brand new. That meant that the fault must be in the ignition cylinder itself. This was unfortunate as the lock was very securely fixed inside a large metal housing that was pressure fit to the steering column.
There’s not a huge amount of information on this assembly in any of the books I own. Thankfully cleanflametrap.com, the true VIPs of the 240 world, have a whole page on it. The lock assembly is held in place by a series of pins that are flush with the outside of the housing. I followed the suggestions on the cleanflametrap page and used a rotary tool to dig the pins out the main difference being that I was doing the job with everything still attached to the steering column. I won’t show you a photo of my work because the end result was… not pretty. But I did get the pins out and I was able to disassembly the lock. The problem immediately presented itself. As is illustrated in this photo, the lock mechanism is actually three parts. There is the part into which the key is inserted, then the part that actually engages the ignition switch, and finally there is a plastic bit in the middle that connects them. My plastic part came tumbling out in two pieces. So that solved that mystery. But I was left in a very difficult spot. Volvo definitely does not make this part anymore nor did they ever offer it for sale, and no one is making it for the after market. This is probably because it usually does not break. Well it did for me, and I needed a new one.
3D Printing to the Rescue!
With no way of obtaining this part short of buying an entire lock assembly, I had to consider other avenues. Considering that the part in question was small and plastic, my mind immediately went to 3D printing. I actually own a 3D printer, but it’s pretty terrible and unreliable. Thankfully I have a friend who is a STEM teacher here in Philadelphia with access to much better printers. But I still had to actually design the model, so I got my calipers, fired up Sketchup, and did just that. After a couple of iterations I had something that seemed workable.
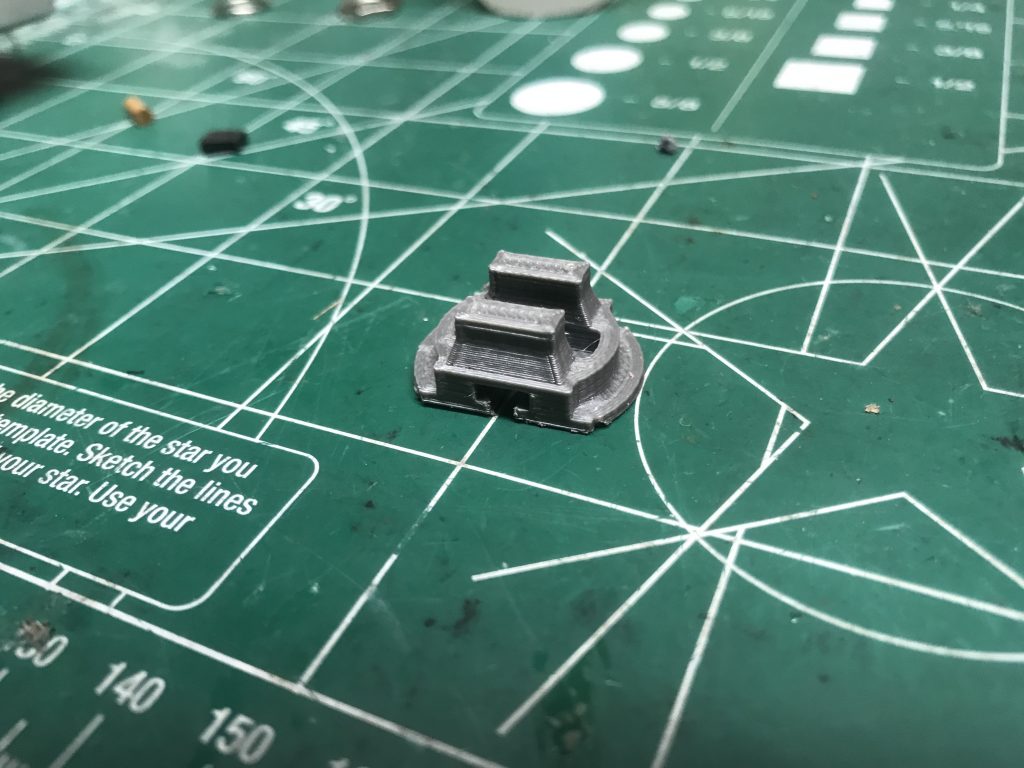
If you happen to find yourself in a similar situation to mine, I have made the models available for printing here.
All that was left to do was slot the assembly back into the housing and secure them with a set screw. I’m not sure what metal they used for the housing but it was quite soft. I was only able to cut threads in one of the holes where the original pins used to be, but it seems to be enough. For good measure I filled the other pin holes in with two part epoxy. It probably doesn’t contribute much to keeping the lock secure but helps stabilize it a little bit. Once everything was back together I turned the key and the car started right up.
Now that the blower motor is replaced and the ignition system is working again, I can put the dashboard back together again. But my dash has a bunch of cracks? Maybe there’s a way to fix that?