Changing the fuel filter, in my mind at least, should be a simple task. On a 240, however, I found it was a pretty big pain in the butt. The filter is located in a metal cradle of sorts just in front of the driver’s side rear tire. This cradle also holds the high pressure fuel pump and is bolted to the chassis using three bolts with 12mm hex heads. Getting them out was the easy part.
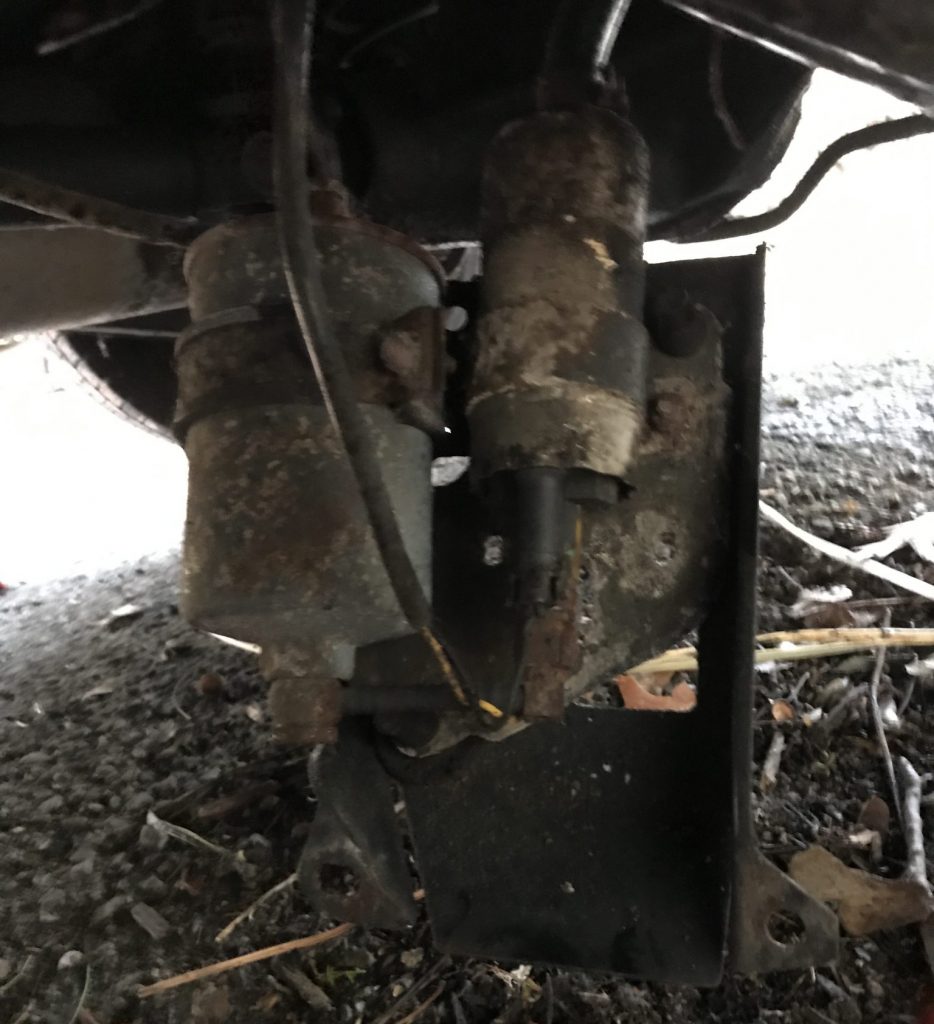
As is evident, the filter and pump were what auto pros like to call “super duper grody.” This isn’t surprising considering the many years spent just inches above the road surface, but I am impressed that the pump has continued to function for as long as it has under these conditions. Anyway, the to free the filter from the cradle one must first unbolt the metal keeper strap. This bolt had gotten very corroded, so I had to hit it with some Kroil before it would come free.
Next the inlet and outlet banjo bolts need to be removed. These were stuck pretty tight too, so after also giving them some Kroil too I used an adjustable wrench to grab hold of the hex shaped shoulder/neck part of the filter where the bolt screws in and put a wrench on the bolt itself. Twisting the bolt to the left while twisting the filter to the right eventually got them apart, but this did take considerable amount of force.
A word of caution here: make sure you have a catch basin handy to hold any gasoline that’s still in the filter once you’ve disconnected it. As soon as the bolts come out that gas, plus whatever’s in the line between it and the engine will begin to pour out. Ask me how I know! Also watch that you don’t end up putting too much strain on the short plastic tube that runs from the pump’s check valve to the filter. You don’t want to accidentally puncture or tear it.

Old 
New

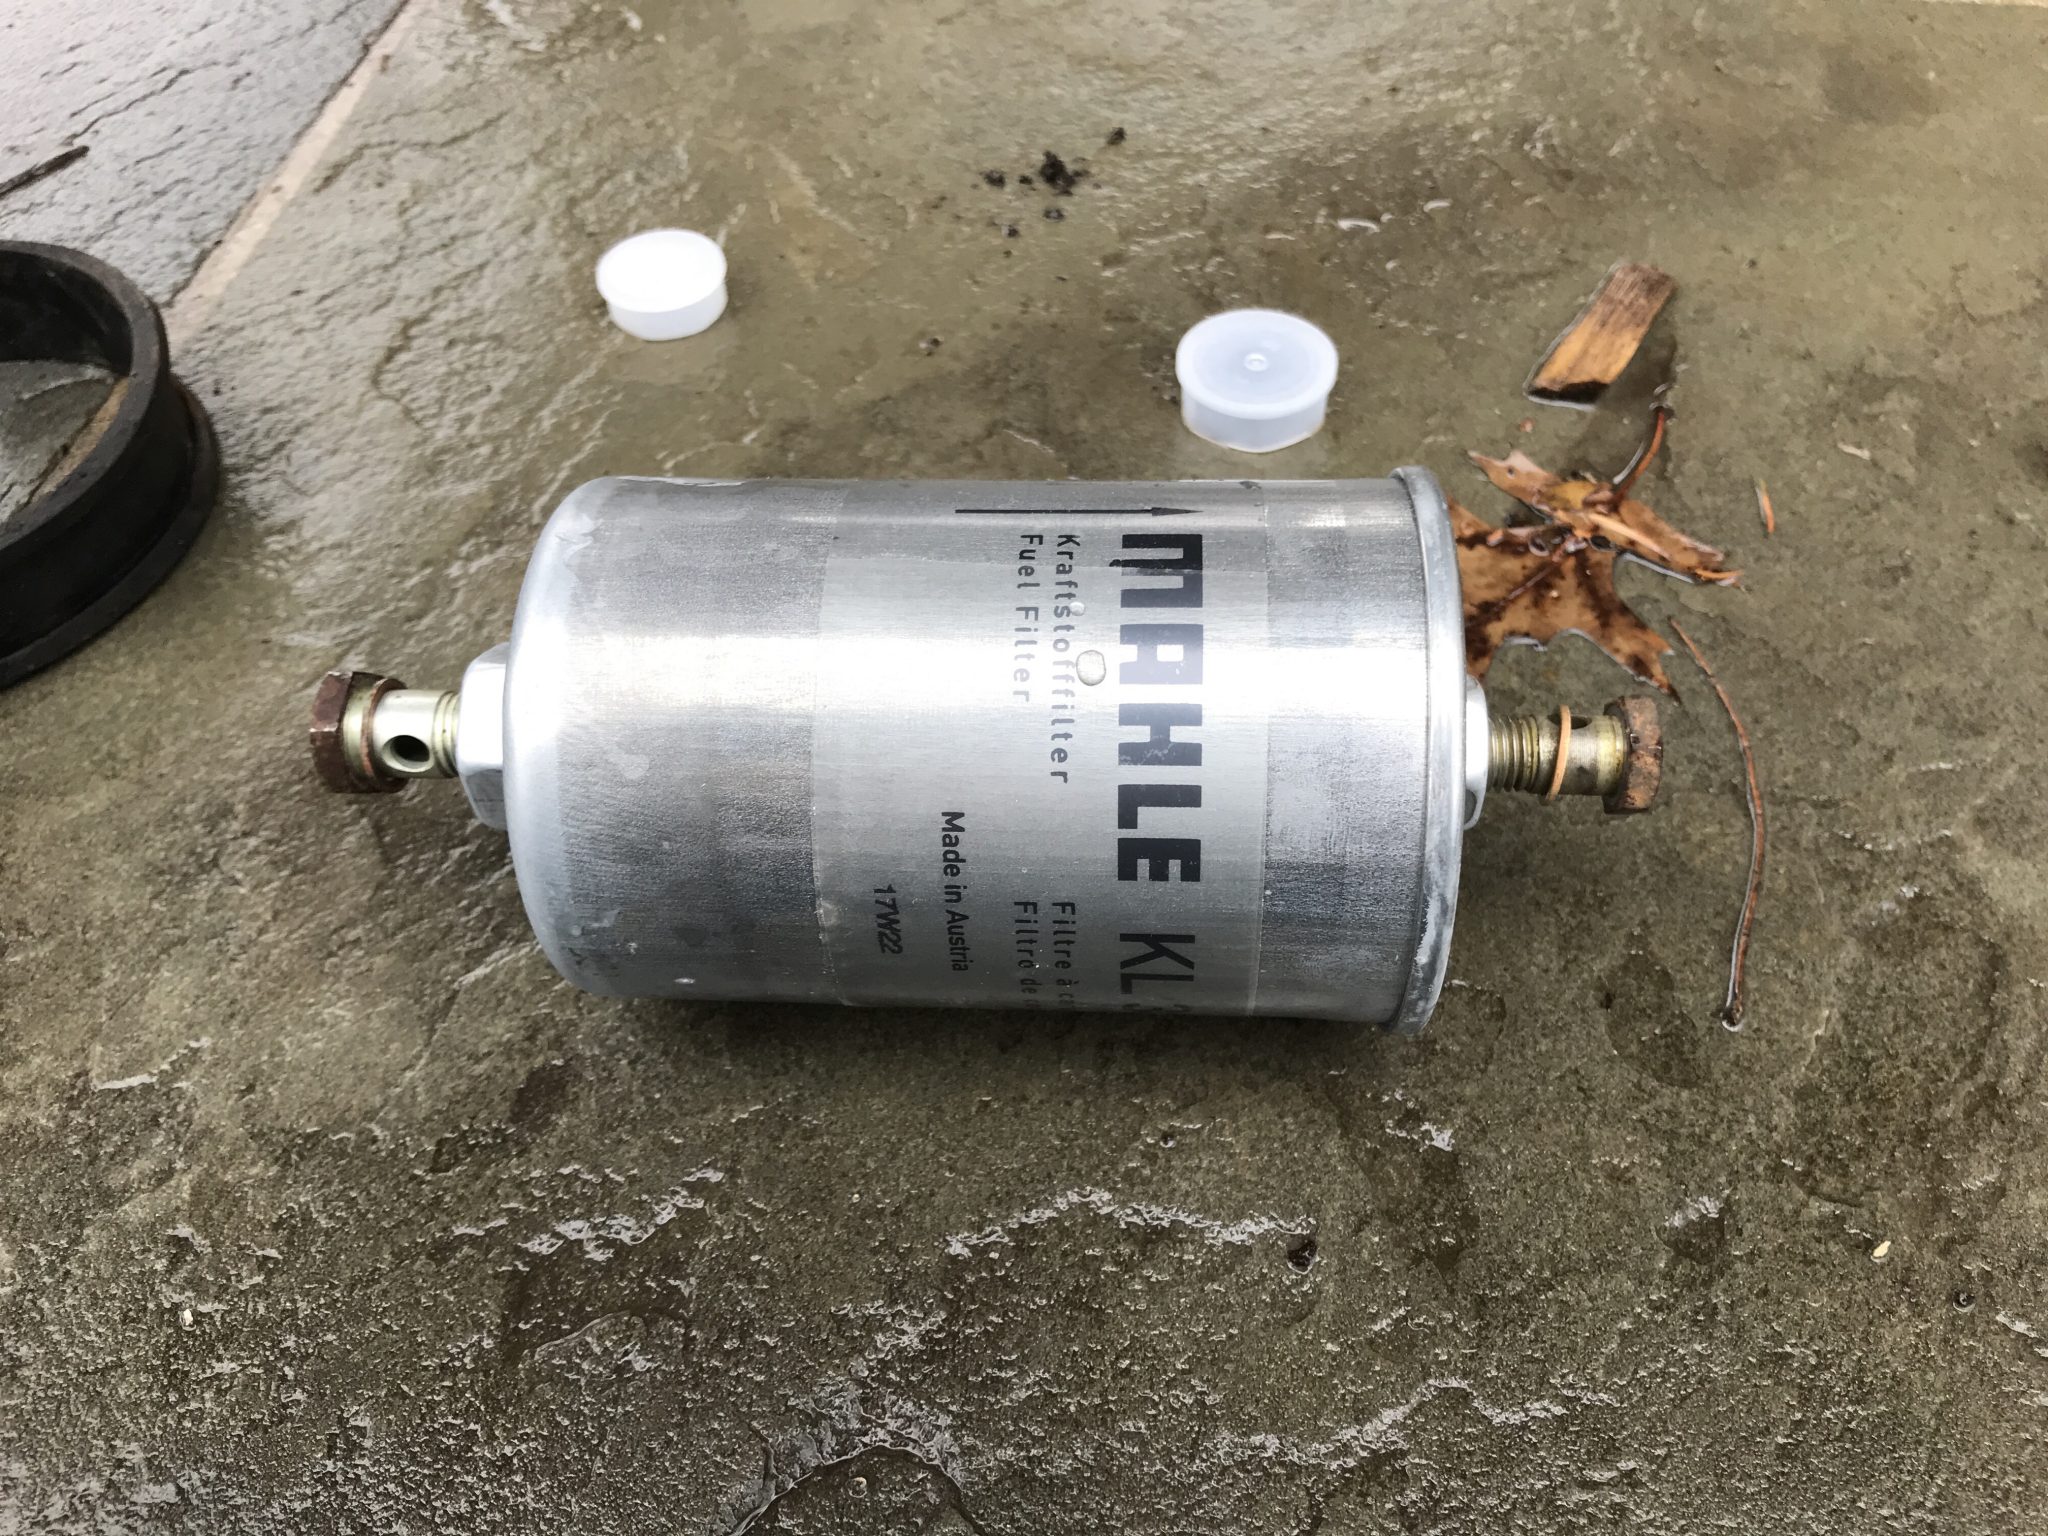
The hard part done, the rest was a relative breeze. As they often say in the manuals, installation is the reverse of removal. Getting the keeper strap, which uses a rubber buffer strip between it and the filter to help keep everything in place, was a little tricky to get properly attached> When that is on, be careful when tightening down the bolt that closes the strap so that the filter isn’t being torqued and the connecting hose from the pump isn’t being kinked. It should be straight.
Test Drive
Once everything was back in and the cradle bolted back onto the car I did a fuel leak check as I did previously by jumpering the left side of fuse four to the left side of fuse six to start both pumps running. I watched underneath the car for awhile for drips (or jets) of fuel and found none. I then started the engine. It stalled a few times at first, which I attributed to fuel starvation while the new filter and the empty fuel lines filled back up. A couple of laps around the neighborhood seemed to smooth out any of those sorts of issues (pictured below).

When I got it back to my house I decided to check for codes to see if anything had popped up. I’m not sure why, but now I was getting a 2-3-2 code which meant “Fuel trim (lambda control) too lean or too rich at idle.” There are a number of things that can cause this, but I decided to just clear the code. The next day started the car and let it idle for awhile. The exhaust wasn’t quite as smelly and the code didn’t come back. Perhaps it was a fluke reading due to some temporary changes in the dynamics of the fuel system introduced when I changed the filter. I’ll keep an eye on it.