My replacement ECT sensor arrived. The time has arrived to really get serious about cleaning and reassembling this engine. First (obviously) comes the disassembly part. I’ve already got the intake section off. Next on the list was the various belts. Well, maybe the second thing. The first hing I did was put the ECT and temperature gauge sender back in and reconnect them.

Belts and Pulleys
The alternator and water pump belts were the first to come off. The required me to partially unbolt the alternator itself so I could relieve enough of the belt tension to slip it off. Easy enough, but looking down in there I saw that the various bolts and brackets holding the alternator on were in horrible shape. There was lots of rust and surface corrosion. Thus I decided to take most of it apart for better cleaning. I really do want this car to both run and look nice (or at least be presentable) when I’m finished with it, so I think it’s worth the extra effort. I similarly loosened to AC compressor and power steering pump, but found that while the belt to the power steering pump was easy to get off, the compressor didn’t quite move inward enough to slip the belt from the crank off. The crank pulley would need to come off. This is probably a good idea anyway since the things was showing some serious surface rust and flakes of what I assume was once paint coming off.
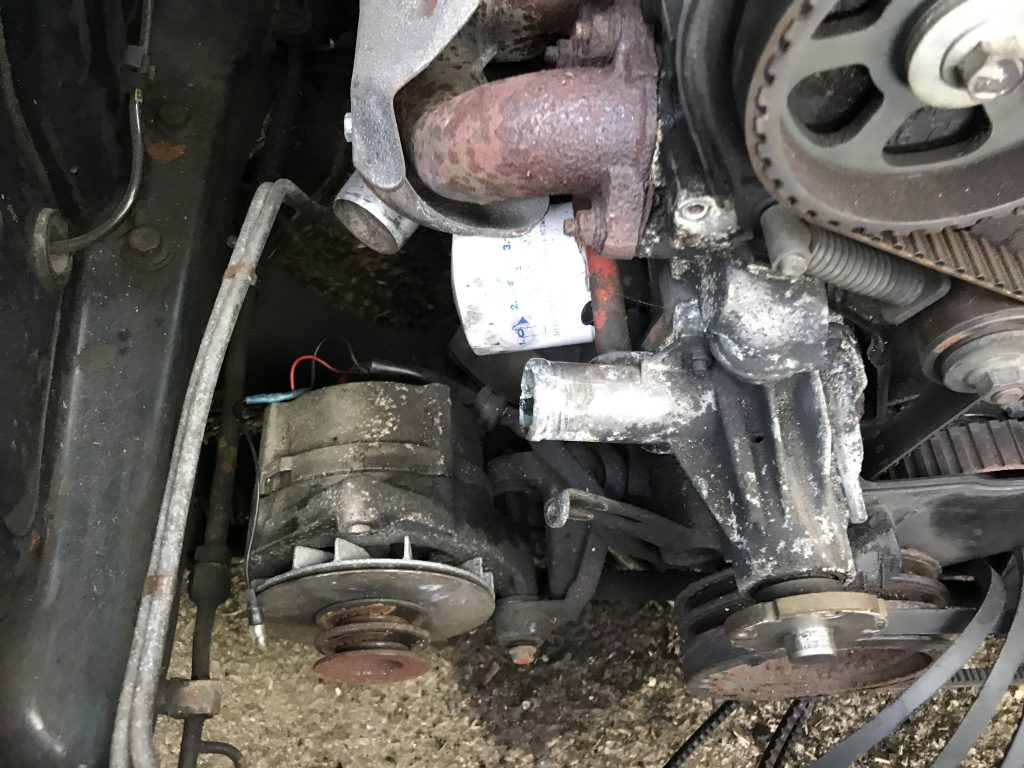
Alternator 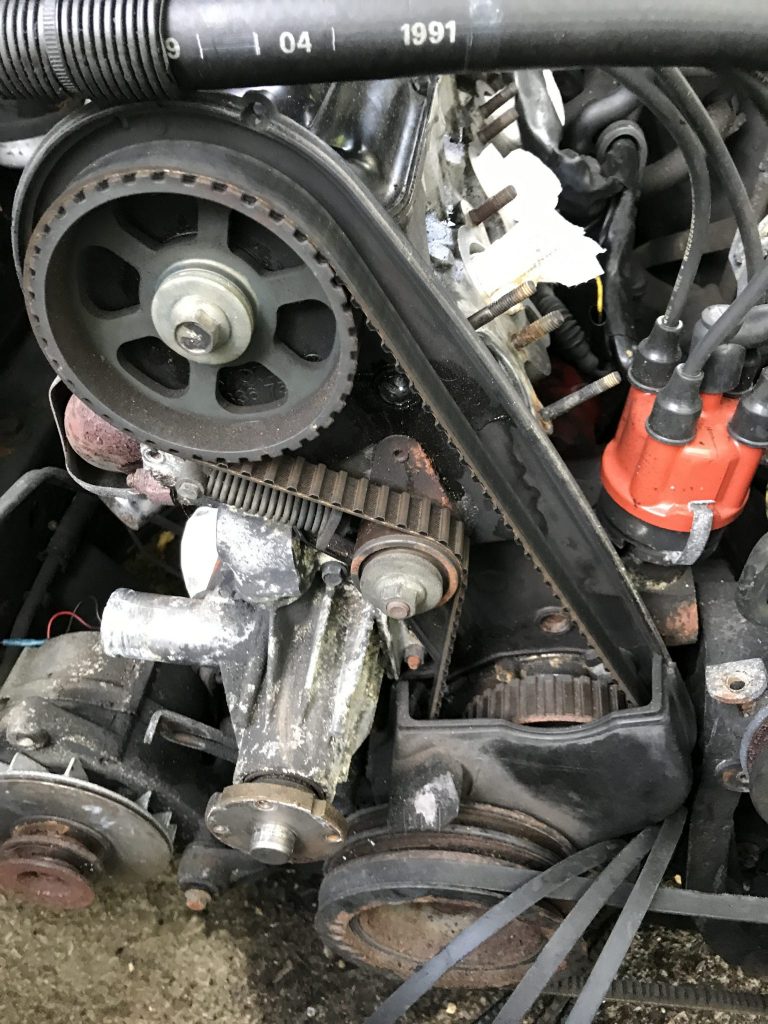
Water pump 
AC compressor
Taking the crank pulley off requires a little pre-wrenching preparation. Since the pulley is coupled to the crank simply turning the bolt that keeps it attached turns the engine. You have to keep the pulley from moving while you do this. A number of places, but in particular this guy, have suggested using a u-bolt attached to a chain which is secured to some part of the car to do this. So I bought approximately three feet of solid chain, attached a u bolt, and, fittingly, fashioned a hook from a piece of Ikea hardware I had laying around. I then threaded the bolt through the pulley and hooked the chain into the frame.

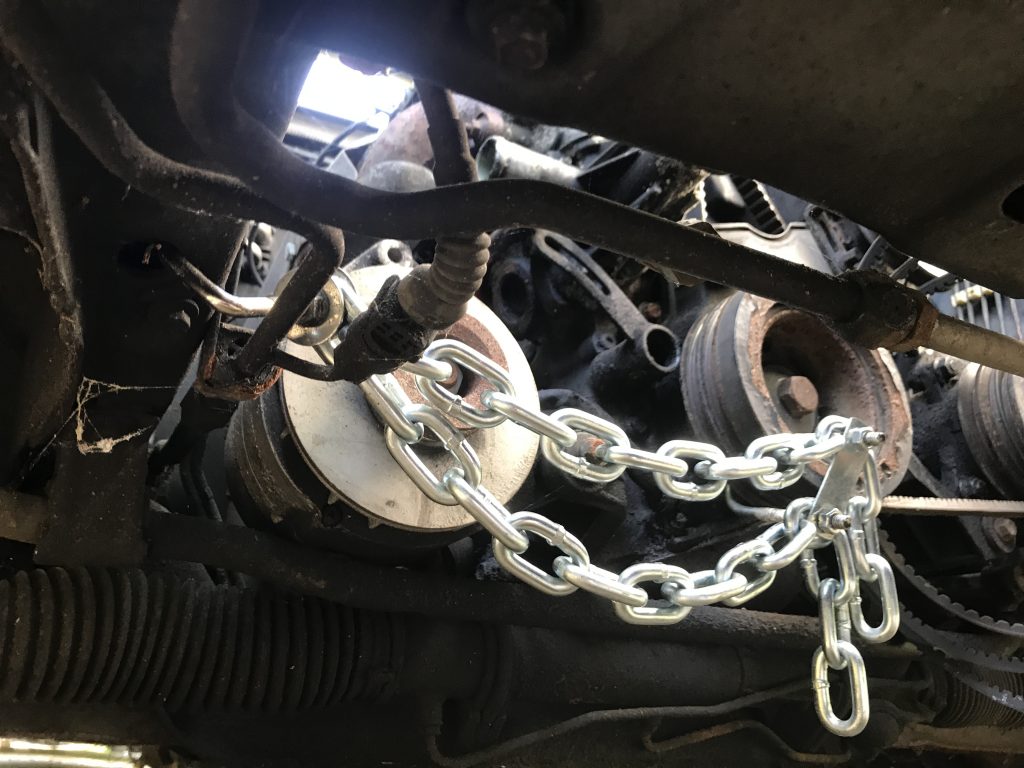
I then put a 24mm socket on a breaker bar, twisted, and… chunk! Out came the bolt. No problem. The pulley itself took a little coaxing, but soon it too came off and with it the final belt. The pulley is actually a three piece assembly. There’s the inner wheel that is keyed to the crank shaft, a rubber donut in the middle, and the actually pulley part on the outside. The three are solidly fixed to each other and all together act as a “harmonic balancer” that reduces vibrations between the engine and the rest of the accessories that are connected via the belts.

Timing Bits and Paint
Next to come off were the timing belt covers, both upper and lower. The were each attached with varying combinations of 10 and 13 mm bolts. Removing them revealed the timing belt, tensioner, and the cam, crank, and intermediate sprockets. The covers, like most of the rest of my engine, is covered in 27 years of oil, grease, and dirt which have combined into a thick, gross paste. I gave them a quick bath in warm, soapy water and scrubbed them a bit, but it wasn’t helping much. I’ll have to find a product that’ll cut that crud.
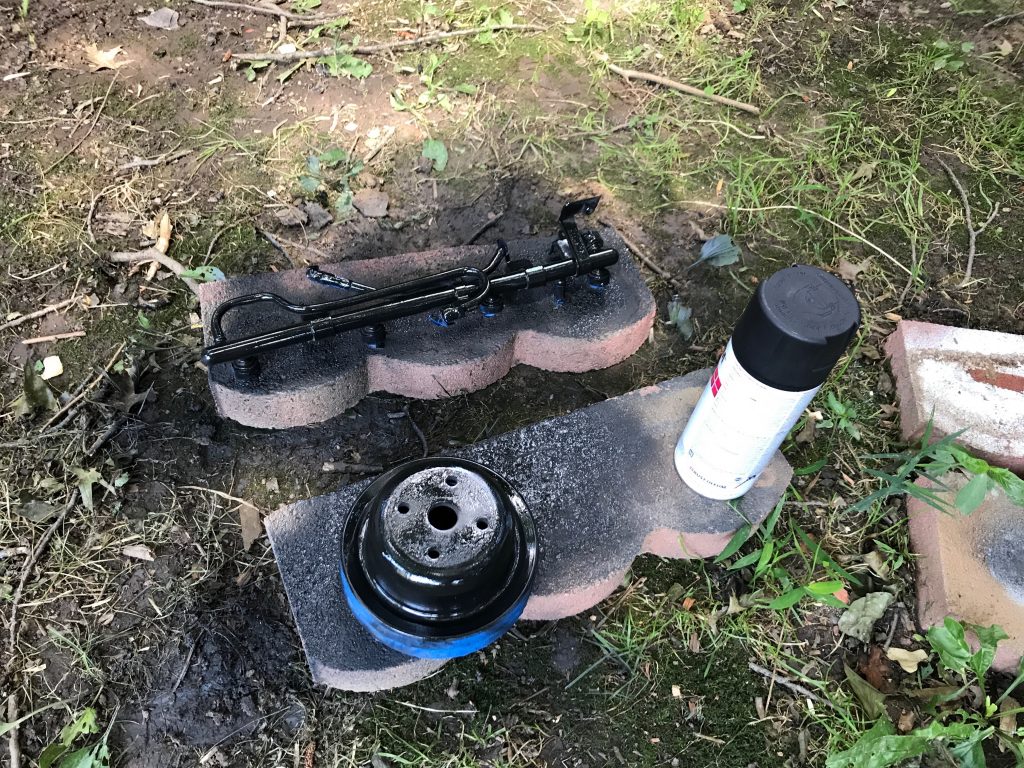
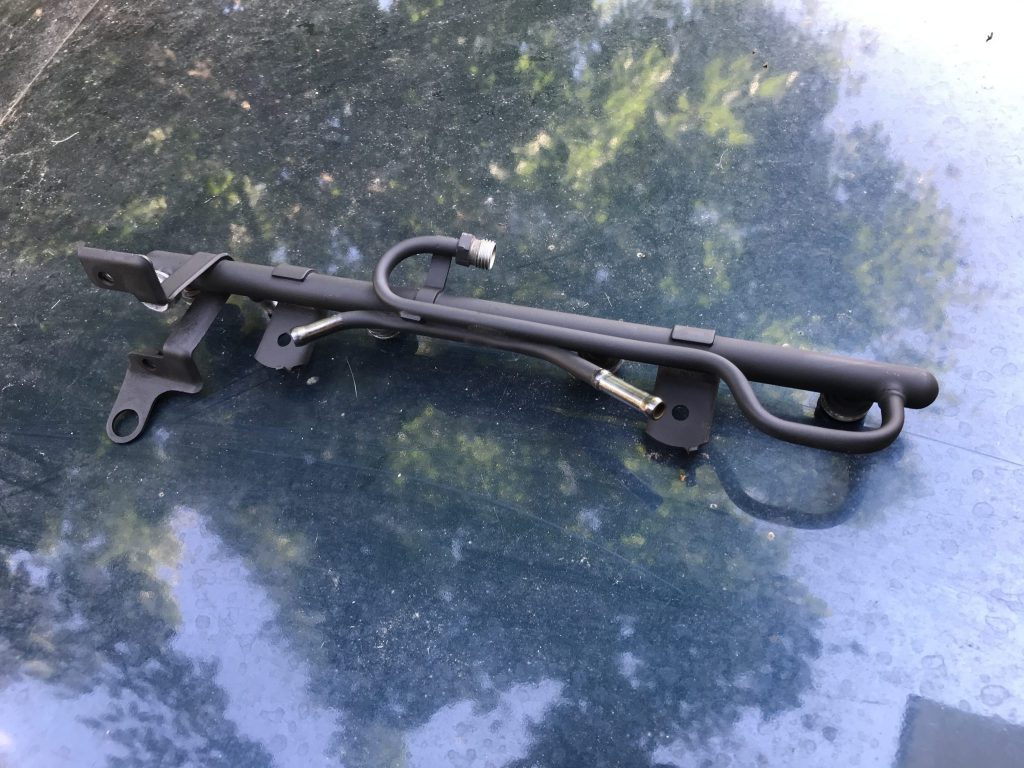
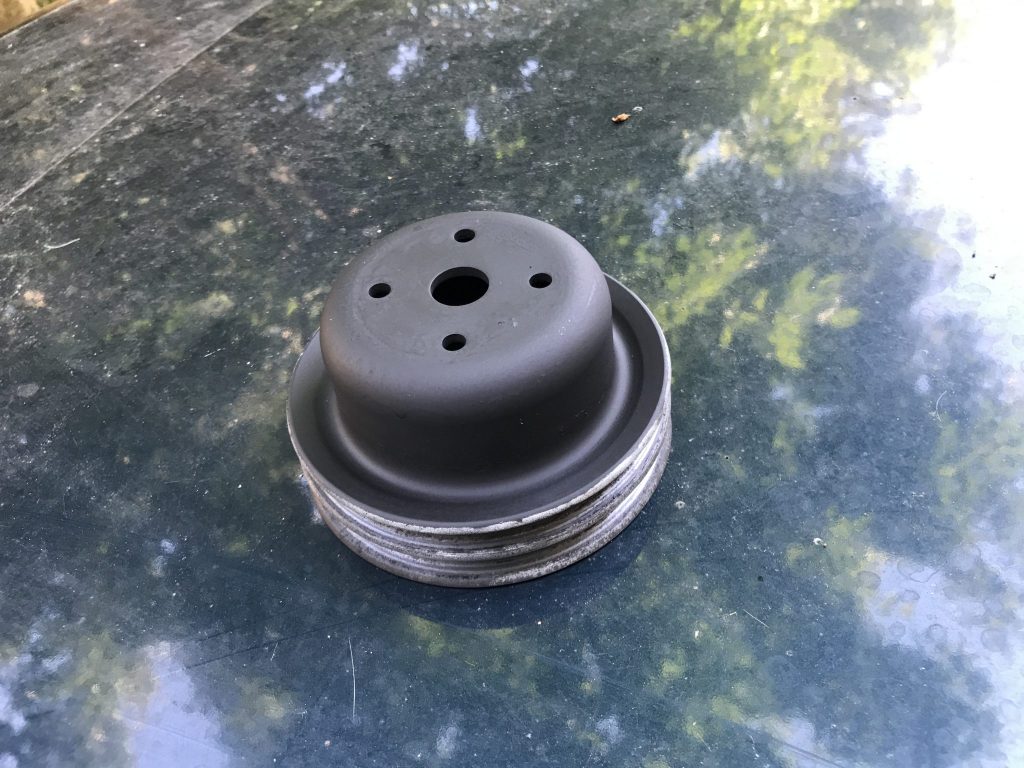
The light was fading for the day, so I decided to take the parts I had already treated for rust and corrosion and give them some flat black paint. At this point these parts consisted of the water pump pullet and the fuel rail. Using blue painters tape to mask off the parts that shouldn’t have paint on or in them (the fuel intake and outflow tubes and injector sockets for the rail and the valleys where the belts sit for the water pump pulley) and took them to the good old painting bricks in my back yard. They look much nicer now, and hopefully they’ll resist rusting back up.
Next up will be treating and repainting the crank pulley and replacing the timing belt.