Recently my horn stopped working, and although I seemingly fixed it for a time it eventually stopped again. Since I didn’t have properly sized insulators, I was initially suspicious of the bullet connectors I had used reasoning that they were coming undone due to the vibrations of the running car. On eBay I found someone selling the same model of horn, a Klaxon brand model TR90 “low”, that used spade connectors instead. When it arrived I hooked it but still got no honk. My multimeter told me that I was getting 12 volts at the horn when I pushed the button. Manually grounding the other side of the horn to the car definitely produced a loud, sharp honk. This lead me to believe that the ground wire from the horn to the steering wheel switch. Thus began a day of disassembling a good amount of the dashboard.
Disassembly
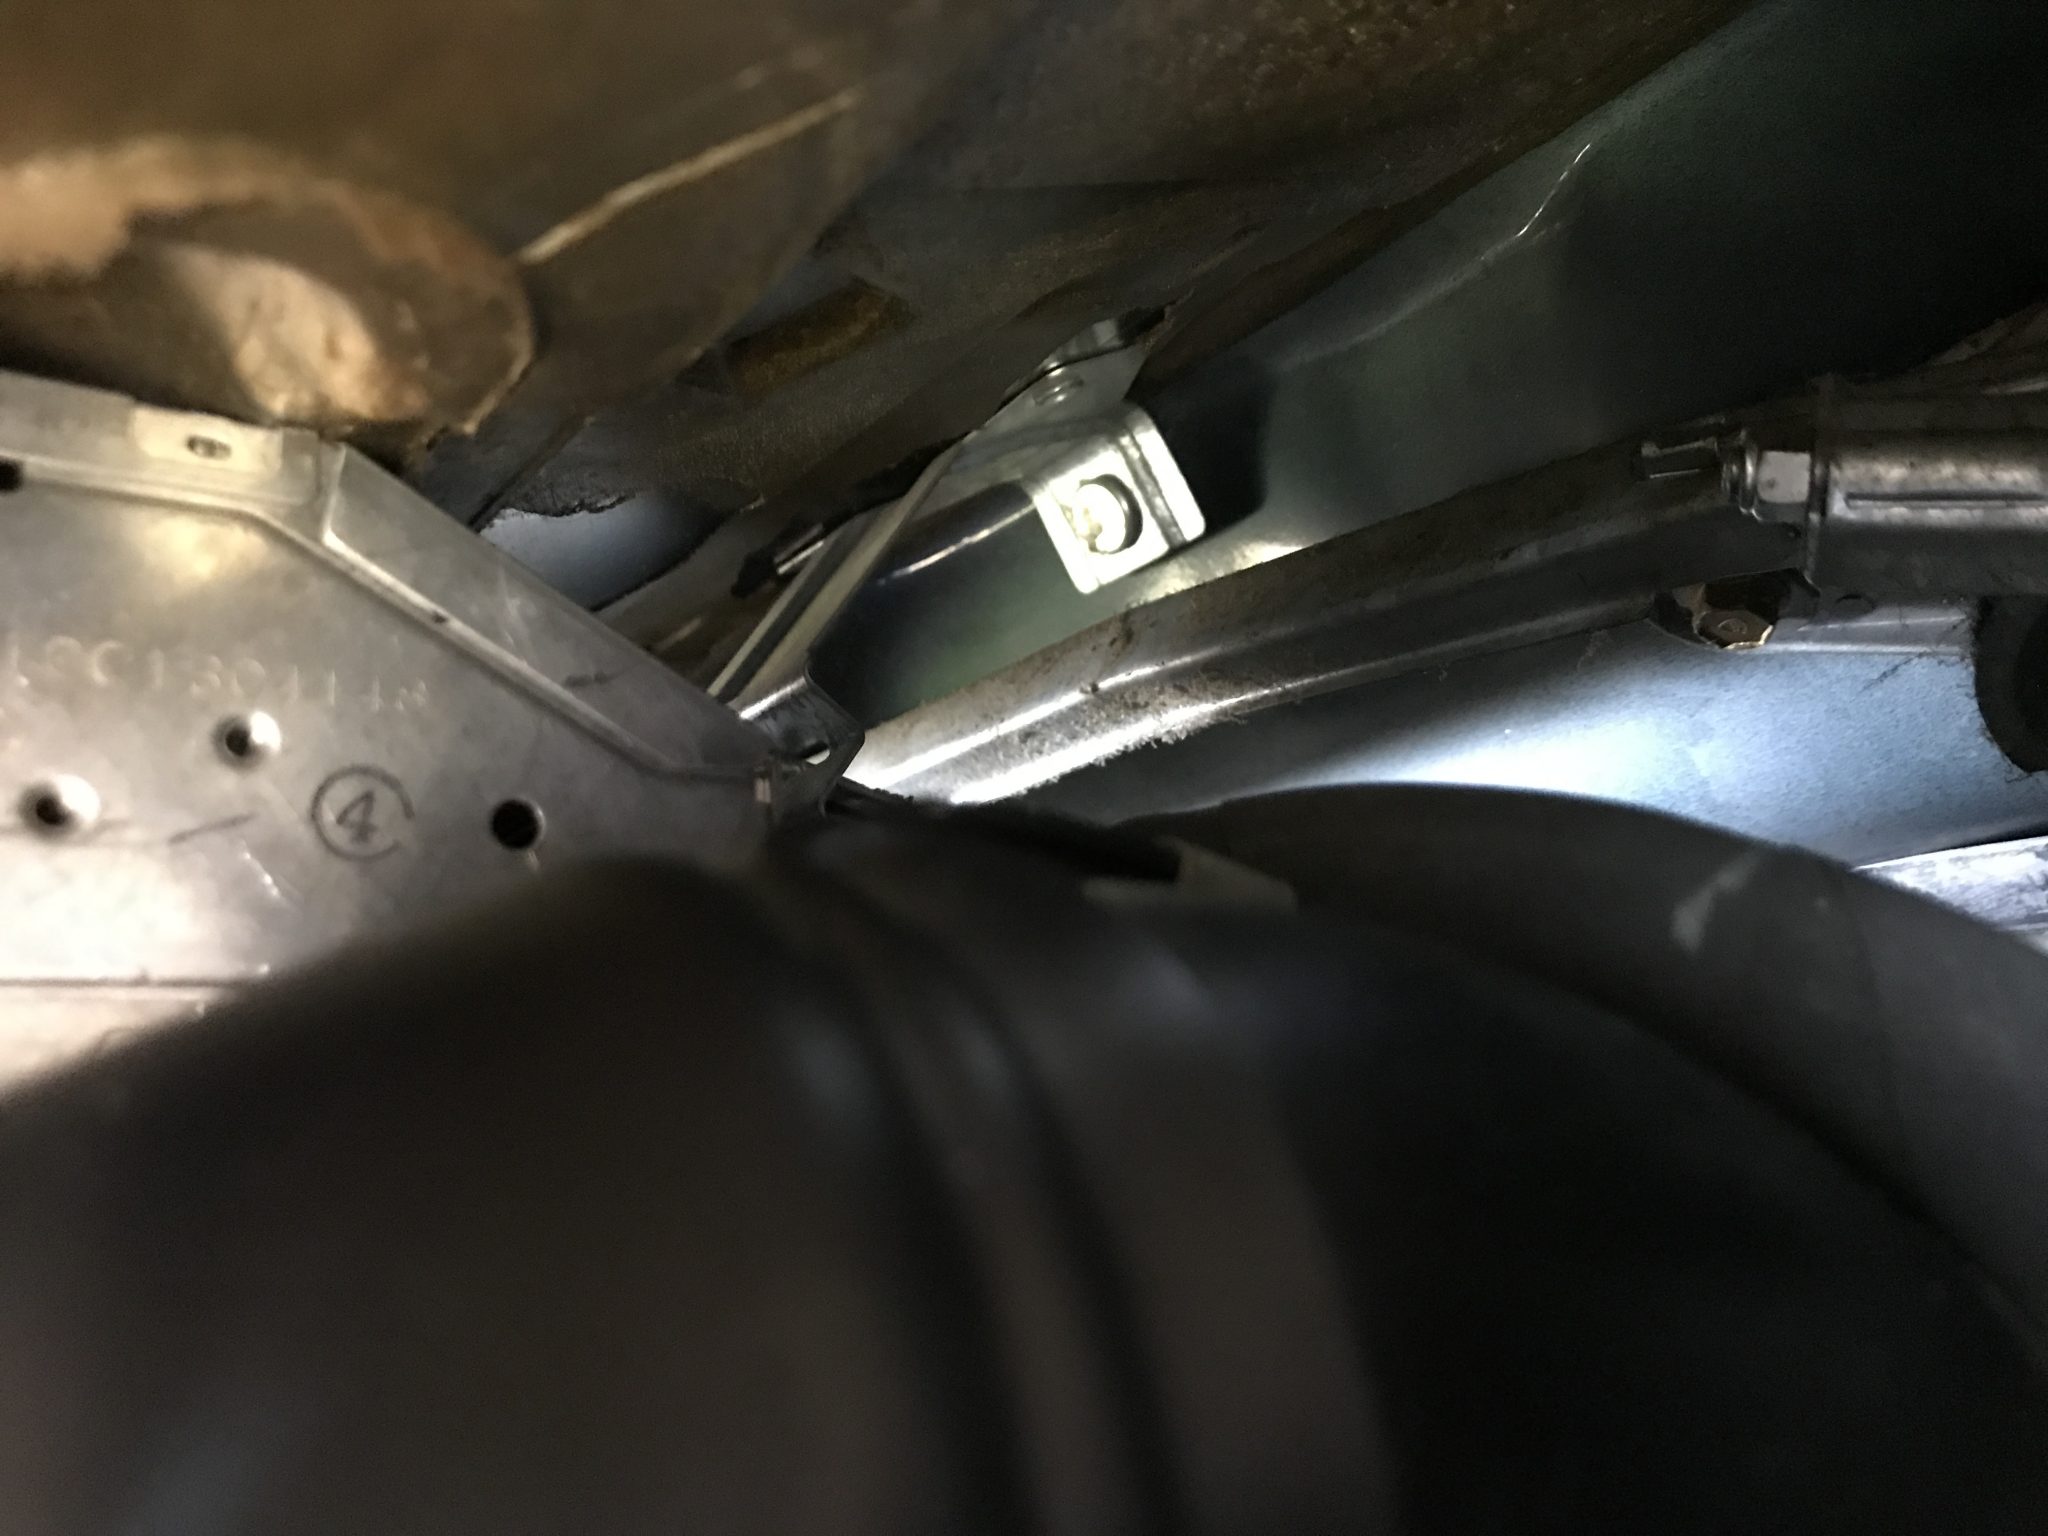
The horn’s ground wire starts at the horn, travels around the edges of the engine bay, through the firewall, and connects to the switch in the steering wheel through a spade terminal on the back of a collar that connects the wheel to the steering shaft. I know all this now because I essentially took apart half of the dash to get a view of these parts.
This is the interior of my steering wheel after I had removed the SRS airbag assembly. The two vertical brackets on the sides are the contacts for the horn, and the black wire between them is the ground wire.
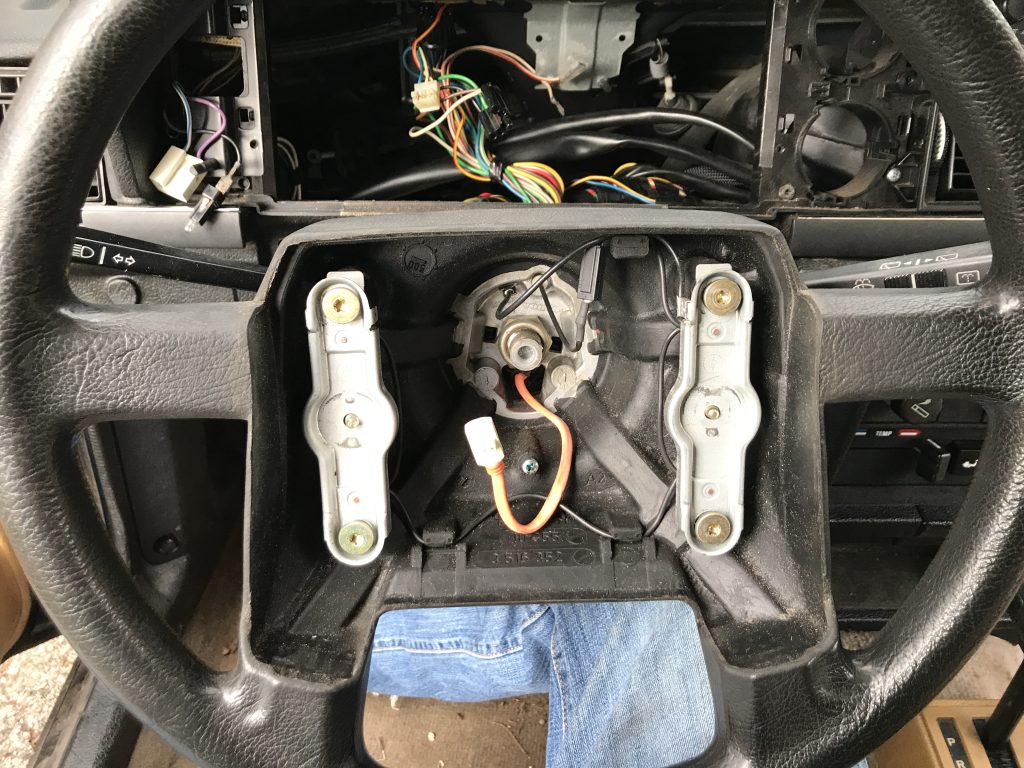
This wire ends in a spade terminal on the back side of the steering wheel collar into which the wire that runs from the horn connects. I fiddled with this spade a little to try and clean it up. A continuity test between it and the end of the wire by the horn showed a good connection. Except for the air bag, I plugged everything back in, reconnected the battery, and HONK HONK! The horn was back.
Removing the Radio
With the instrument cluster removed I could see the back of the radio. My radio, a factory standard TD-613, never really worked. The knobs were noisy and staticky, the front was unilluminated which made it hard to use at night, and the tape deck didn’t even work. Naturally it will need to be replaced with something a bit more modern, so I figured that since I was working inside the dash I might as well take the opportunity to remove it. I’d soon find that this is easier said than done!
To start this process I removed a few of the more obvious screws. Then I met this guy.

This is Volvo’s stereo anti theft device. It is literally a metal strap that is bolted to the back of the radio and hooked through a bracket. Pull as hard as you’d like, it is nigh impossible to remove the radio. After a significant amount of bending and stretching and yanking I ended up having the snip the bracket to free the radio. It was an ordeal, but I’m happy to say that the old, broken radio is out and I have a new system on the way.
Here is what that metal strap thing looks like once the radio is out. Turns out it was attached with two screws, neither of which were readily accessible with tools. God only knows how these radios were meant to be legitimately removed, but I guarantee you that it would have never been successfully stolen.

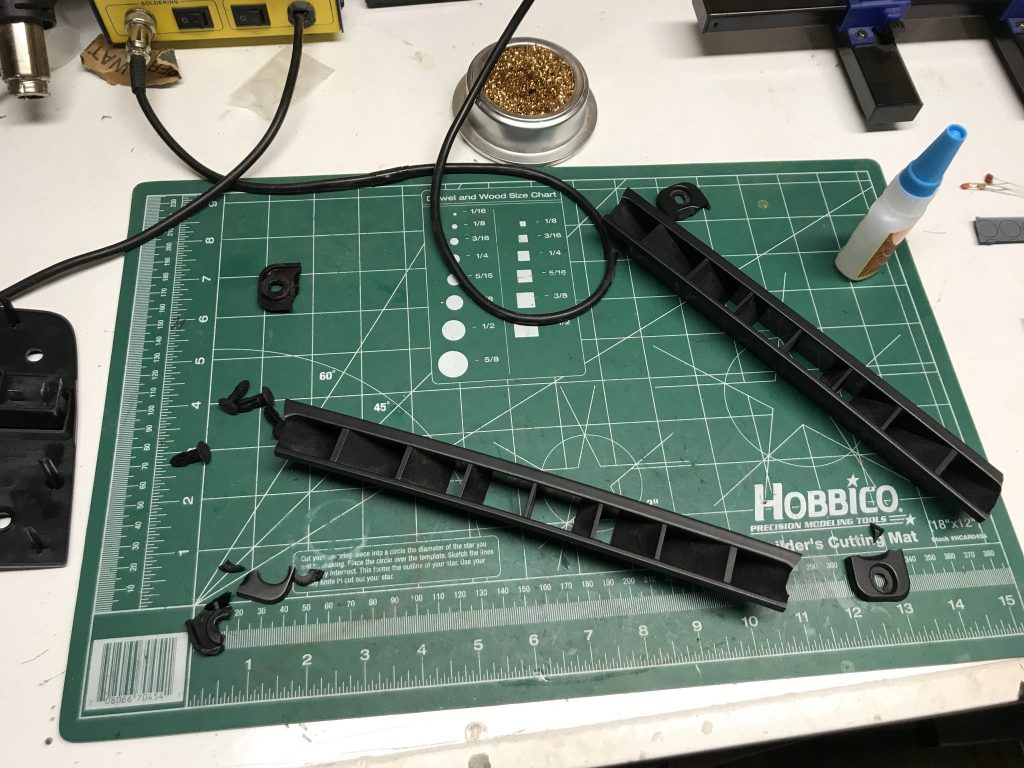
Again, since I was in there, I also removed the front dash heater vent covers. Both had broken over the years and weren’t really secured in place. I’ll do my best to glue them back into place. It’s sort of a low priority right now because right in time for winter my blower motor has stopped working. I’m thinking that my spring project for next year will be a dash removal/restoration and blower motor replacement. Maybe I’ll find a R-134A AC system to install at the same time and get all my heating and cooling issues fixed in one go.