The good with the bad

The weather this past weekend was just glorious. After a disappointingly warm and wet September we had our first real run of crisp, sunny autumn days. I made sure to carve a little time out to start the tests of the fuel system. The results turned up both good and bad things.

The Good

I began by sorting out the fuse panel which, for some reason, had a couple of fuses of the wrong amperage in the wrong places.

With those sorted I decided to test the fuel pumps for basic operation. Using a small jumper wire I had made I removed the fourth fuse from the top, which is for the primary fuel pump, and connected the right side of that terminal to the left side of the sixth fuse down. This brought power to the in-tank pre-pump which started right up with a faint hum from the rear of the car. I put the fuse I had removed back in and applied attached the wire to its left side. This powered the primary pump which also began to hum nicely. With the pumps running I tried starting the car. Success! The engine started up and this time didn’t immediately stall. After some warming up it did sustain itself at idle, albeit roughly. This tells me that the fuel pump relay is kaput. I immediately ordered a replacement, thankful to only be buying a relatively inexpensive relay rather than a much more expensive new pump. The rough idle is probably due to bad timing. A friend has a timing lamp which I’ll use to correct that.

I also got around to attaching the rear windshield spray nozzle. I’m not getting any spray out of it right now, but like the front I’ll just have to clear the line. Unlike the front one the routing of that hose is a bit less accessible so hopefully this won’t be too difficult.

The Bad

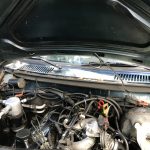
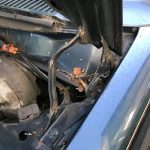
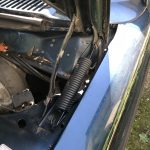
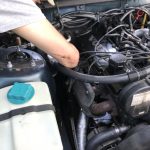
While clearing the front windshield spray nozzles my driver side hood hinge decided that it would much rather start hinging sideways rather than up and down.

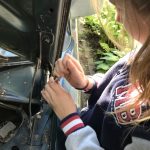
With my daughter’s help I attempted to straighten and reattach it, but the damage seems to have been done. The next attempt to close the hood resulted in the same sideways movement. I’ll have to get a new hinge. Interestingly, when I looked on eBay I saw plenty of hinges for sale but most of them are for the passenger’s side. I wonder if this means the driver’s side has a tendency to break more often resulting in a glut of single passenger’s side hinges for sale.

Throttle back on plus a cleaned IAC

I found a few minutes recently to reattach the throttle body. It was a pretty unceremonial act, and since I was pressed for time I didn’t get photos of it. Really the experience can be imagined by going back to the post where I took it off and looking at the photos is reverse order. The only difference you would notice is that I replaced the gross old gasket.

Tucked Away All Down There…

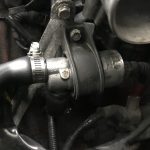
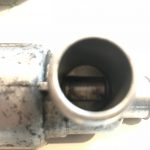
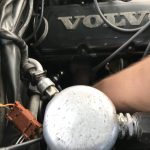
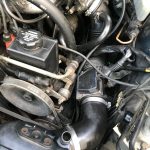
While working on the throttle I noticed the idle air controller valve (IAC) tucked down there. The IAC is a device that is in charge of maintaining an engine’s idle speed. It has a servo motor controlled valve inside that is opened and closed to varying degrees by the ECU using a pulse width modulated signal. This allows the airflow to bypass the throttle valve in order to maintain a steady idle. The action of the servo can become dirty and sticky over time, and since I had clear access to the IAC I figured I take it out and clean it. It sits inside a rubber collar that is attached to the engine with a couple of bolts.
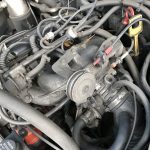
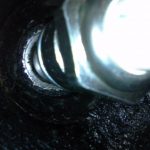
Getting a photo of the actual valve with my phone was not easy. You can sort of see it in the above photo. In truth it wasn’t very dirty, but it did have a thin coating of gummy residue on the outside. I blasted both ports with carb cleaner and ran a rag inside to clear that off. Then I moved the valve back and forth manually to make sure it could move smoothly. I could have rigged up a servo control circuit to actually test it out, but that seemed a bit more effort than I had time or patience to handle right now so I’m trusting that the servo itself still works.
A Series of Tubes

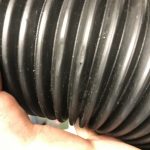
Since I had removed the main air duct to clean the throttle, I cleaned it off and looked it over to make sure there were no holes in it that might lead to excess air coming into the system after the MAF sensor. There were no big holes, but I did find a teeny, tiny hole in one of the bellow ridges. I doubt this was causing me the problems I am experiencing, but I put a little dab of rubber cement on it and covered it with a small piece of electrical tape just to plug it up.

I began to reassemble all the air hoses between the throttle, the IAC, and the engine but got called away half way through the process. Total reassembly and the next attempt to start the engine will have to wait for the weekend.

Cleaning the Throttle Body

I kept this post in my pocket for a few days. After cleaning the throttle body I had hopes that I’d also have reinstalled before publishing it, but the weather around my parts has been brutally hot and unpleasant so that hasn’t happened yet. I did find my way to my local NAPA store where I bought some throttle body cleaner and a few other needed solvents. These included specialized throttle body and air intake cleaner, brake cleaner, and some belt conditioner. The last item was because I’ve found that when I start the engine and give it a little gas one (or more) of the belts is letting out a hellacious squeal. I figured a little belt conditioning couldn’t hurt and might fix that issue. I consulted with a friend of mine and he suggested that the squeal might actually be due to failing alternator or water pump bearings, but I’m hoping this doesn’t turn out to be the case as I’d rather not have to replace either of those things at the moment.

The Work

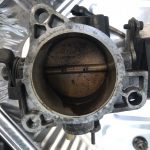
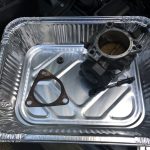
When I got home I took the throttle and removed the two the vacuum line fittings in the top. I put the all the bits into a disposable aluminum pan and gave them a thorough spray and soak in the cleaner which, as my son found out, is some pretty noxious stuff. But for all its smelliness it’s also terribly effective. The caked-on grime withered away beneath the spray and soon the pan had a little pool of very dirty chemical runoff. The gunk was especially thick around where the valve met the housing and seemed to make the action sticky and lethargic. I made sure to also whack a rag around the inside of the air channel and into the little nooks and crannies all over the piece. The valve now definitely opens and closes more readily than it did before.

Thanks again to Son 1 for helping me out with cleaning and reassembly.

Here’s the before and after.

Removing the Throttle Body

Having tested the spark in our previous episode and found it satisfactory, I decided to move on to removing the throttle body. The throttle body, for those who don’t know, is the mechanism that controls the amount of air going into the intake manifold in response to how far down the driver is pushing the accelerator pedal. The airflow is controlled by a butterfly and the position of that valve is read by a throttle position sensor attached to the side. This information is sent to the ECU as part of the equation used to figure out the air/fuel mixture to be injected into the engine.

Throttle bodies get dirty, and a dirty throttle body can stick and otherwise not function well. The dirt introduces turbulence into the air stream which can mess up idle and diminish fuel economy. Neither of those things are good, so I decided to take mine off and give it a good cleaning.

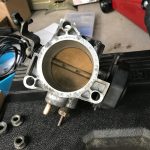
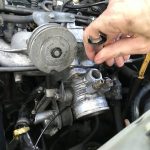
Removal was a relatively simple affair, in principle at least. It’s held to the intake manifold with just three bolts. The outer top bolt can be easily removed with a socket wrench. The other two required me to borrow a set of crescent wrenches from a neighbor because the space available to access them was minimal to say the least. Once I had the wrenches I was able to remove the last bolts and take the assembly off.

As you can see in the middle photo, the inside of my throttle body was quite dirty. Unfortunately I did not have any throttle body cleaner on hand, nor did I yet have the replacement gasket. The existing one was also quite dirty and definitely needed to be replaced. That should arrive in a day or so.

Check for spark

I wanted to check for spark, but rather than do the more laborious plug-against-the-block check of the spark plugs I borrowed an in-line tester from a friend of mine. This handy tool lets you attach to one end into the installed spark plug and the other to the distributor. A light in the middle lights up when the circuit is completed. Here is a short video showing it in operation. Shout out to my son for starting the car for me while I held the camera.

It’s not easy to see on video, but the light is flashing. So I have spark on all four plugs. I also replaced the distributor cap and rotor. The old ones looked a tad corroded, and since those two parts are inexpensive I figured they might as well be changed along with the plugs.

The motor is still stalling out, so down the checklist I go.

Thread Status: Chased

The weather improved a little and I eventually worked up the nerve to chase those plug threads, and while I can’t say that it was a resounding success I can say that I was able to get the plug screwed in satisfactorily.

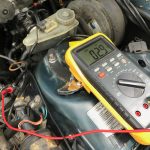
When I tried the ignition the car did start momentarily before it stalled out. So basically I’m back to where I started a few weeks ago. There are quite a few things that could be wrong here. I’ve covered spark, so I decided to move on to air. That meant making sure the MAF was still working, so I hooked up my multimeter.

I verified voltage on both the power and signal lines, and they were good. Next I tested resistance across the sensor saw numbers that were within the limits as shown in my manual for an LH-2.4*. There may be some air leaks messing up the calculations, but I haven’t noticed any yet.

This leaves fuel. I think my next step will be to take the throttle body off and clean it up.

* 2.5-4.0 ohms

New plugs and wires

After doing a little reading about 240 starting issues I landed on “bad/wet spark plugs” as a possible culprit. Since the fuel injectors were telling me they were fine I figured changing out the spark plugs would be the next easiest thing to try. I had no idea when the plugs had last been changed. For all I knew they could be original.

Get To Work

I proceeded to pull the rubber boots from the plugs only to find that half of them had terminals that had at some point corroded and become cemented to the terminal nut. This meant that the wires were no longer usable. The plugs themselves looked pretty dirty, so replacing them, even if they didn’t turn out to be the source of my current issue was probably a good idea.

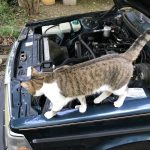
After ordering new plugs and wires, I gapped the plugs and swapped them. Thanks to my cat for being my helper for the day.

Rookie Mistake

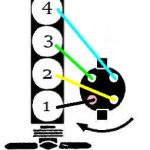
Of course, like a real newbie, I forgot to note which wires went to which terminals on the distributor. A little more investigation cleared that up, and I present a diagram here for anyone else who might find themselves looking at a B230F and wondering what plugs into where:

That makes the firing order of the cylinders 1-3-4-2. Good to know. Part of my own difficulty in figuring this out was the fact that my distributor had terminals in a “box” formation like the above diagram whereas a lot of 240s have them in a “diamond” configuration. If your car has a distributor like this just pretend that the pink terminal in my diagram is the point of the diamond closest to the front of the car.

With everything back together, I hopped into the driver’s seat, turned the key, and heard… WRRR-wrrr-wrrr-wrrr. The dreaded sound of a weak battery failing to crank the engine. Crap. Thankfully, a friend had a recharger I could borrow but the day was getting long and time short so that’ll have to wait.

Slowly coming back together

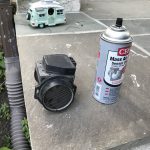
I decided it was time to start putting things back in rather than take them out. While the engine block was still beyond the normal human bounds of filthy, I did not think it prudent to try and power wash it as I’m not 100% sure where all the more sensitive sensors and other bits are on the engine and didn’t want to inadvertently break something important (and expensive) for the sake of the aesthetics of a part of the car that’s hard to see even when the trunk is open. So first back in was the air intake system. Before putting it all back together I decided to clean the MAF. A few good sprays of MAF cleaner and some brownish gunk flowed out. It obviously needed it, and I’m hoping this will help a bit with a bit of hesitation at idle I’d noticed.

After also cleaning out the air ducts, which were also pretty filthy inside, I put everything back together with shiny new duct clamps. It was something of a wrestling match to get it all back into position, but I eventually got there.

Next was the pre-heater hose, which is at the bottom of the engine and can’t really be seen here, followed by the radiator and its hoses. I have a few more radiator related bits to square away at which point I can reinstall the battery, cross my fingers, and hope the engine still starts.

Air box reassembly

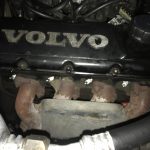
When I first decided to clean out the engine bay, the first thing I took out was the air box. The air box, for those who are unfamiliar, is the plastic box where the air filter sits and delivers clean air through the Mass Air Flow (MFA) sensor and into the engine. Volvos at this time had an additional feature inside their air box in the form of a thermostat controlled flapper that covered a separate air intake hose called a pre-heater. This hose was attached to the exhaust manifold of the engine. When the air temperature was cold this thermostat would open up the flapper covering the pre-heater hose’s intake and allow air warmed by hot exhaust gasses into the system. This gave a boost in engine efficiency after cold start ups on chilly Swedish mornings.

My Air Box

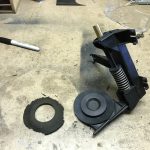
I found that the thermostat on mine had become stuck at some point. Thankfully it had stuck in a way that kept the pre-heater intake closed. This was lucky as too much of this warmed air passing through the MAF is not good for it in the long term. I ordered a new and installed it. I also had to cut a new gasket for the flapper. The original was made of some sort of open cell foam rubber that had degraded considerably over the years. I cut my gasket (40mm diameter with a 20mm diameter hole in the middle) from a small sheet of 1/16th” thick neoprene I happened to have laying around my shop. This should last a lot longer than a foam one.

It is currently raining where (and when) I am writing this, so photos of the whole thing back into the bay will have to wait.

Interestingly there is a school of thought amongst 240 enthusiasts that sees the whole air box thermostat and pre-heater hose concept as unnecessary at best and potentially harmful at worst. Their solution is to remove the entire assembly, close off the pre-heater hose, and sometimes even ditch the intake snorkel so that the engine gets the maximum amount of air as is possible. A lot of these people seem to live places where it never really gets that cold so they do have a point there I guess, but it definitely does get quite cold in the winters where I live. I’m also aiming to restore this car to as near to its original state as I can manage, so for now I’m trusting in the wisdom of Volvo engineering and leaving the system in.

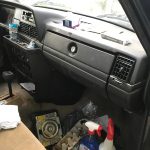
Glovebox is back

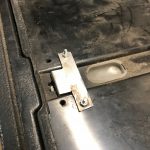
After many tries at buying the elusive and no longer made part “3540574 Plate” (aka the glove box latch plate) I threw my hands into the air and decided to just make my own. After working over a small pieces of sheet metal with my rotary tool and hack saw I came up with this.

It would be kind to call this “sub-optimal” but it seems to work and will do until I get around to just buying an entire intact glove box. It certainly beats the screen door latch that was there before. Here it is installed.

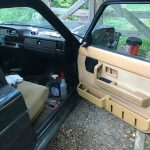
Bonus work: I put the passenger seat door card back on and attached the new map pocket. The painted guide casing is passible but definitely not a forever type thing. As I find ones in the actual color I’ll replace them, but for now this, like the latch, will do.

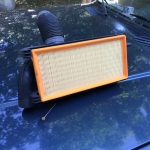
I’m waiting on a part for the air filter box to come in, and when it does I’ll finally be ready to put the cooling system back together.

Weekend Work

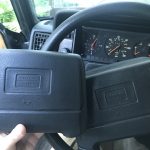
I didn’t have a huge amount of free time this weekend, but I did get a few things accomplished. First, having recently noticed an unsightly crack in the cover of my air bag while at the same time seeing a replacement for sale on eBay, I changed it out. Just a couple of deeply set screws in the back of the wheel and a single connector. God only knows who effective a 26 year old air bag is, but at least it looks nice now.

New Paint

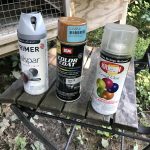
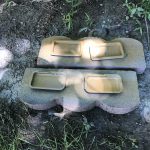
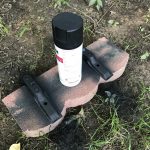
I also finally received a color matched tan paint I had ordered awhile back that I wanted to use in an experiment. This experiment is called “not paying $50 for a single tan door guide casing.” The procedure was to buy cheaper blue guide casing, paint it tan and use it for the time being. I took my paints out to the ol’ paintin’ bricks in my back yard and hit them with several coats. The results looked nice, but I’m concerned about durability. We’ll see once I get them on. Since I had the bricks out, I also took a couple of rustier pieces from the engine bay and painted them black. They’ll go back on when I get the engine bay back together.

The star accomplishment of the day, though, was on the tailgate. Having had no luck finding an actual Volvo latch pin for the back door, I went to the hardware store to try and find a substitute. It turns out that a 5/16th inch diameter wire tab lock pin with the wire tab part removed works perfectly. Click the link to see the video.

Continue reading

Cleaning the engine bay

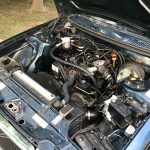
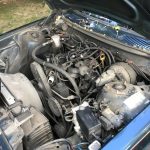
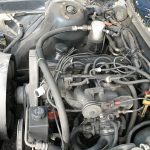
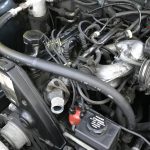
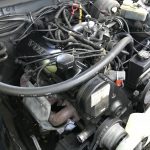
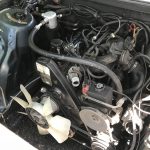
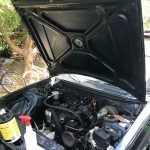
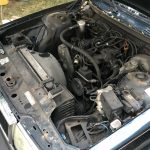
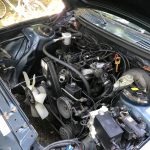
Being a 26 year old car that has obviously been driven pretty much every day of all those years, It’s not surprising that my 240’s engine bay (and the engine itself) is as dirty as flip. A picture is worth 1000 words, so I’ll just show the “before” photos:

As can be seen, the entire bay had a coating of greasy grime, the accumulated grit and oil of give or take 150k miles of chugging along. This was going to take a whole lot of soapy water and rags to get up. Not pictured are the battery and tray, the wiper fluid reservoir, and radiator coolant expansion tank. This was to allow more access the the bottom of the bay. They will be cleaned separately. There was also a significant number of small rust spots where paint had chipped off. I could clean these up, but I’m not entirely sure what I should do to prevent the rust from spreading, at least in the short term. I might end up getting some touch up paint to cover these spots until the day when I repaint the entire bay.

Next To Godliness

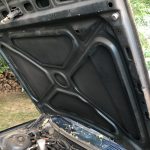
After going to town on the parts I could reach I decided the fan shroud, radiator hoses, radiator should come out too. This allowed me a much greater amount of access to the bottom of the bay. Now I was able to clean a lot more of the gunk from the bottom parts of the engine. The underside of the hood was super dirty to the point that as I wiped that dirt off the paint was coming off with it, and that was with only soapy water! I’m not too worried about how this looks as it’ll mostly be covered by the heat shield/sound reducer that I will eventually get to replace the missing one, so it may get some touch up using the color matched paint mentioned before or even just flat black Rust-Oleum.

So after a day of effort this is what I have now.

Definitely cleaner, but there is still a bunch left to do. I have to reassemble the radiator and the filter box and preheat hose. Interestingly I saw this post on the MVS forum about just taking the preheat thermostat out completely. He makes a compelling argument about it being just there to deliver as much air as possible to the engine, so perhaps I’ll take that advice in the future. Until then there will be some more cleaning and a reassembly to the original state. Look for that in the coming days when I 1) have more time and 2) the darn heat doesn’t make being outside for more than a few minutes utterly unbearable.

Getting ready to clean and flush

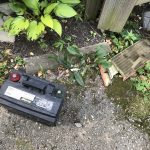
After showing my car to a friend who is a legit and long-time “car guy” who has fixed and restored many of his own cars and hearing him comment at how dirty the engine bay was, I decided that until the parts I’m waiting on arrive from the magical land of plenty known as Sweden I could start cleaning that up. I looked around on the internet for some tips and came across this video from YouTuber ChrisFix. In it he gives a step-by-step example of how to clean out the bay and improve the old, crappy stuff. In my spare moments I decided to start taking out certain bits that might be in the way. This included the windshield wiper reservoir, the radiator overflow tank, the battery and its tray, and a few other bits and bobs that either needed cleaning or replacement. I also took out a bunch of very corroded screws, bolts, and pipe clamps that I’ll replace with new, shiny ones.

When I get the opportunity I’ll bring the shop-vac and some brushes in for the dry clean and then the hose (and possibly the pressure washer) for the wet stuff. One thing this exercise has shown me is that my hood is missing the sound insulation normally found under the hood. A replacement is sort of spendy, so there’s a chance I’ll just buy the material and make my own or wait until I find a cheaper original.

Removing the tint

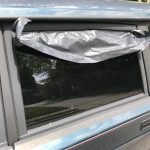
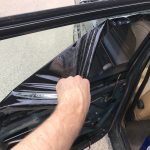
I’m not a big fan of window tinting. I think it makes a car (and its driver) look shady (no pun intended) and is generally sort of tacky. That being said, my car actually came with what I’d call a pretty good tint job. There were no bubbles, ripples, or any other defects commonly seen with aftermarket tints. Regardless, I had always meant to take the tint film off. I looked to YouTube for guidance. The consensus there suggested the best and easiest way to take off a tint was by using a combination of the sun and an ammonia-based window cleaner. The process is, in short, spray a whole bunch of cleaner on the inside of the window and then cover it with a black trash bag. The sun then heats up the bag and cleaner and softens the glue. After an hour or so in bright sun it’s a matter of just using a razor to get under the edge of the tint and pulling it off in (often) one go.

Using this method I was able to remove the tint film from the four passenger door windows. There was some glue left on the windows after removing the tint but it’s easily taken care of with a combination of window cleaner and a razor. Due to a lack of time and the onset of clouds and rain, I did not make an attempt to do the same to the cargo area windows. I’m sure the procedure will be about the same, the only possible complication being that the tailgate window’s film is on the outside to avoid touching the window defrosters.

A small but enlightening bit of progress

The replacement door jamb switches finally arrived. This was after they already arrived once but broken. Amazon (eventually) came through on the replacements. A quick switch later, and I have a dome light that respects the opening and closing of the doors.