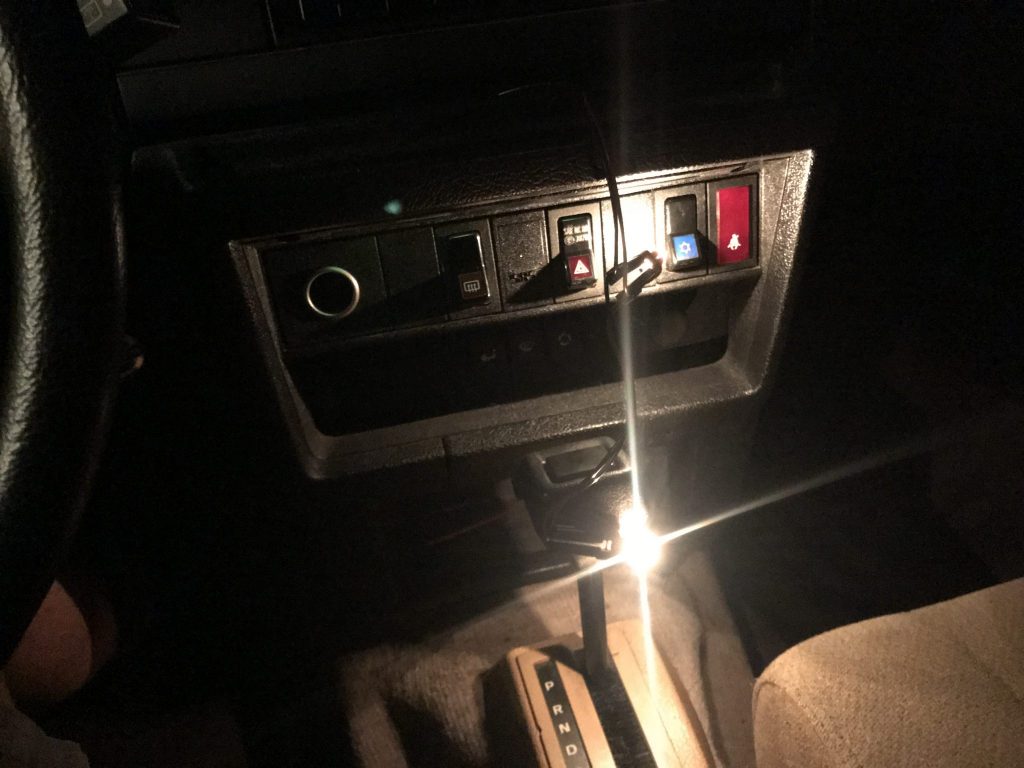
I replaced all the bulbs in the lower dashboard, got all the switches and wires reconnected, and I’m happy to say that the blinkers work and all the switches light as expected. However (and there’s always one of those) I have two extra bulbs whose location I can’t quite figure out.
Little lost bulbs
One bulb goes into the glass “lightbar” (part 1212530) above the controls, but I just can’t figure out where the two other similar bulbs originally went. I took photos of everything still installed before initial disassembly, but they aren’t particularly clear on this. If anyone out there knows, feel free to click the Contact Me link and share your knowledge.
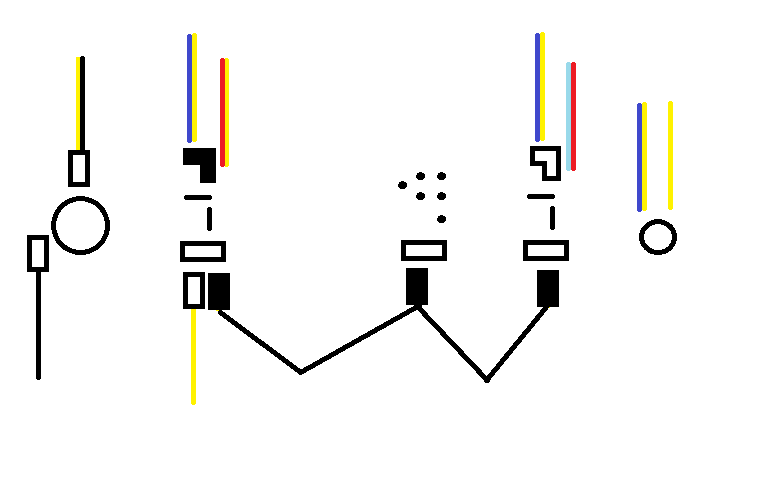
Here is my simplified diagram of which wires went to what. The pictured layout shows the cigarette lighter as the large circle on the left and the safety belt reminder light as the smaller one on the right. The empty space towards the middle is an unused spot on my car.
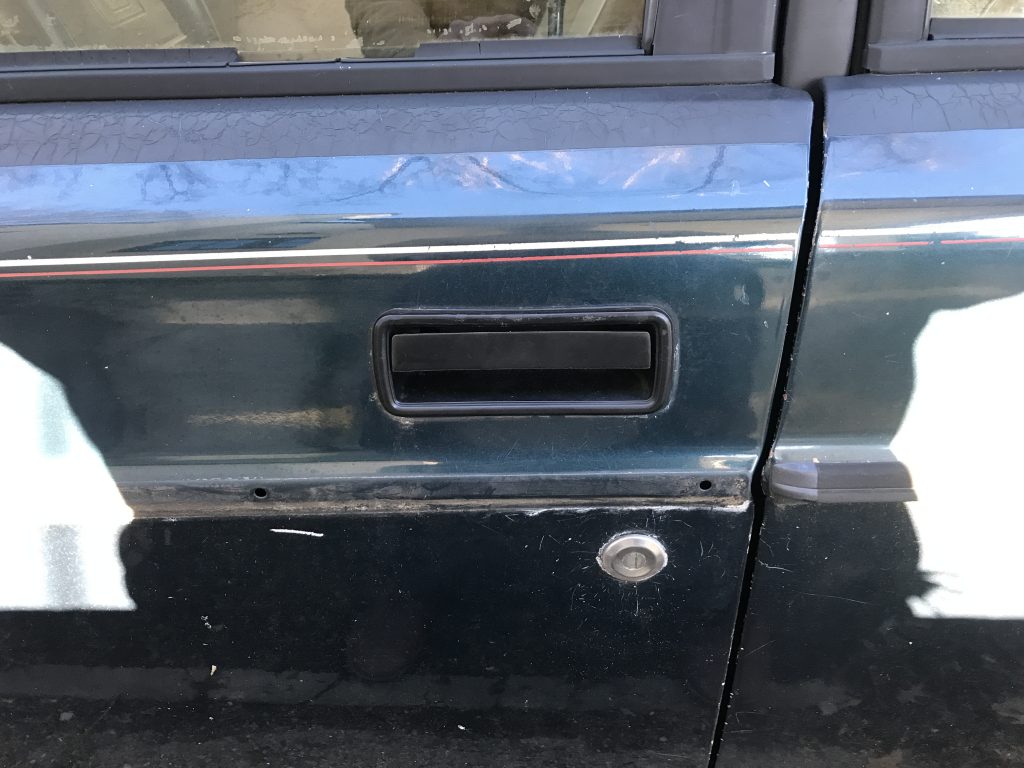
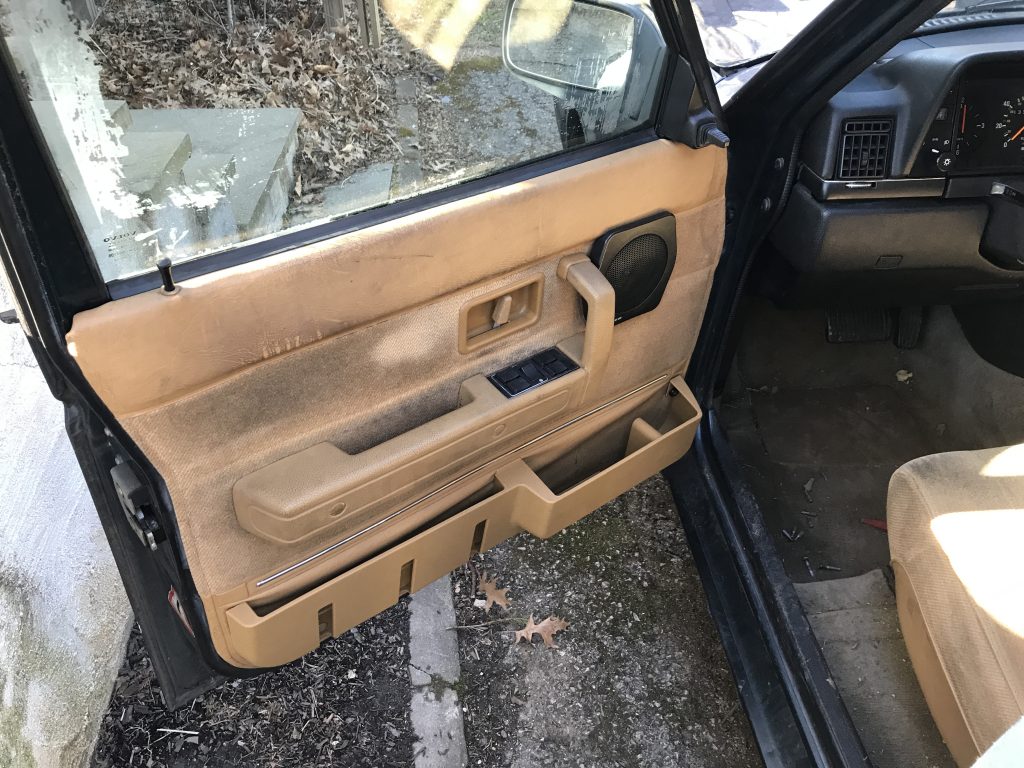
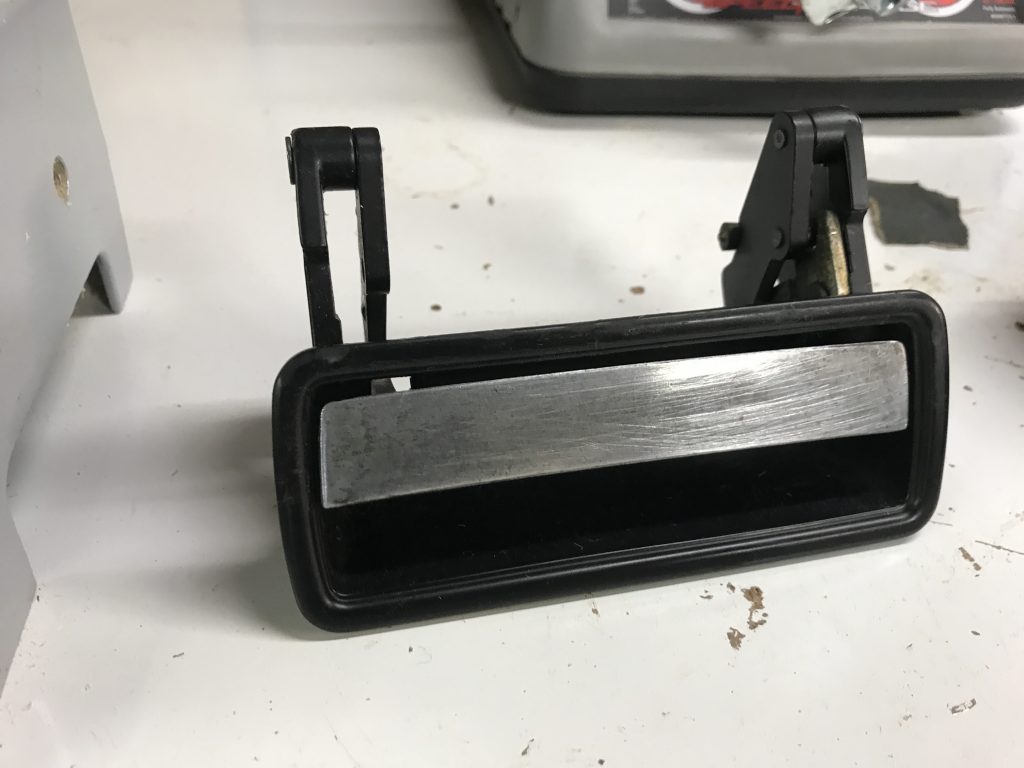
The day was relatively warm but very windy, so my ability to work was somewhat limited. I installed the newly painted driver’s outside latch and reinstalled the door card and arm rest.
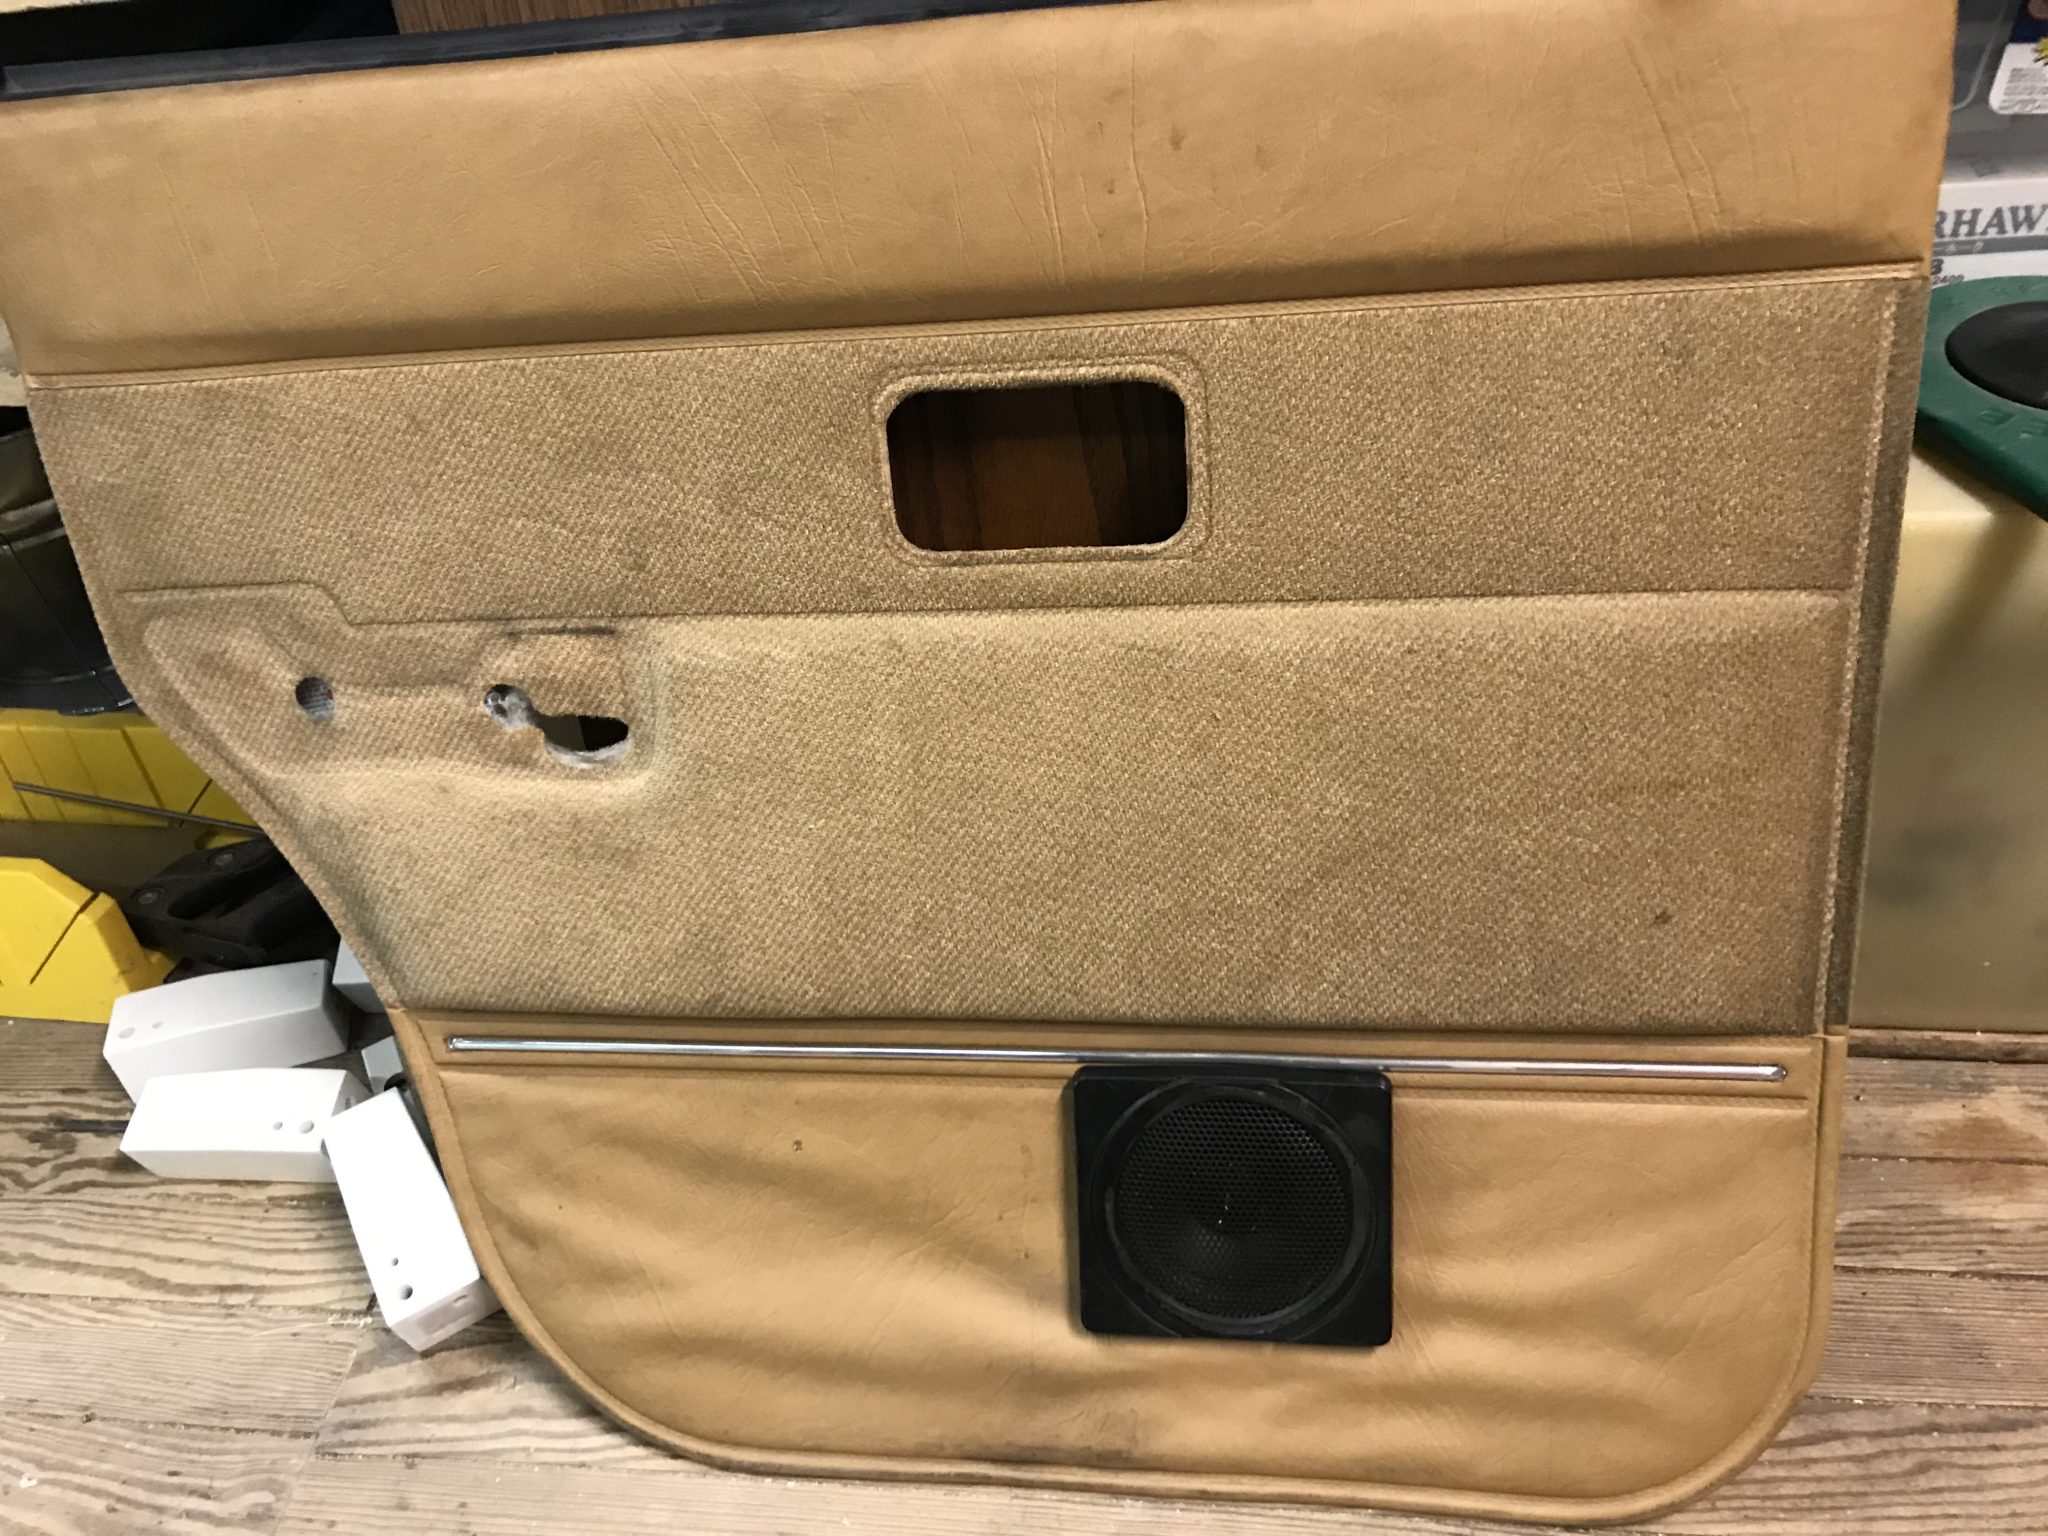
So now I can open the door from the outside again. This is good, but I was reminded as to just how terrible the door cards are overall. Some day I think I’ll have to replace them all for good measure.
Next up I think will be to get the center dash reinstalled with all the lights working. Stay tuned.
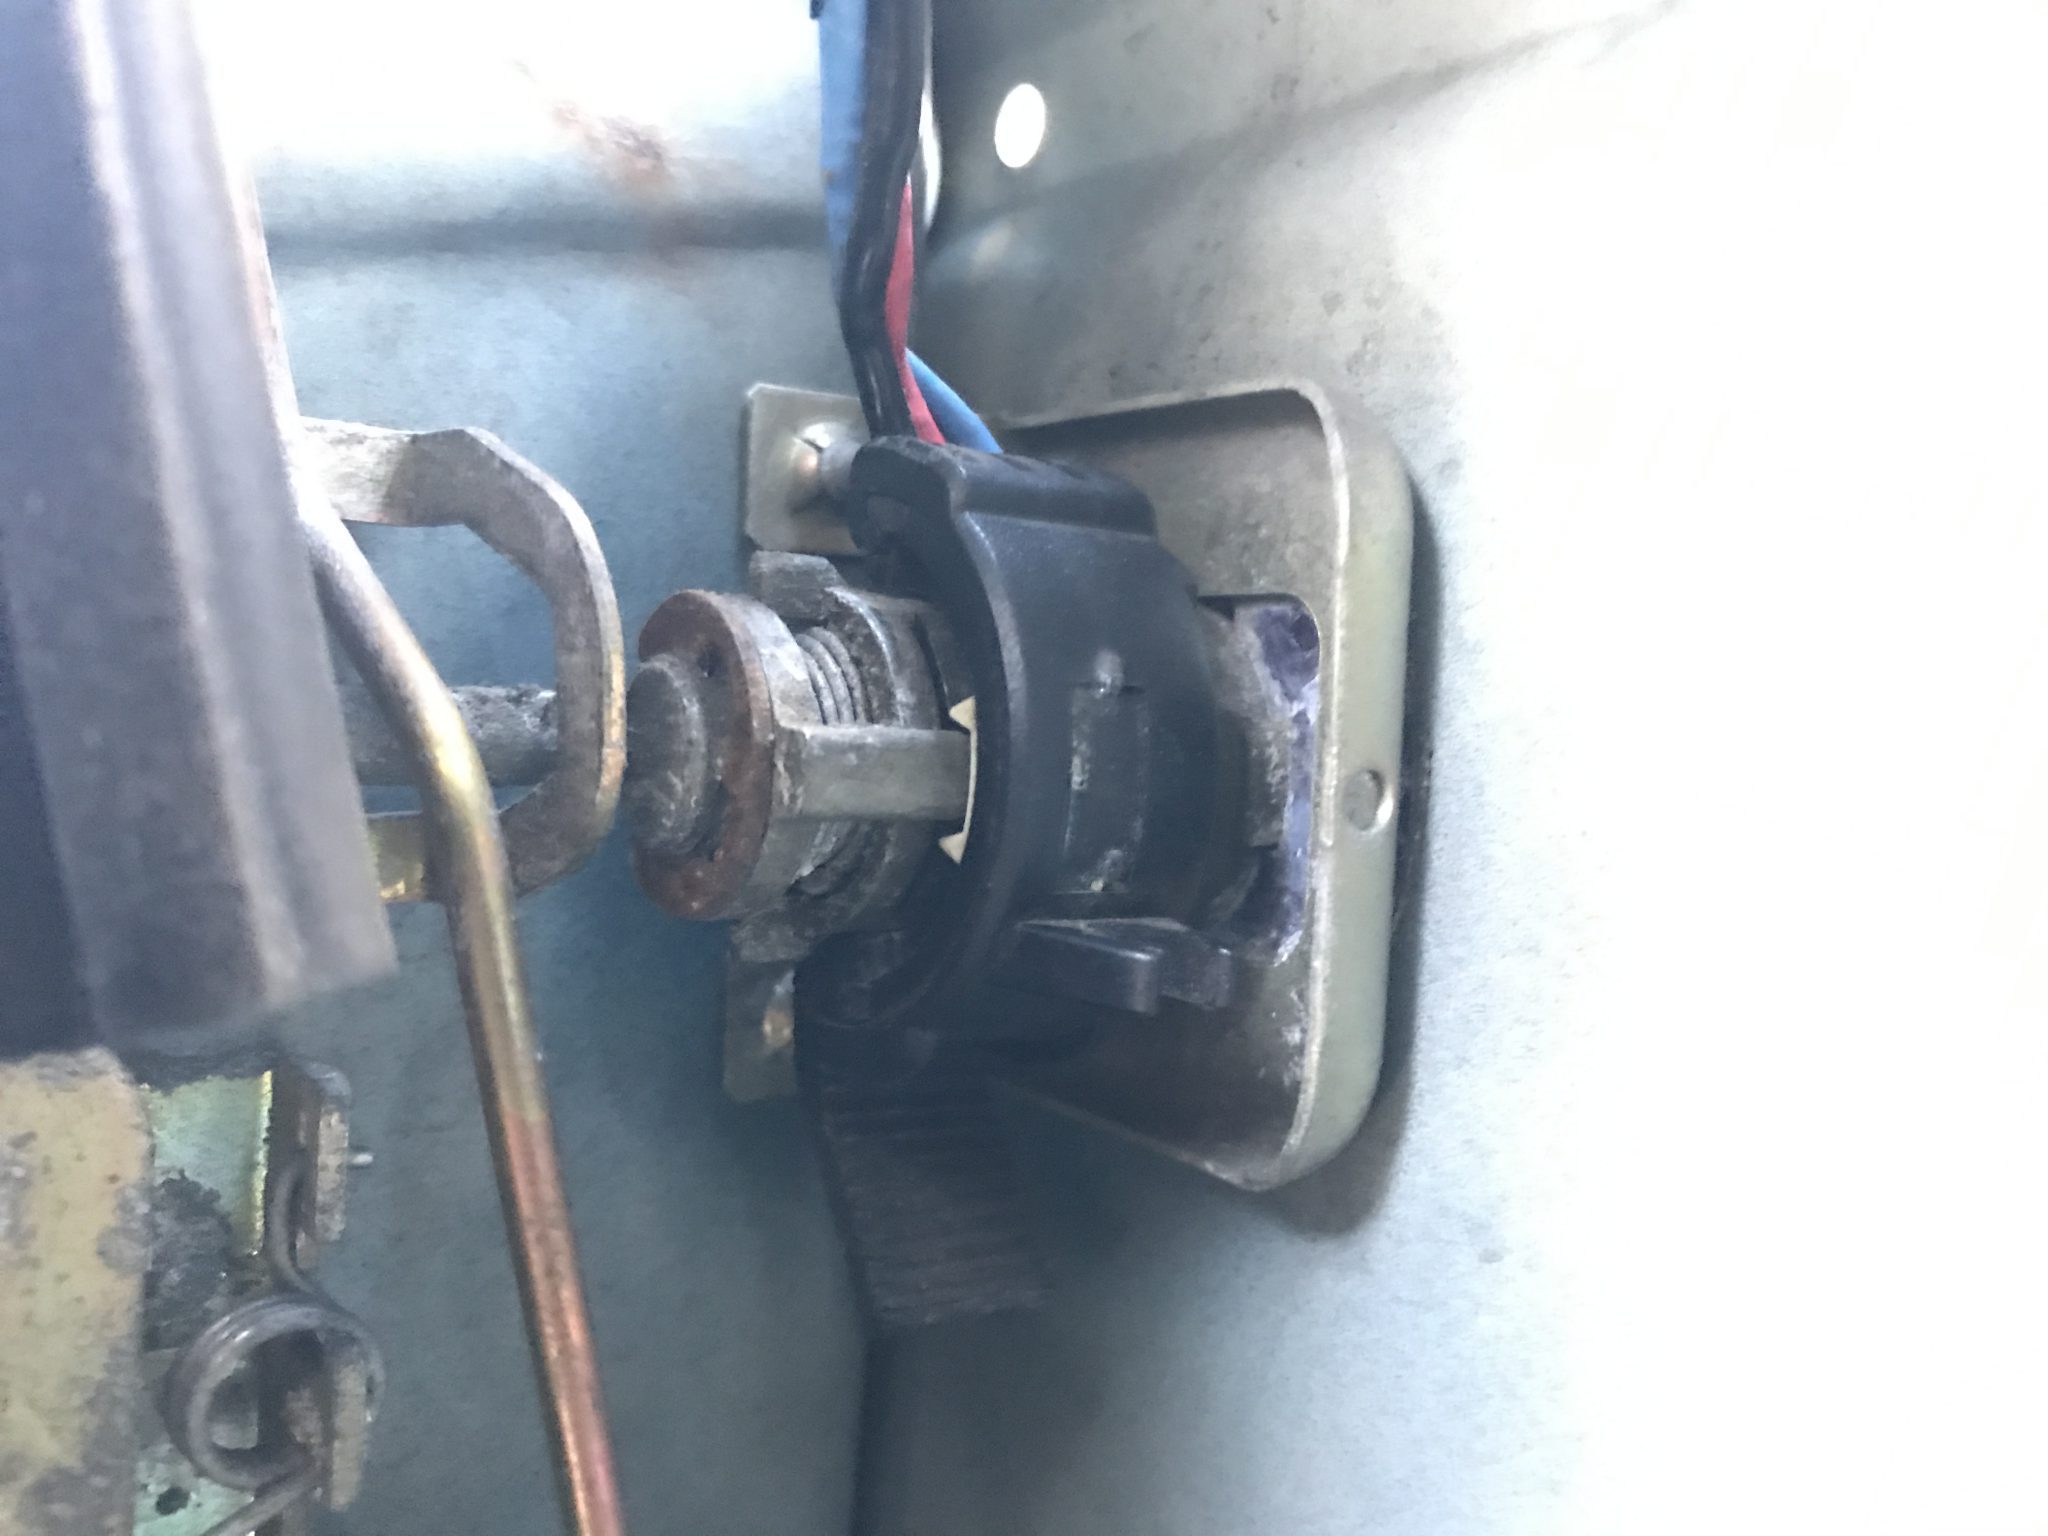
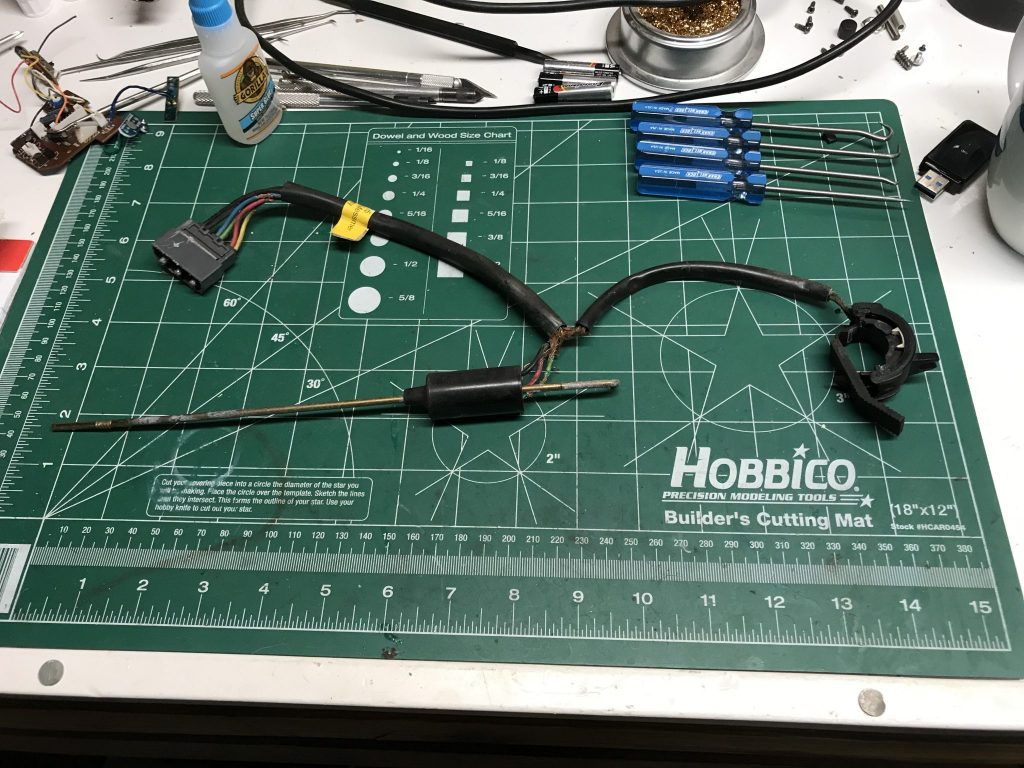
I had a few minutes over lunch free this afternoon, so I decided to reinstall the central locking harness I repaired in the previous entry. The trickiest part was getting the end of the harness that fits around the lock itself in the proper place.
Notice the small, white bracket piece. In it sits a lug attached to the lock mechanism that turns with the key. This bracket is a small switch that makes the connection to drive the lock motor one way or the other to either lock or unlock the other doors. I had to make sure the lug was in this bracket before squeezing the plastic ring closed.
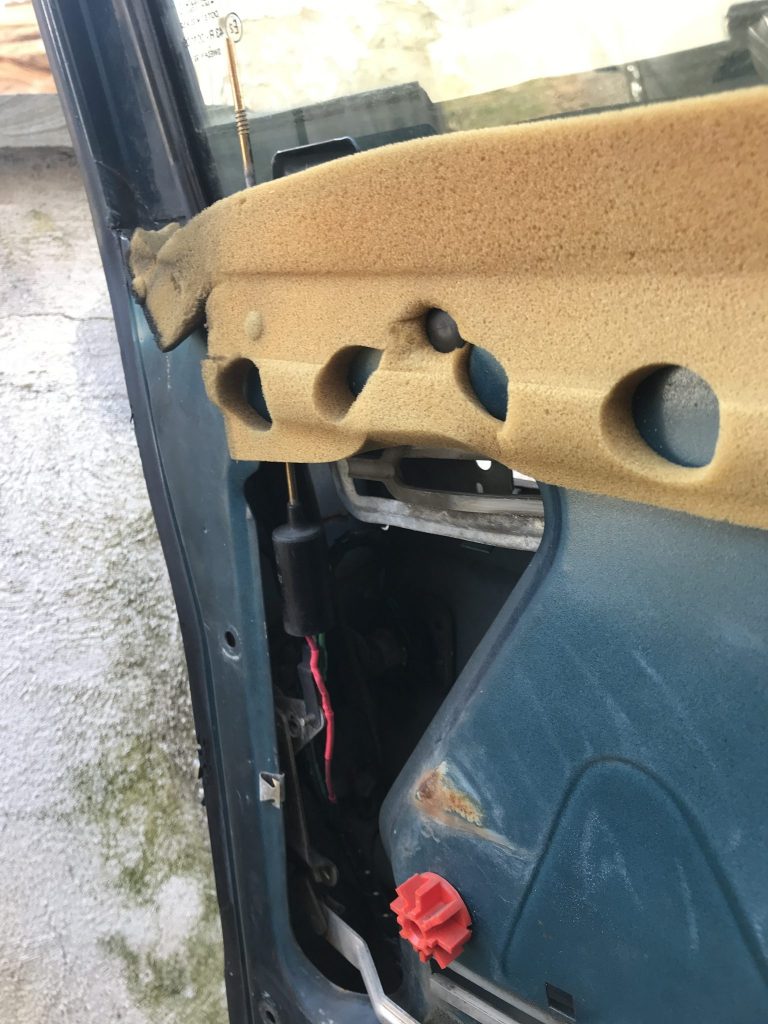
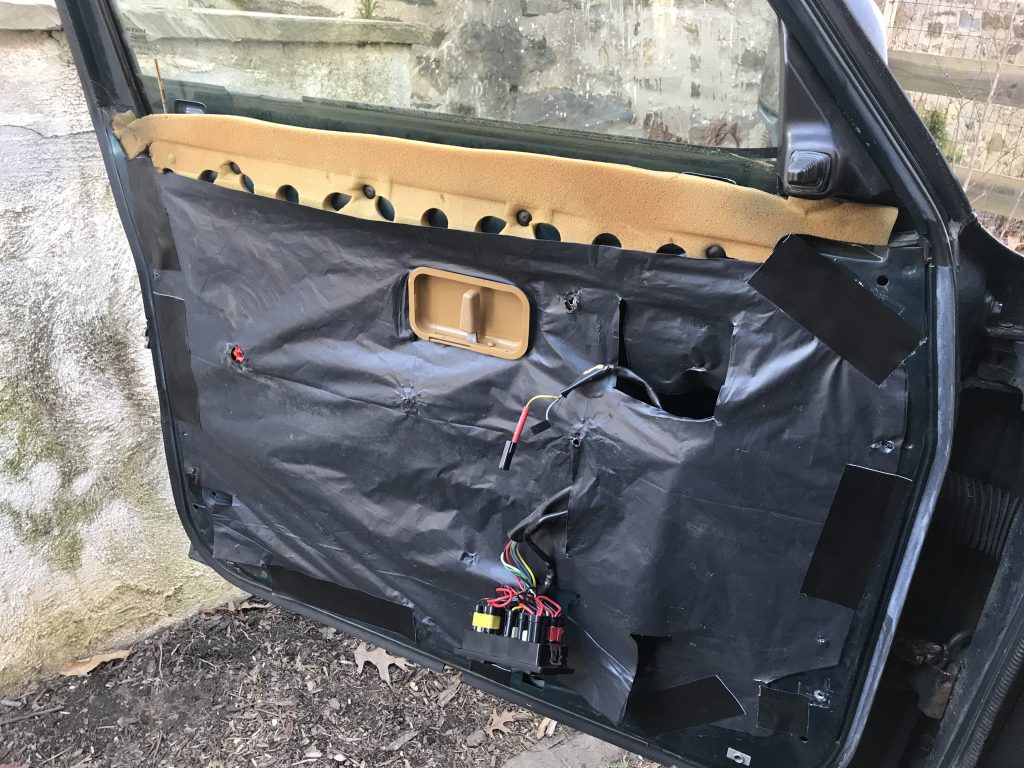
I placed the rod that the lock knob attaches to back through its hole and attached it to the actuating link for the central lock. Then I reinstalled the guide casing and taped the homemade vapor barrier back into place. As soon as I get the screws I need to attach the new handle I’ll close it all back up.
Since the weather has improved a little in the last couple of weeks I felt it was time to address a few things actually inside the car. As we’re in the Smarch part of the year, it is still generally too chilly and windy to do complicated things outdoors. I’ll be tackling easier things at first.
Replacing the handle
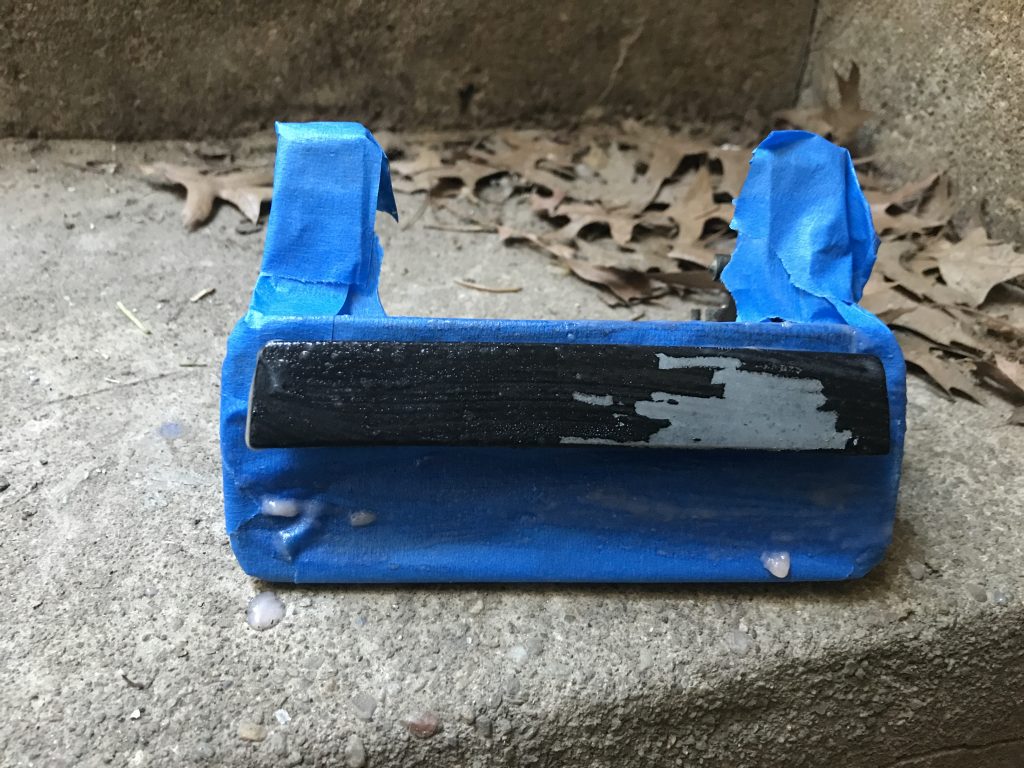
This time that took the form of replacing my broken driver side door handle. I had recently purchased a used replacement that needed a little paint, so that was job one. First came paint stripper and then some scraping and sanding.
Gooped with paint stripper
Scraped and sanded
As you can see, this went well enough. I even repainted the handle using a can of 16-year-old satin black Rust-Oleum I had laying around which had just enough aerosol in it to paint the handle.
Wire issues
There was a complication, however. When I took the door card off the door I got a good look at the central locking switch (part 3540135) wires. They were in a real state with a lot of the insulation flaking off and some of the wires beginning to fray. Touching them had the tendency to ground out the connection and trigger the lock. I imagined someone letting themselves in by giving the door a Fonzie-like fist pound and decided to switch tasks to the rehabilitation of this part.
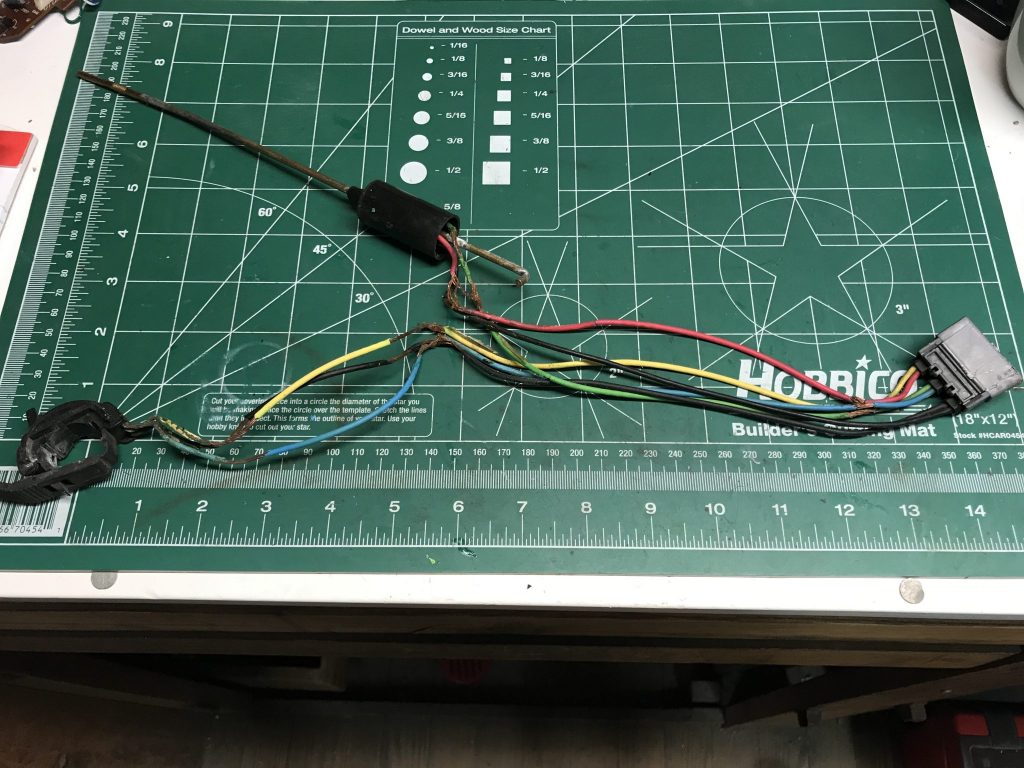
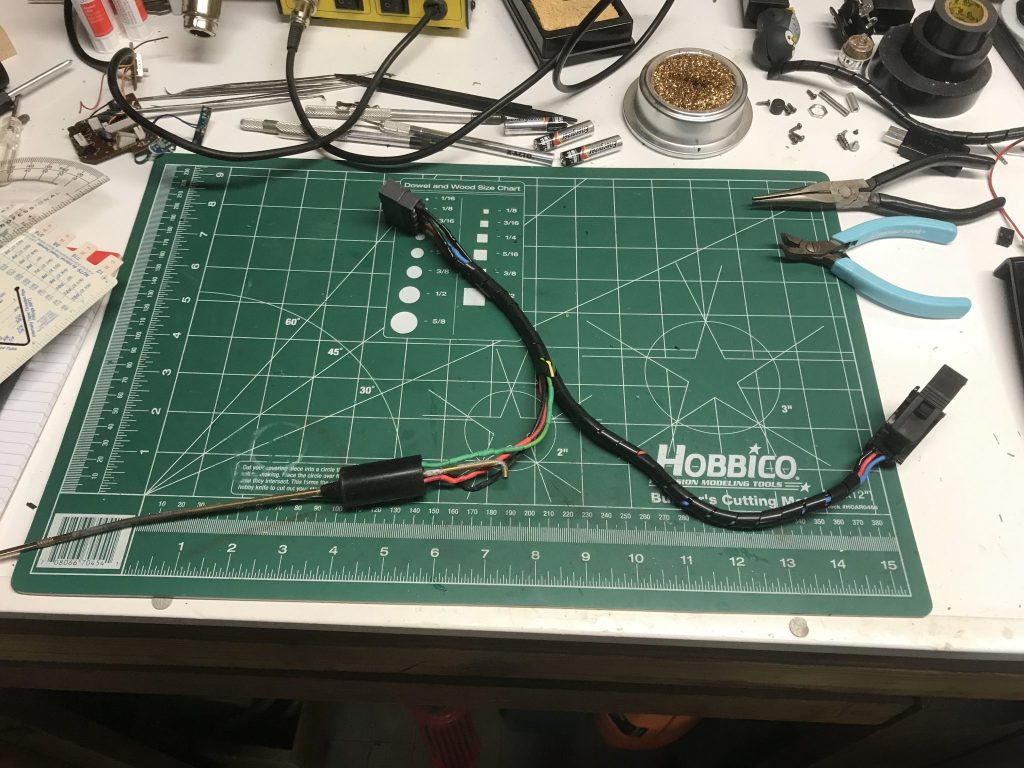
When I got the harness out, the insulation continued to flake. I took it down to the shop, removed the loom, and snipped the wires close to the connector. I then covered the frayed sections with heat shrink tube and resoldered the wires back together. A simple continuity test told me everything was still connected.
Initial state
Looms removed
All done
Unfortunately that was the end of the day for me, so I didn’t have a chance to reinstall the wire let alone the new handle. That was missing one of its screws, a type and size I didn’t happen to have on hand, so I’ll have to stop by the hardware store to get one before I can address that. That’ll probably be the subject of my next post.
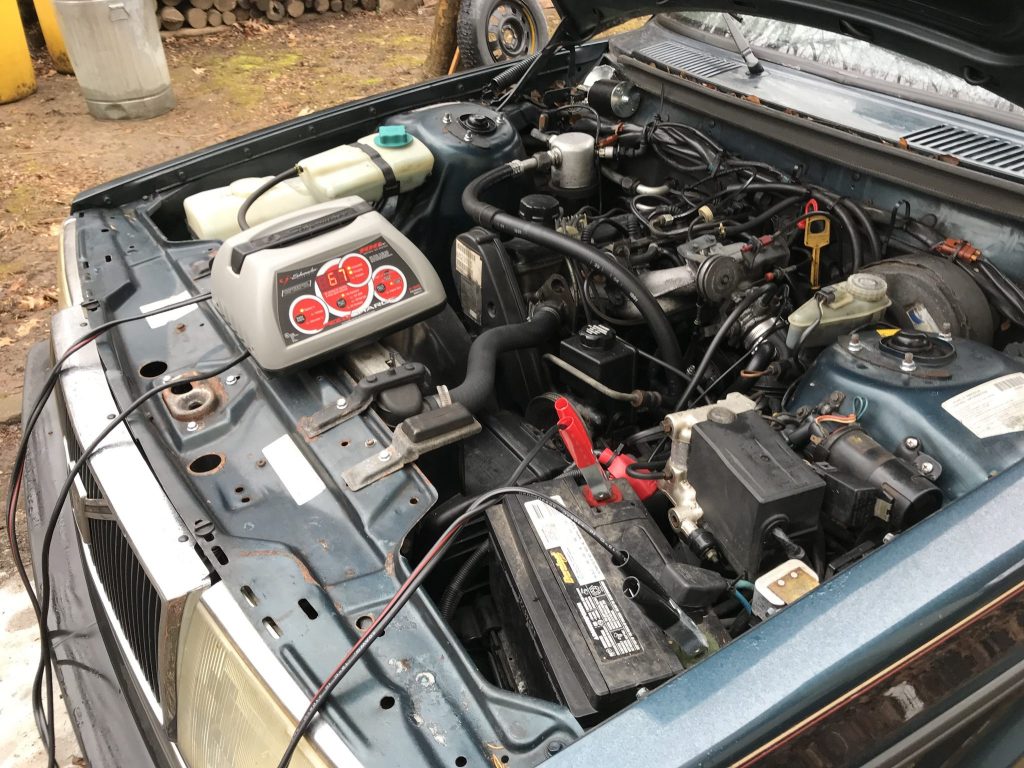
The cold weather has not been kind to my battery. It was almost completely dead. I once again borrowed my friend’s recharger and topped it off, so to speak.
Two small updates. First, I was able to locate the last piece of trim I need for the exterior. This was part 1255891, the “Dirt Deflector Moulding”. It runs below the doors, in my case on the driver’s side. I got it from a local guy who I’ve seen advertising on Craigslist for some time but had never been able to get a hold of through email. My persistence paid off, though, as he both had my piece for a very fair price and also had, like, seven other 240s around his house. I see him being a good resource provided I can keep him answering emails.
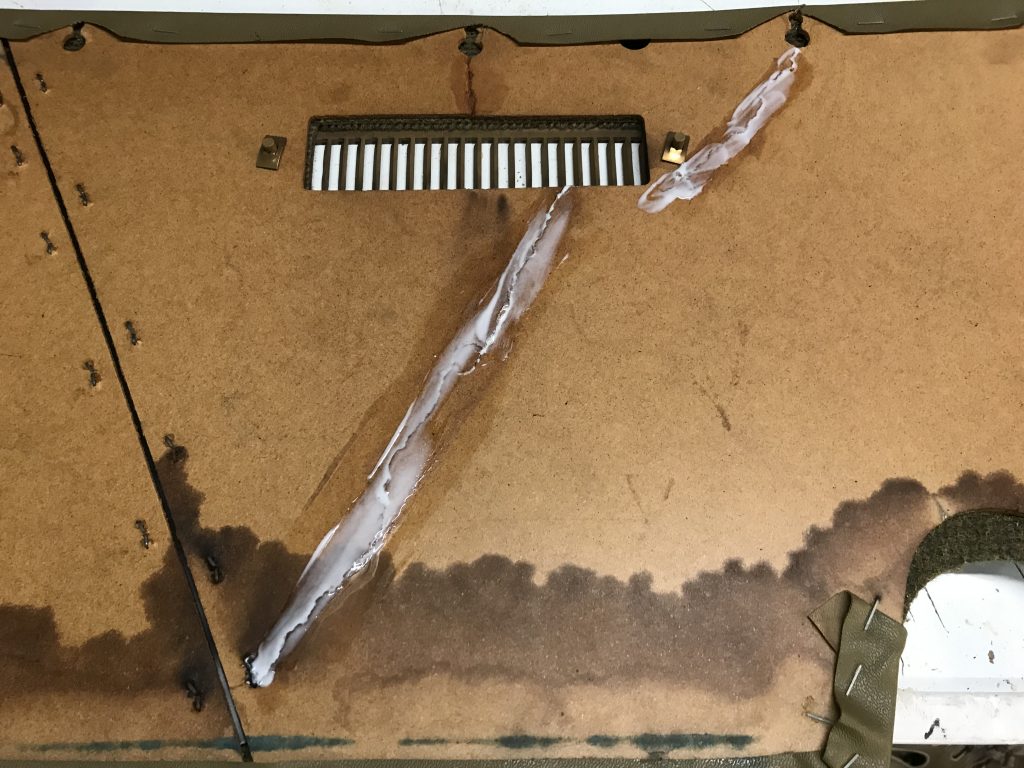
The second item on list was a few outstanding interior wall and door cards. For longer time readers of this blog, you may remember that the door cards in this car were not in great shape. I decided to rectify this by reinforcing all the cracks and problem spots with simple white glue. As silly as it sounds, white glue is well suited for strengthening paper. So I squeezed some along each fissure, around the shabbier fastener holes, and anywhere the card was coming apart. I placed heavy objects along the cracks to keep them together and the card flat.
The cargo area is now back together after taken most of the panels out when I replaced the fuel pre-pump. I also finally put the rear driver side door’s card back on.
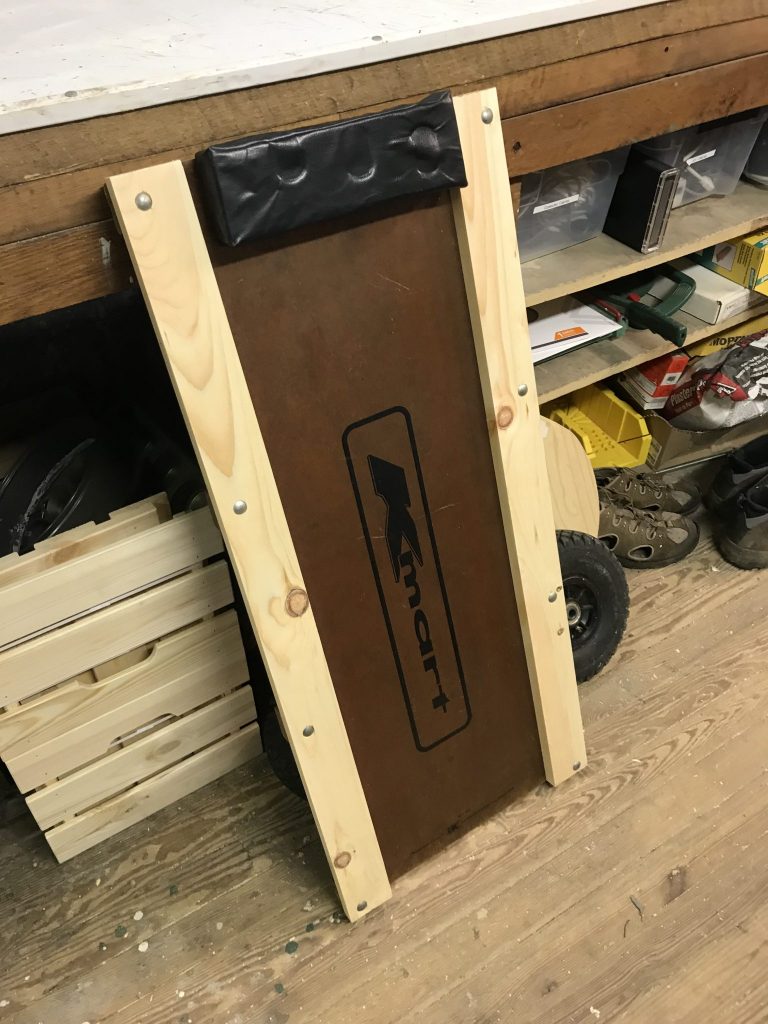
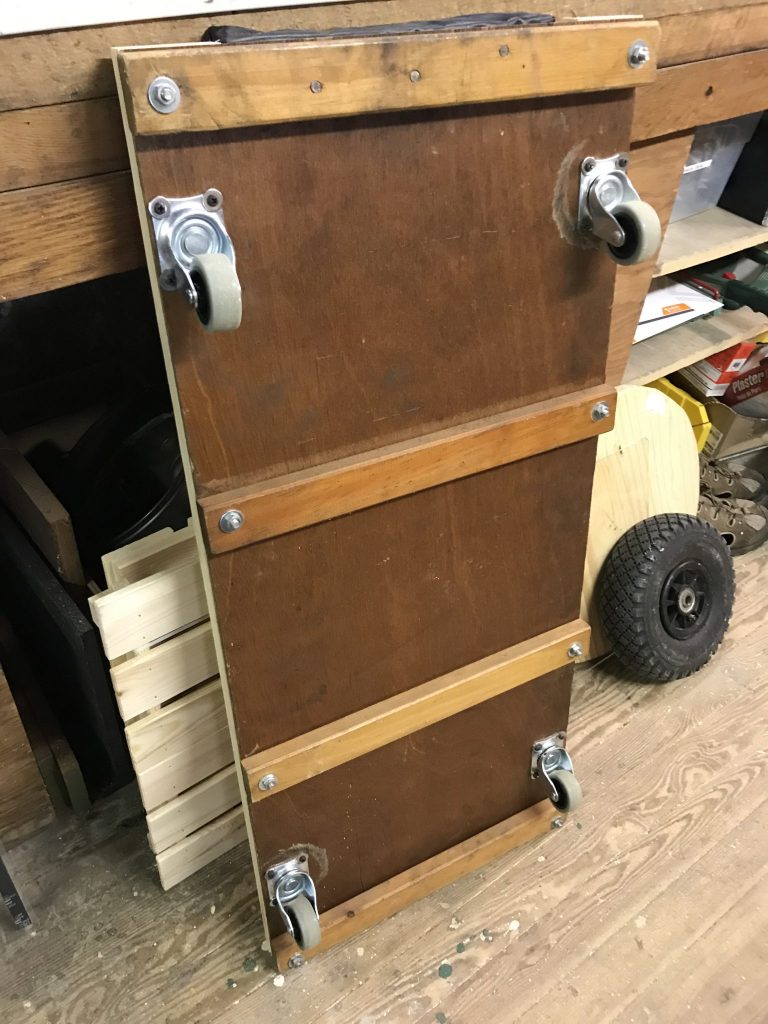
The weather is still sucky in my part of Pennsylvania. It tends to vary between snow and mud with cold and windy as the consistent theme throughout. So not much work has been done to the car itself since the last time. I have finished cleaning up my shop, though. With that cleanliness some the ability to actually work in, and that is what I have done. Among the tools I received from my friend was an old K-Mart brand creeper (so you know it’s quality!). I actually used it when fixing my Honda, but it was in terrible shape. The wheels were these terrible, chewed-up plastic things and the foam rubber head rest had long ago turned to dust. Other than that it was fine, so instead of going out and buying a new one I instead bought new wheels, a few pieces of wood to accommodate them, and some new foam and voilà… I am now scoot enabled.
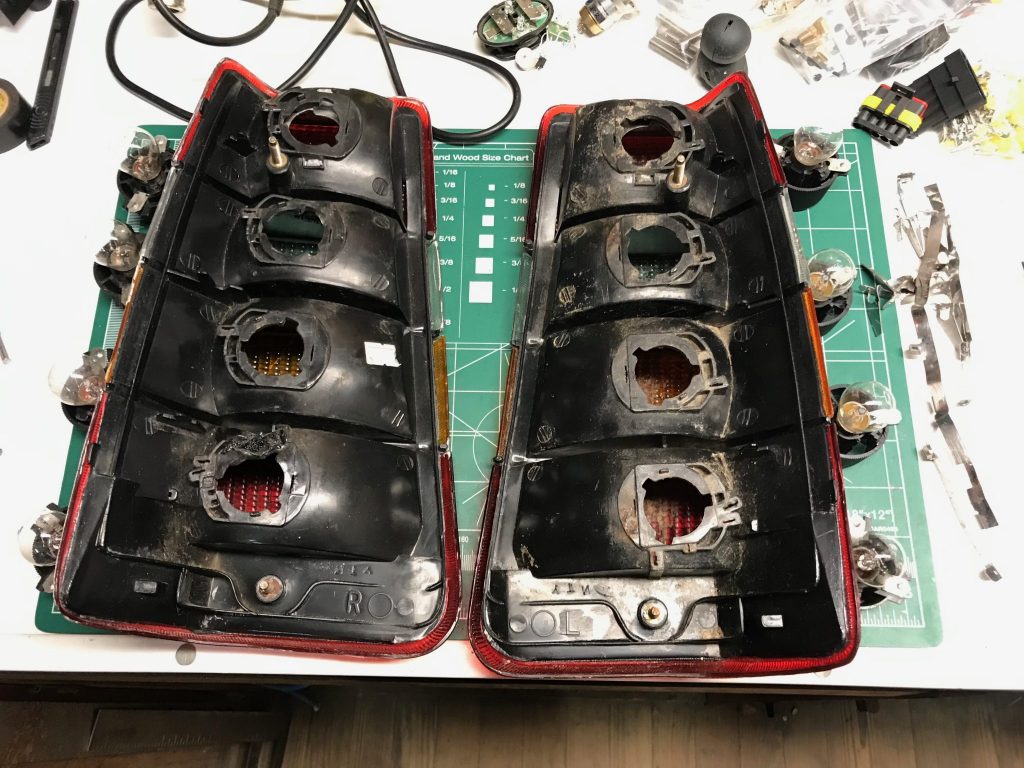
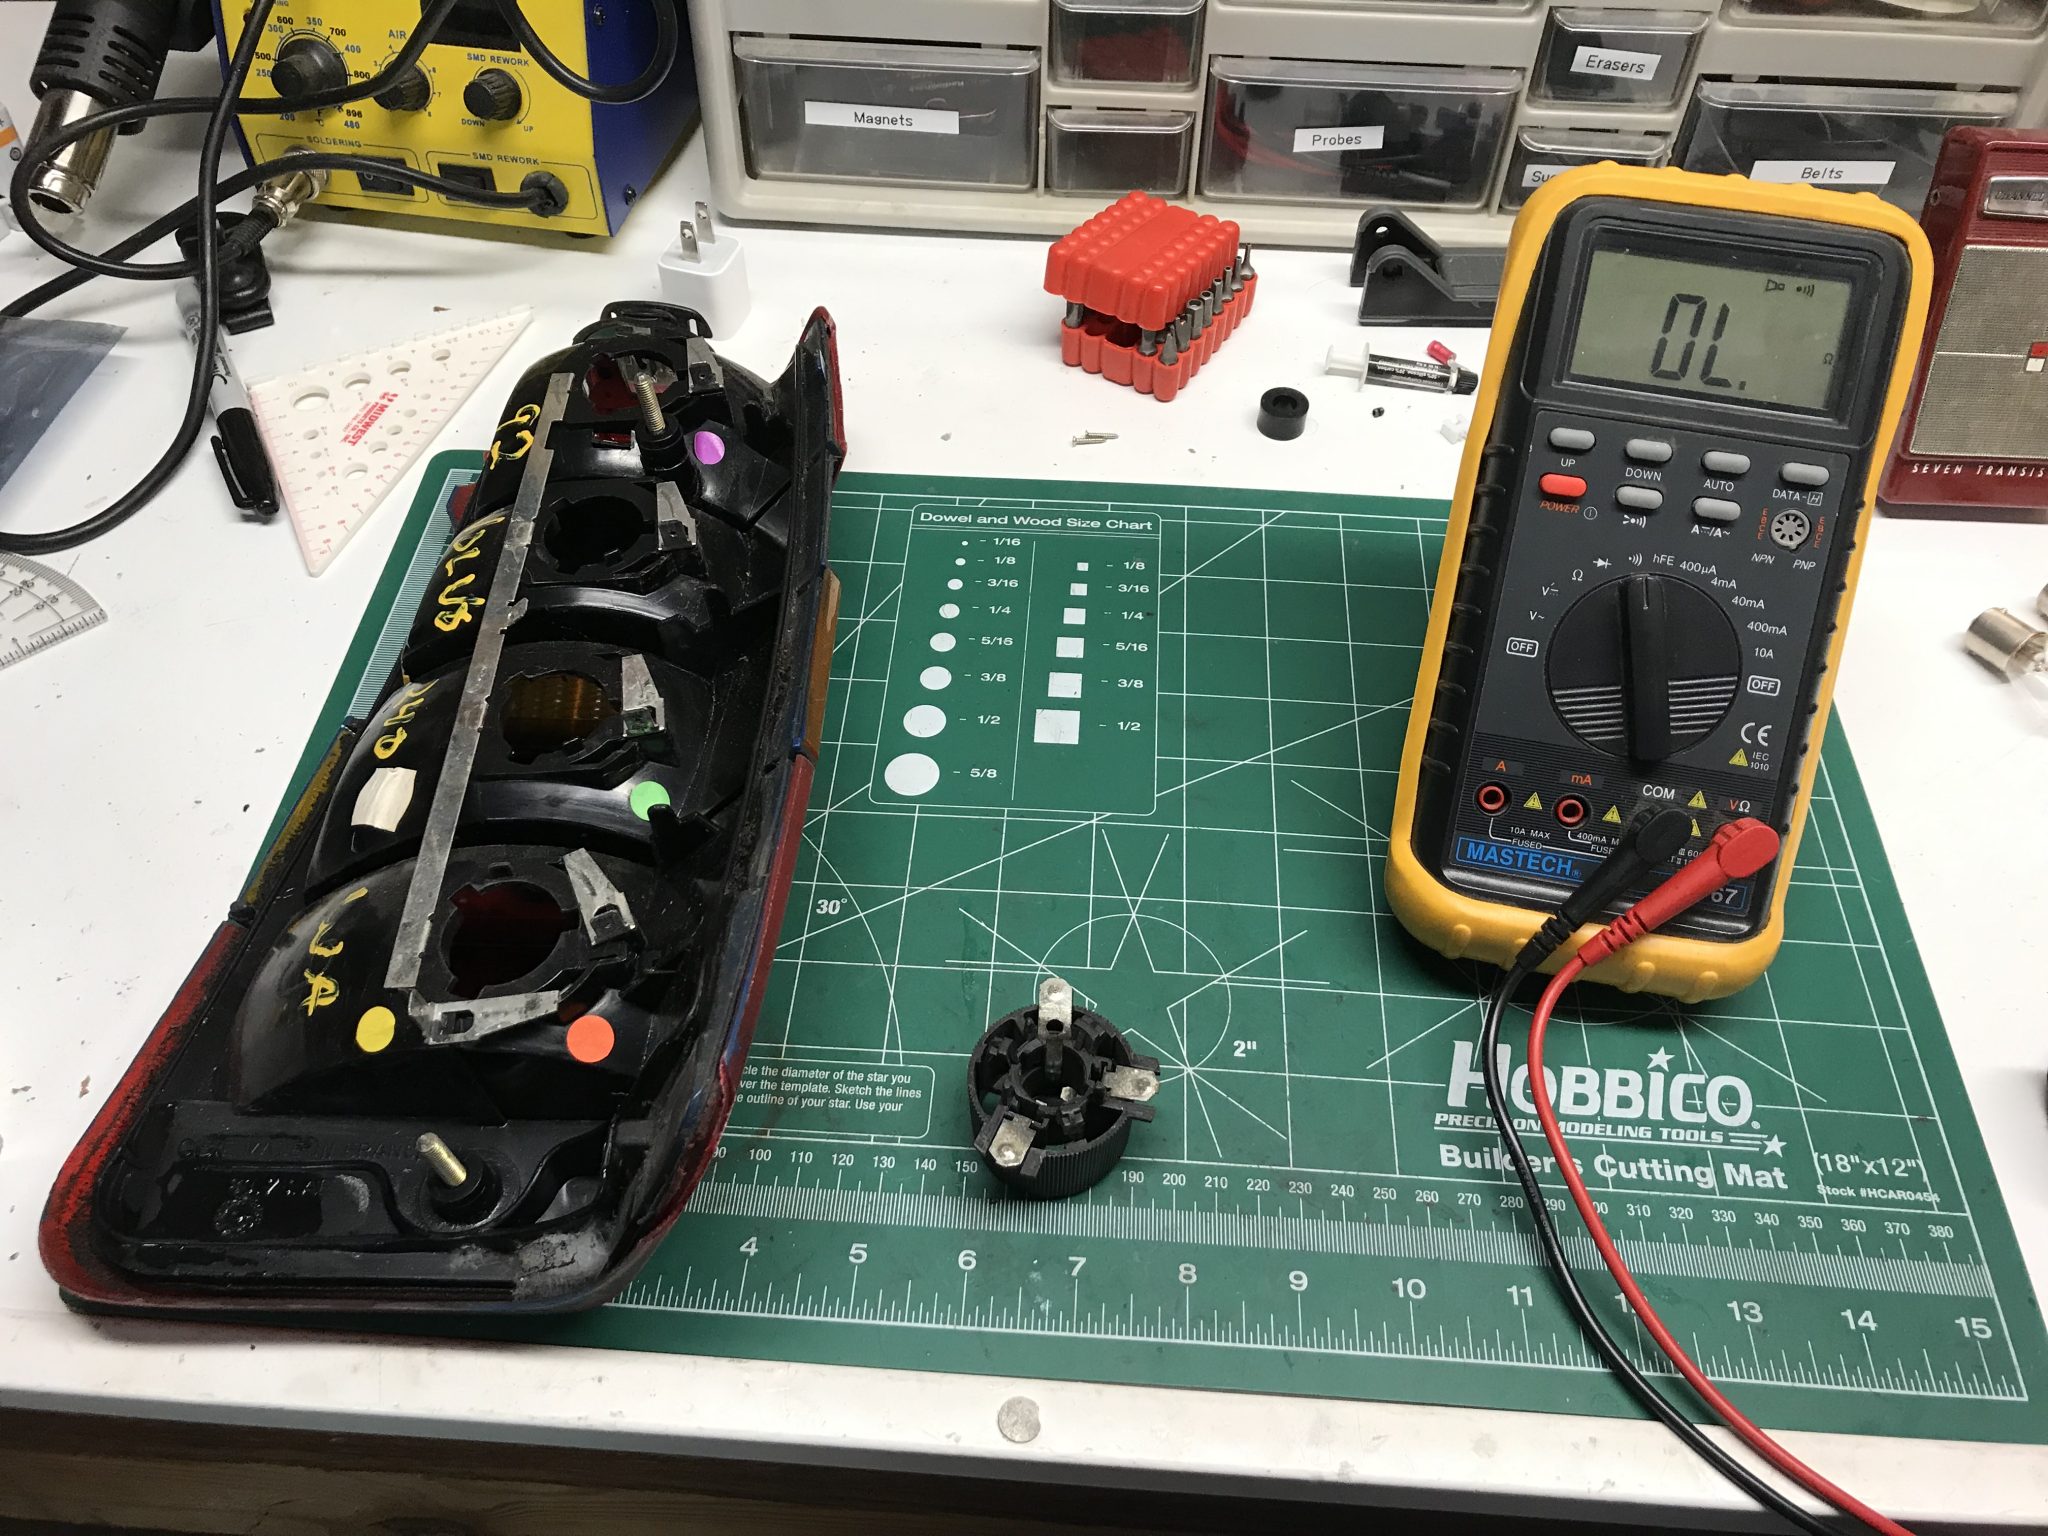
You may remember that I had bought a new set of tail lights from someone one the internet. I actually tried installing them pretty soon afterwards but found that even though I knew all the bulbs to be good, once the lights were in the car they intermittently stopped working. Electrically, Volvo 240 tail lights can be a bit problematic. They make heavy use of spade connectors and the ground connections are done along a bus bar of thin metal, all of which are prone to corrosion. On top of that the plastic of the assembly and the sockets in which the bulbs sit can warp over time and disrupt contact between the tabs and the connectors. The solution to this has been to remove all that stuff and solder the connectors together, and this is what I decided to do.
The nasty cut on my hand has sufficiently healed to allow me to fiddle with the car again. I’ll probably have a pretty gnarly scar, but my hand still works and scars can be cool so I won’t complain. It’s also now a new year and I am ready to get to it!
Tool Heaven
New Tools!
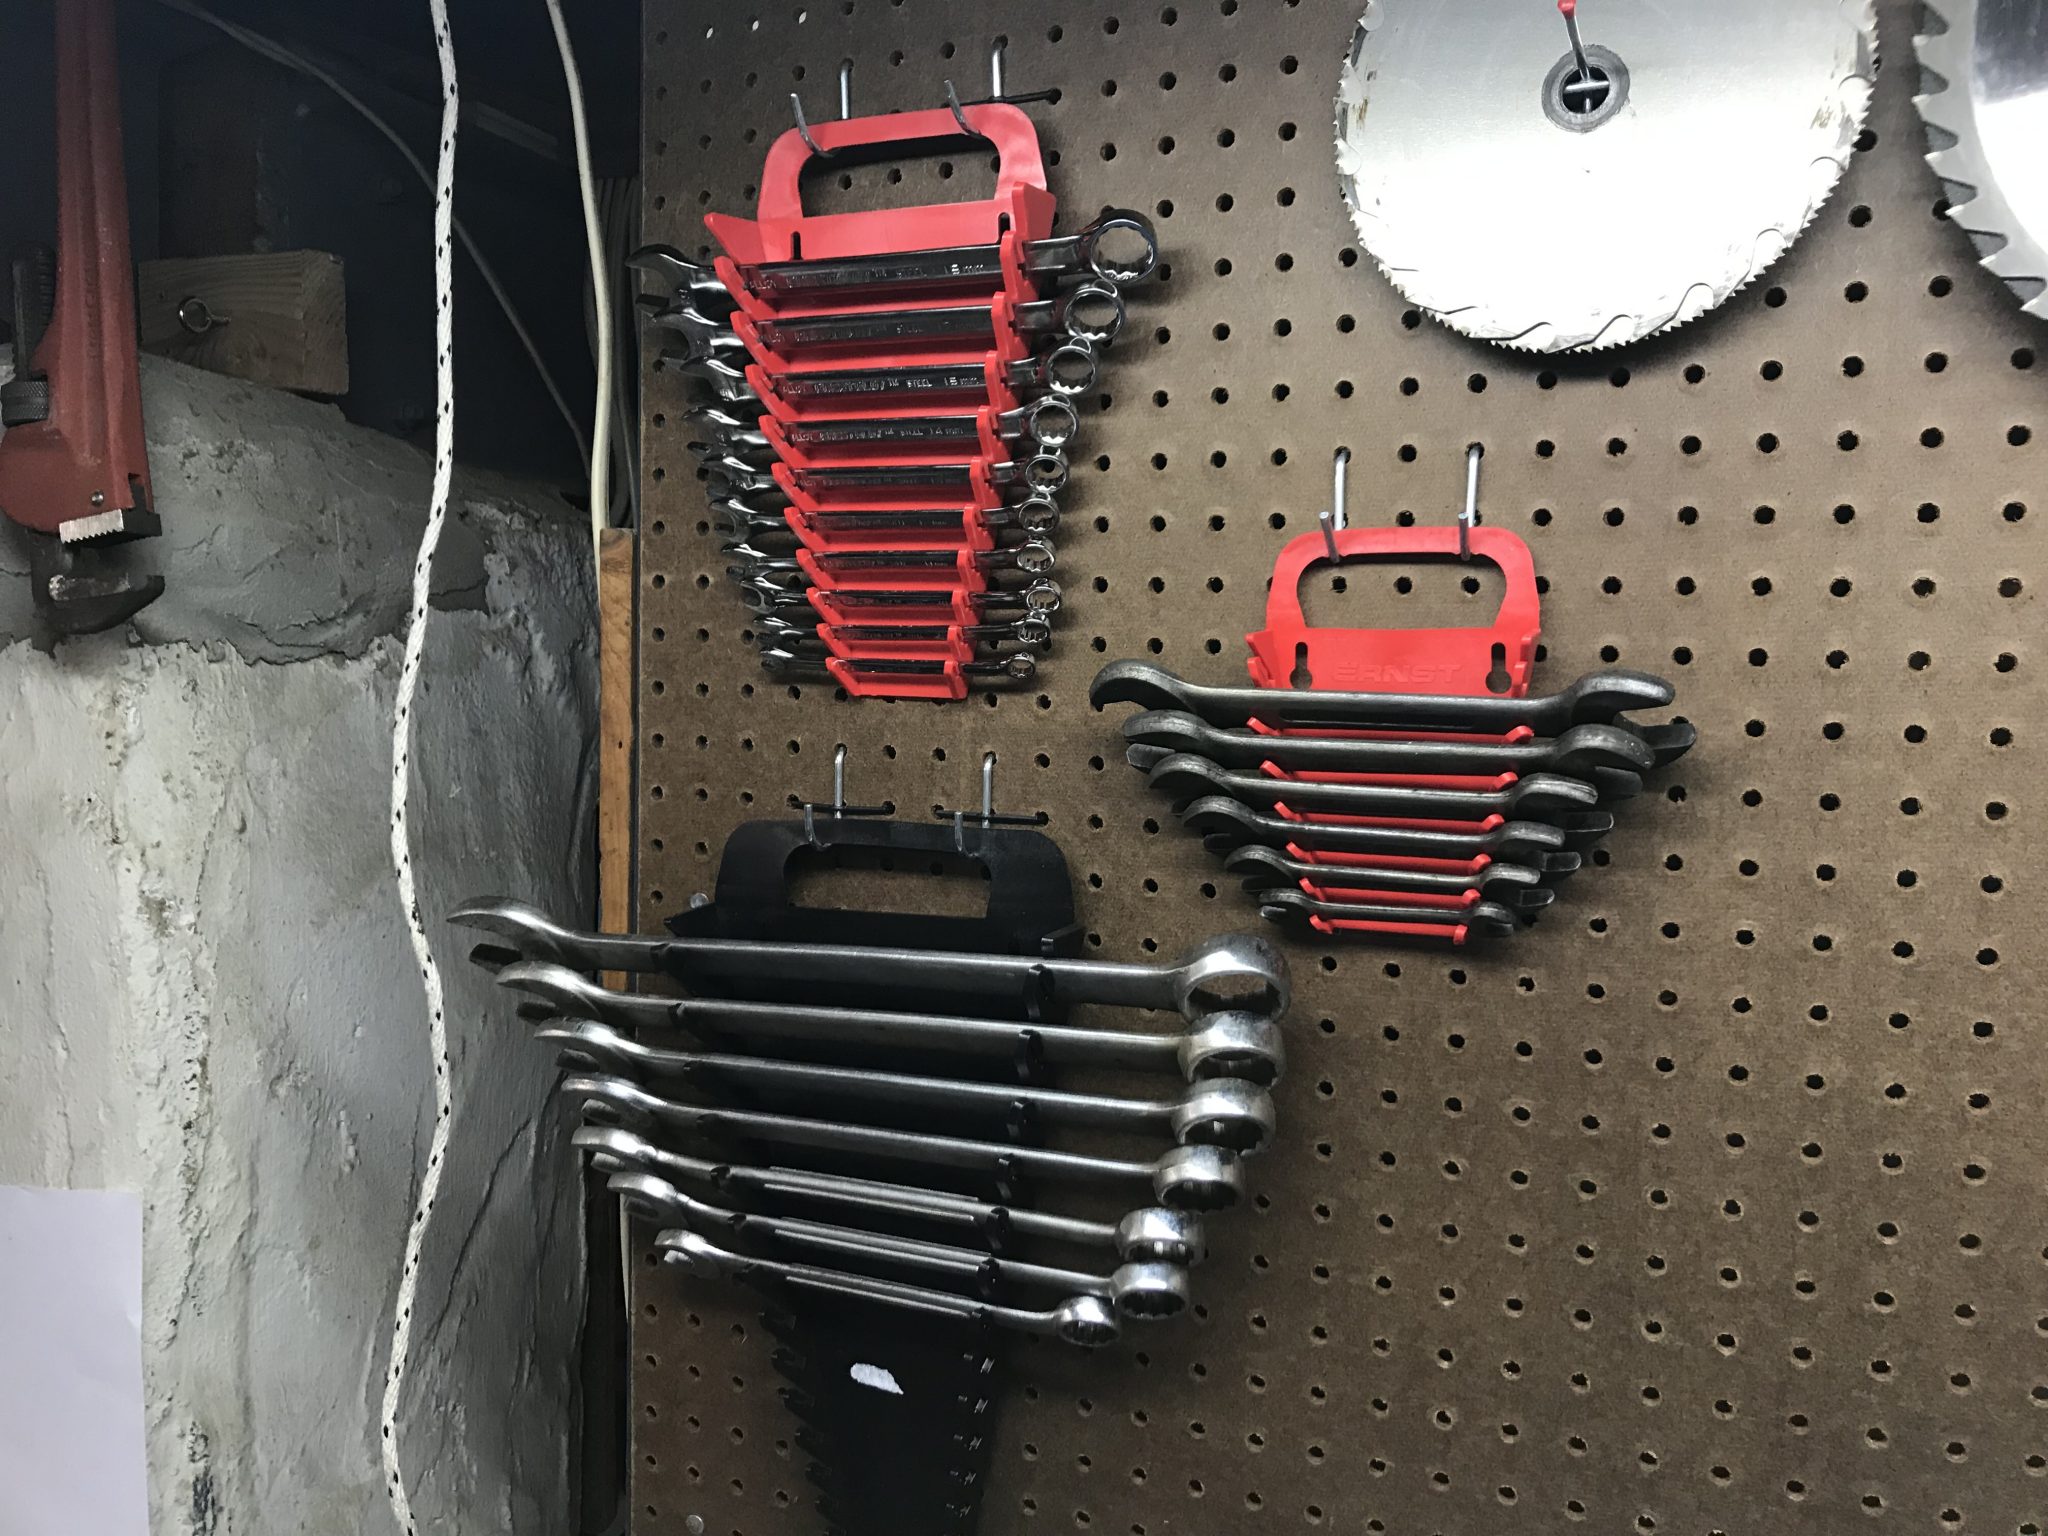
There have been several developments since my accident. First, I had the supreme luck to be friends with a person whose parents are downsizing before a move. One of those parents happens to have been a shade tree mechanic himself years ago and had literal mounds of wrenches, sockets and other tools in his garage and basement that needed a new home. Some of them were a little worse for the wear, but, given a little treatment with Evapo-rust coupled with a light coating of oil, they came right back to life. So I’m pretty set for now in terms of the ability to turn bolts and screws.
New Parts
Next, I am happy to say that I managed to snag a set of good condition rear tail lights from a 240-centric Facebook group I’m on, and I got them for what I’d call “a steal.” I’ve not attached them yet as I need to test and clean up all the electrical connections, but they are very nice, especially for the price, and a far sight better than the busted ones my car used to sport.
I am also now in possession of an Engine Coolant Temperature sensor (ECT) and an intake manifold gasket. This is all in preparation for removing the intake assembly, cleaning it up a bit, replacing the ECT, and remounting it all. Additionally, harkening back to that list I found in my glove-box, I have a Fuel Pressure Regulator on the way too. Perhaps I’ll also disassemble the fuel rail and clean it out, or at least remove the injectors and clean them. I’m not sure about that yet, so stay tuned. Even further still, I went and got an overdrive bypass plate from iPd. My plan is to install that and see if I can fix the actual solenoid. If I can manage that I’ll take the bypass back off and reinstall the solenoid.
(Re)Fixing Stuff
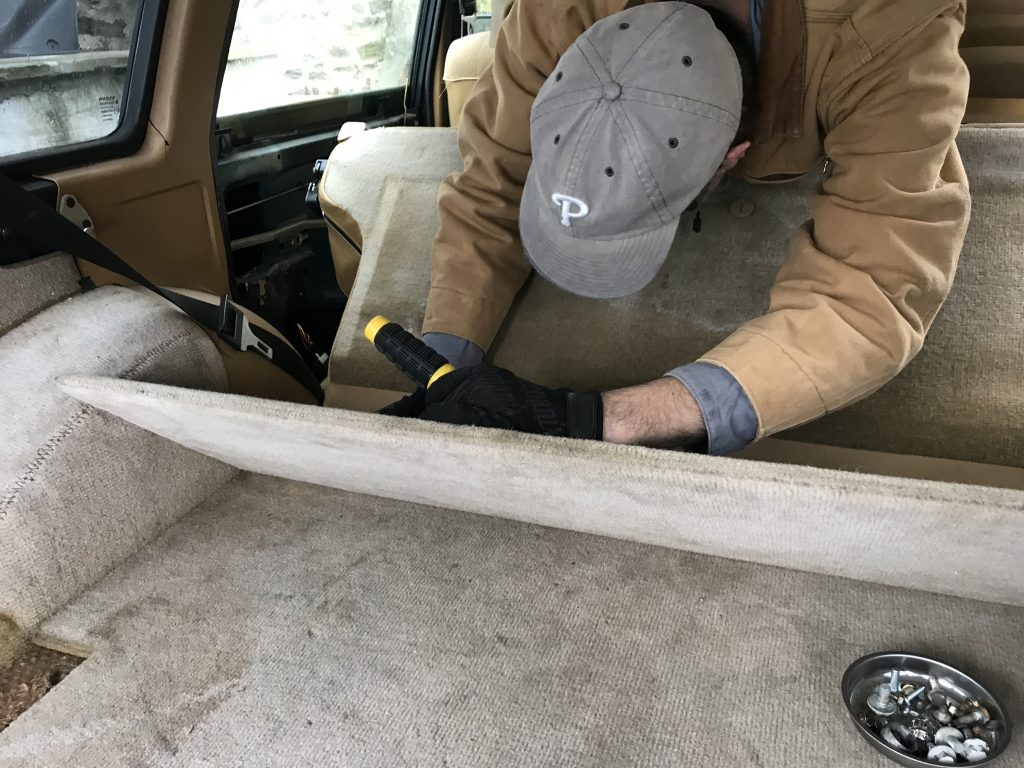
Finally, a small amount of actual work. Sort of a revisit to previous work, really. When I had originally installed it, I hadn’t noticed that my pre-pump assembly was missing the rubber o-ring that helped keep the gas fumes from coming from the tank and into the car. So I took it back out, added the o-ring, and then sealed it back up, this time using a new and not corroded to heck lock nut. After a quick test to make sure the pump was still operating I sealed the whole thing back up and reinstalled the floor of the cargo area.
In the process I also located the previously missing center lap belt! One tiny step at a time.
I’m back from the Thanksgiving break. I hope all of you who celebrated had a nice one, and those of you who did not had a good time doing whatever you were doing too.
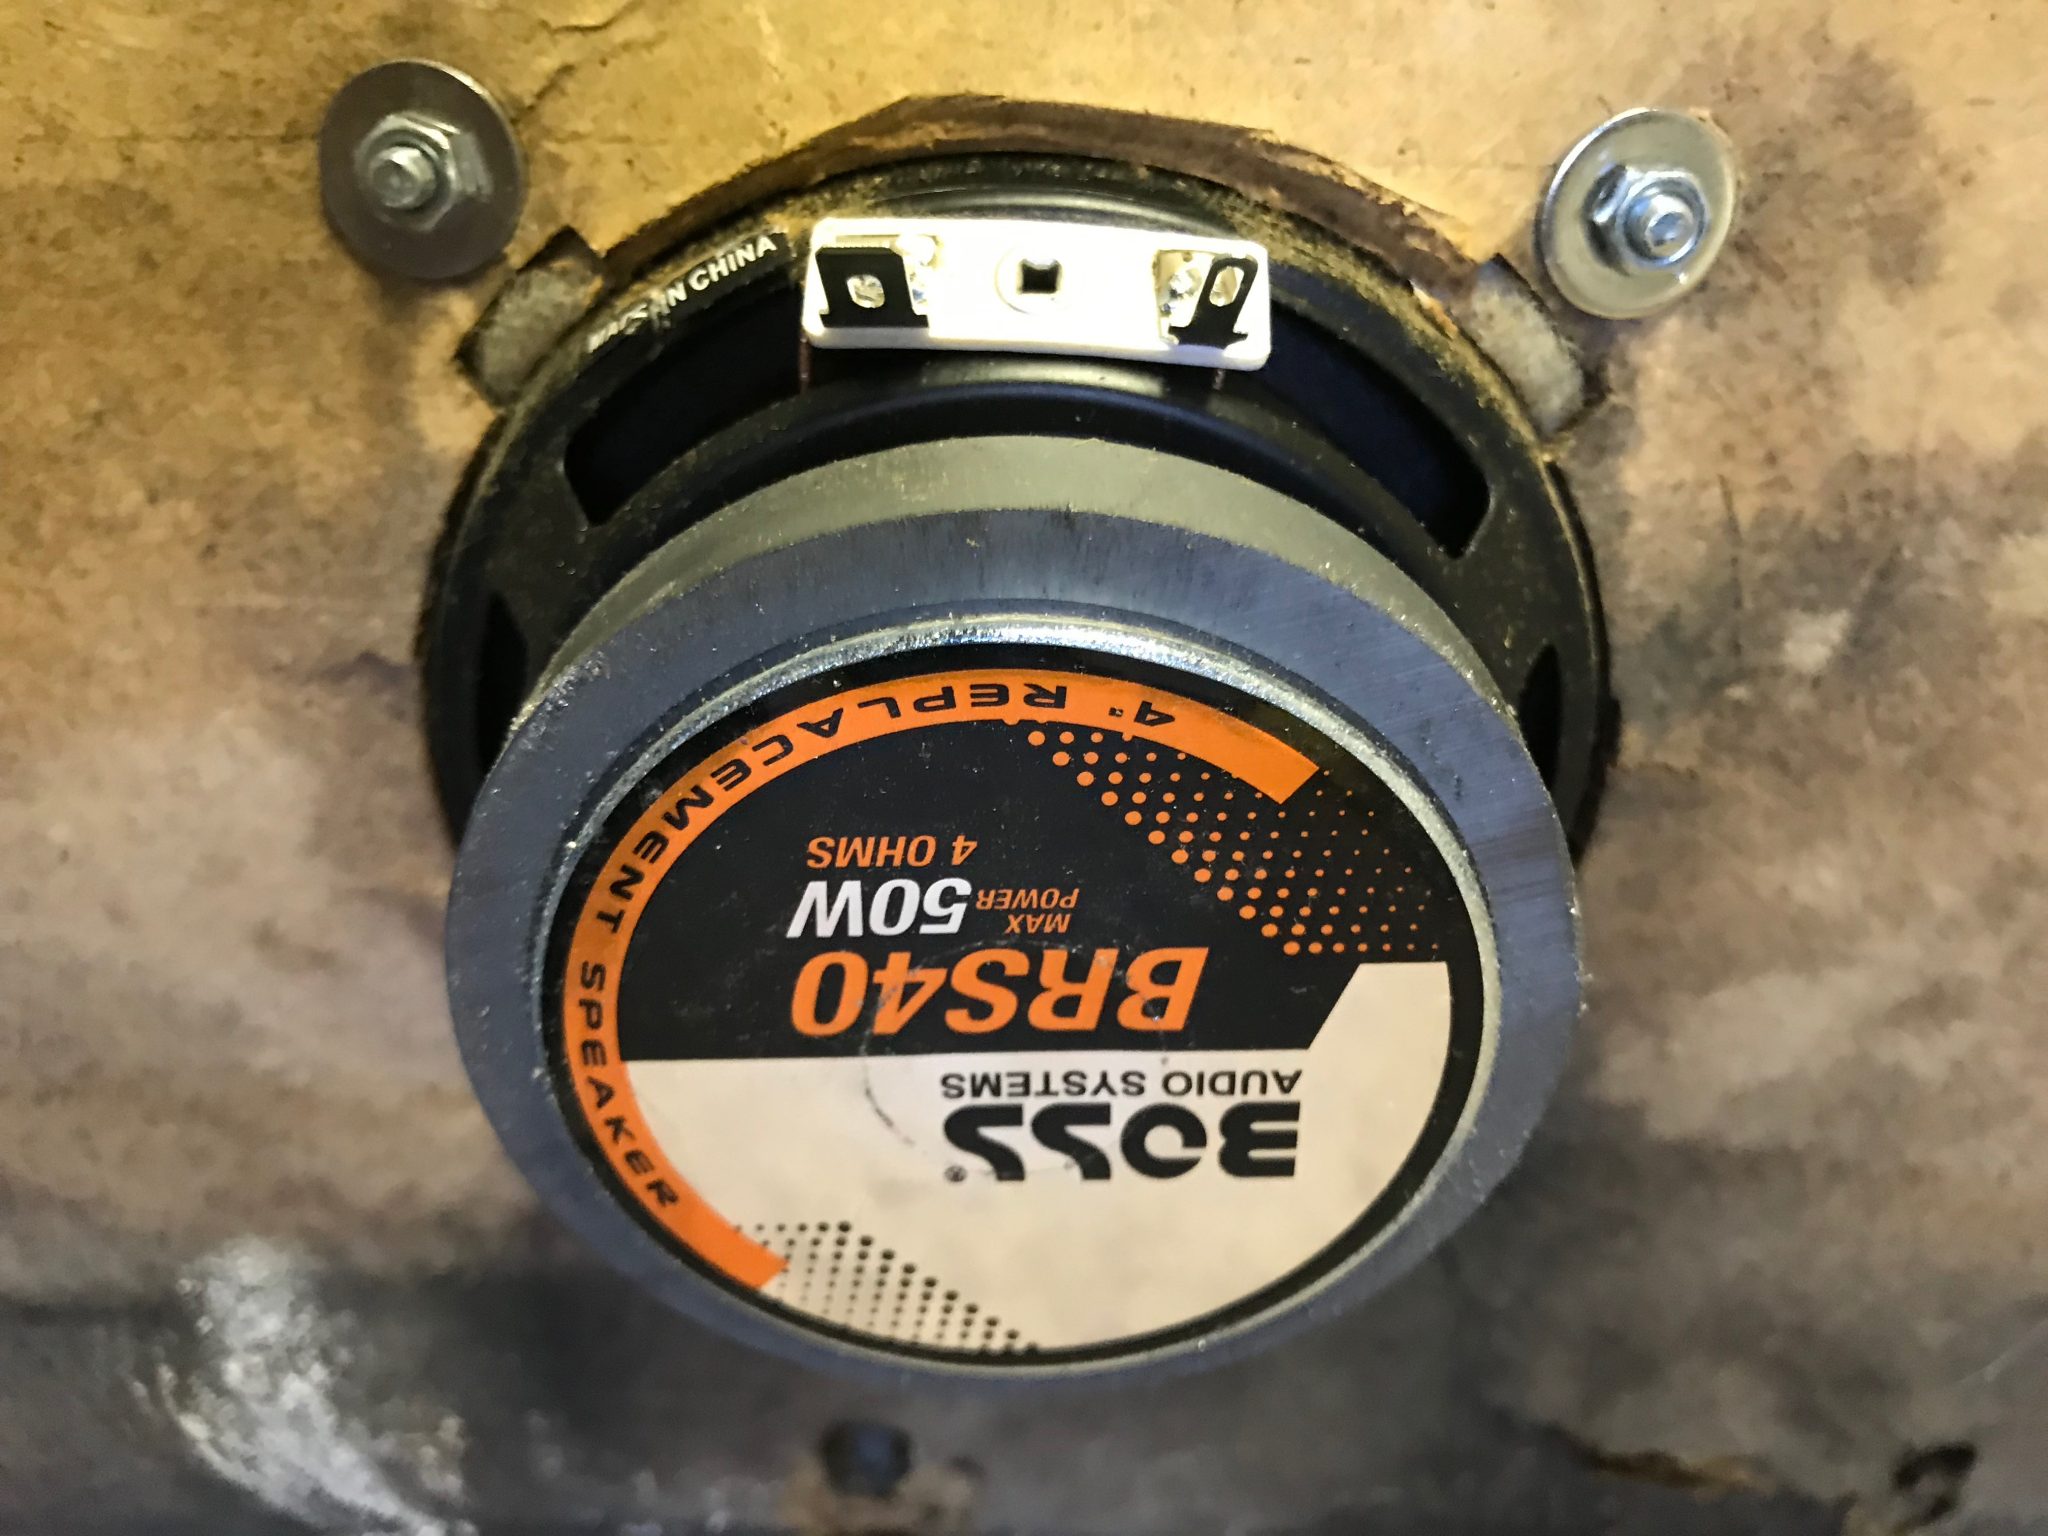
Having beaten the front speakers into submission in the ugliest way possible it was now time to do the same in the back. I did this already on the passenger side and promised to show how I did it. The “how” here is tied to the mechanism by which the plastic speaker grille is attached. The edges of the grille have tabs that lock into slots cut into the metal part of the speaker bracket. Unfortunately the speaker and the bracket are integral so it’s not like you can just mix and match. That leaves the options of either fabricating a new adapter bracket or doing what I did – hack up the old speakers for the bracket part.
This is the post Dremel (the choice of half-assed fixes the world over!) cutting away the speaker from the bracket. The metal is quite thin so it only took a moment to cut through using a fiberglass reinforced cut-off wheel. I don’t recommend using the non-reinforced wheels for this as they will wear down very quickly against steel.
As you can see, my speaker sits quit nicely beneath the bracket. Instead of the pain-in-the-butt blind rivets Volvo used I elected to use a few M4 sized screws. This will make it much easier to change speakers if I ever desire to do so.
And here it is back on the door card. I have to paint up a guide casing to go on the door itself before I can install the card. I actually did that this past weekend but didn’t have an opportunity to actually put it in. Stay tuned for that.
Anticipating a busy day, I took the morning to get a couple of things I had waiting finished up. I installed the rear passenger door card. I figured out how to mount my new speakers using the old grill system. The details of that will be forthcoming, but here is the end result.
I also got my driver’s side tail light turn signal working. The terminal contacts only needed a bit of cleaning!
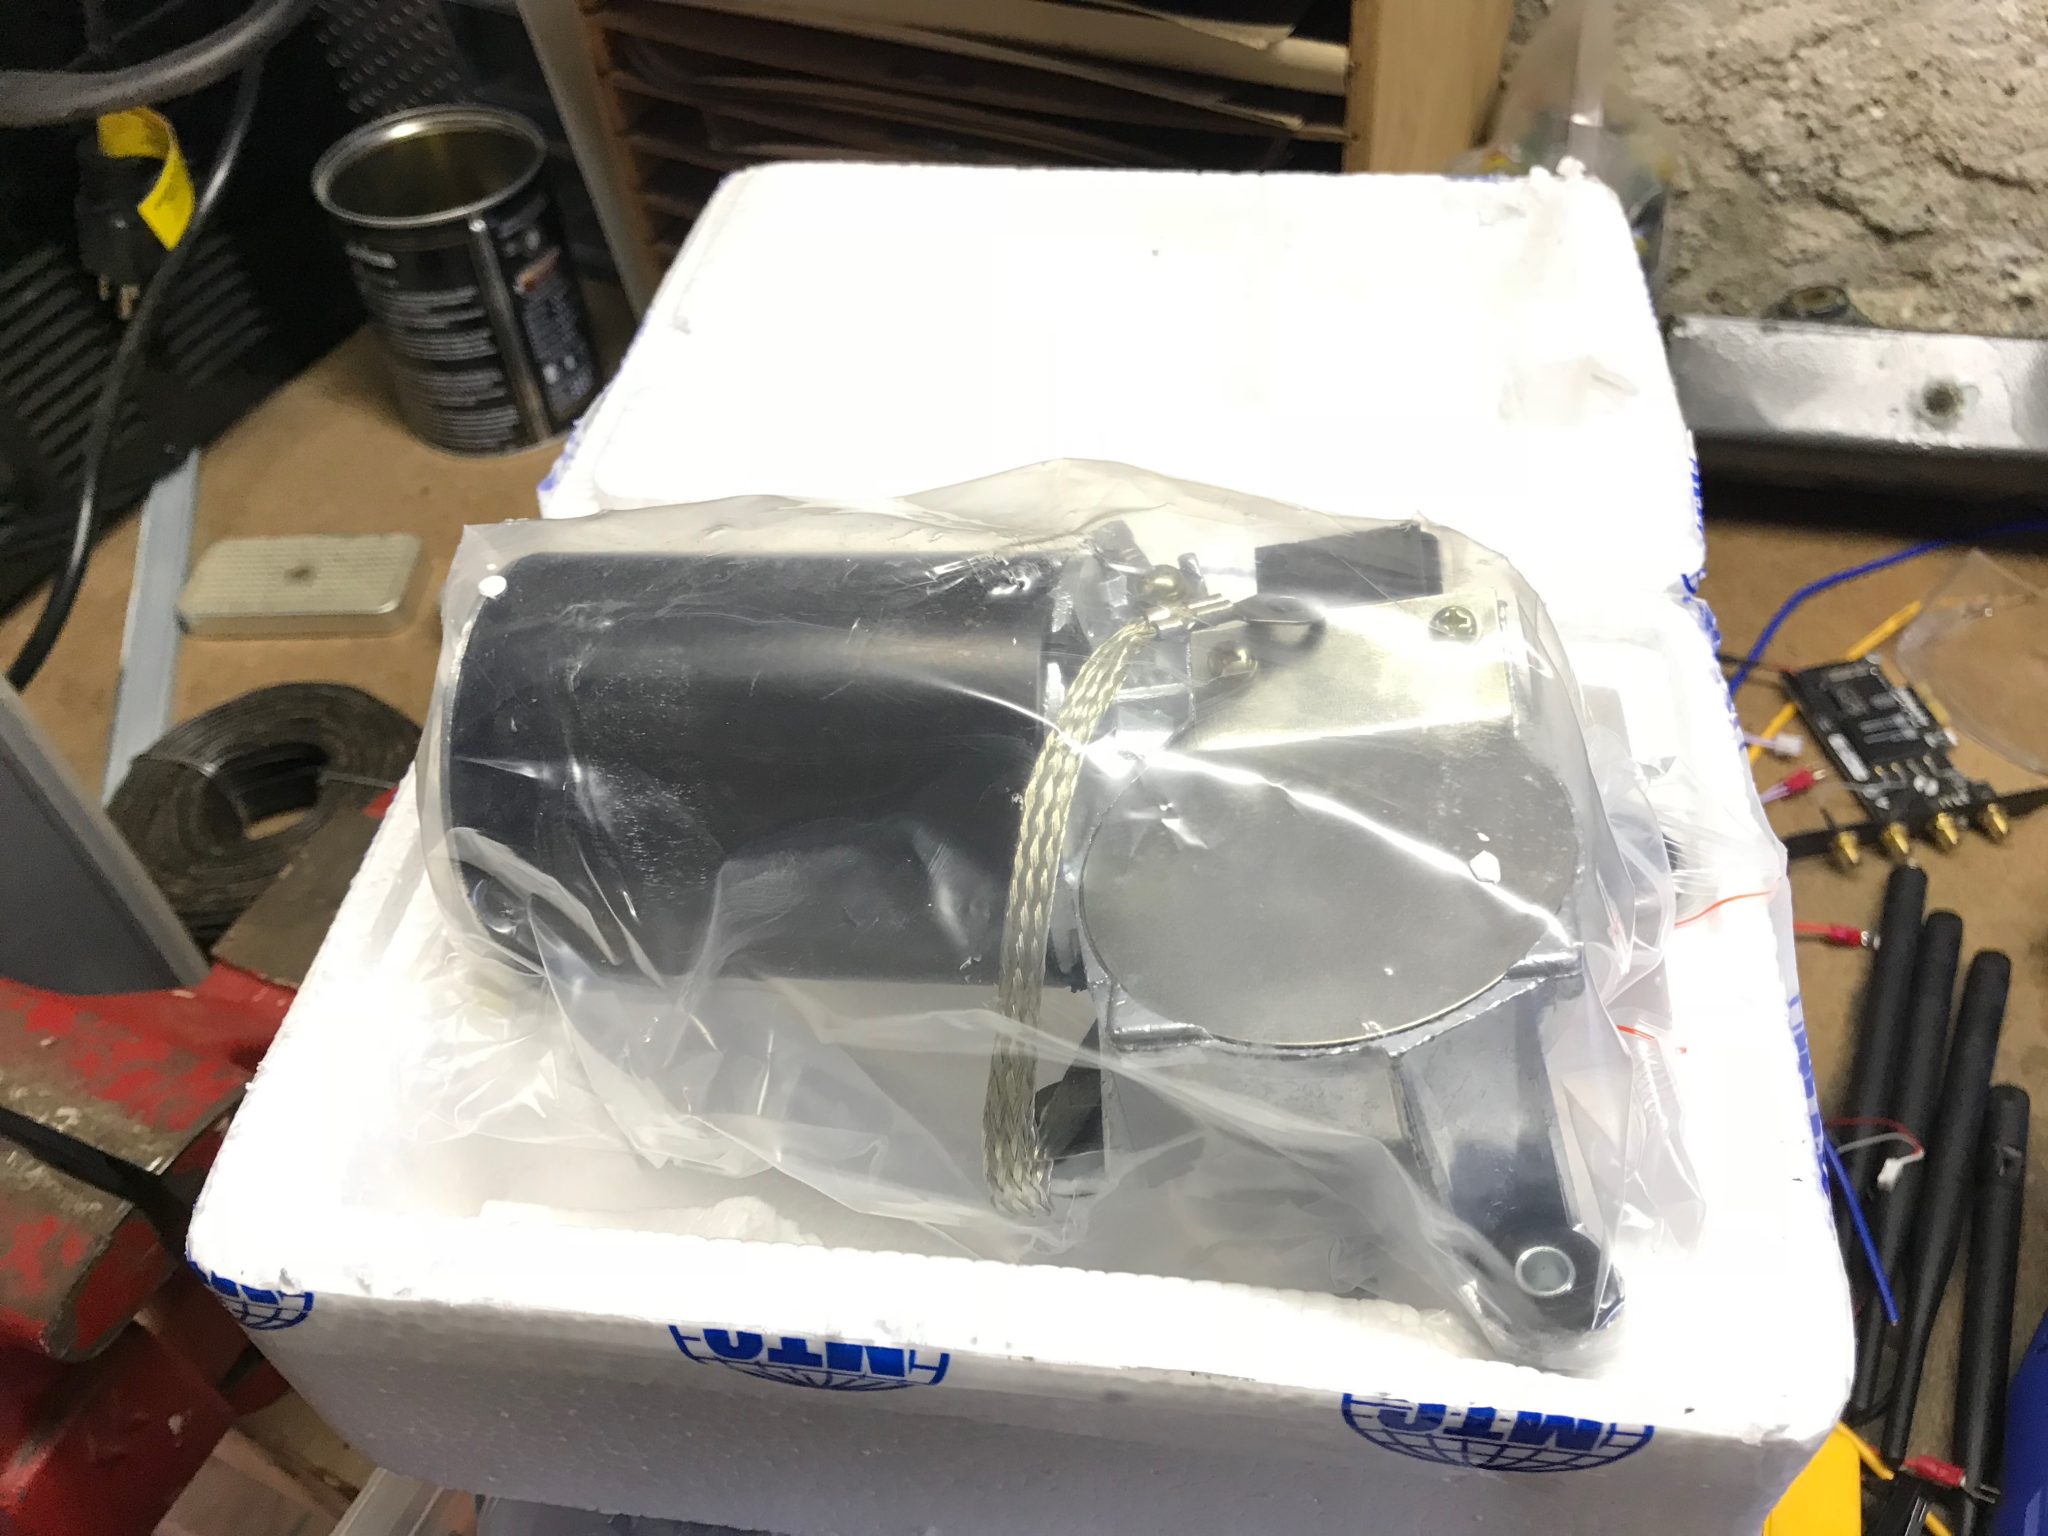
Friday brought my a variety of new parts, both of which are essentially motors of one kind or another.
Specifically, a new, after market windshield wiper motor and a new, after market fuel tank transfer pump. Both are after market because original Volvo made ones are craaazy expensive. The guys at Clean Flame Trap recommended the Airtex E8778 as the after market transfer pump of choice, so I went with that along with a fuel strainer from good ol’ Delphi parts. The wiper motor is MTC.
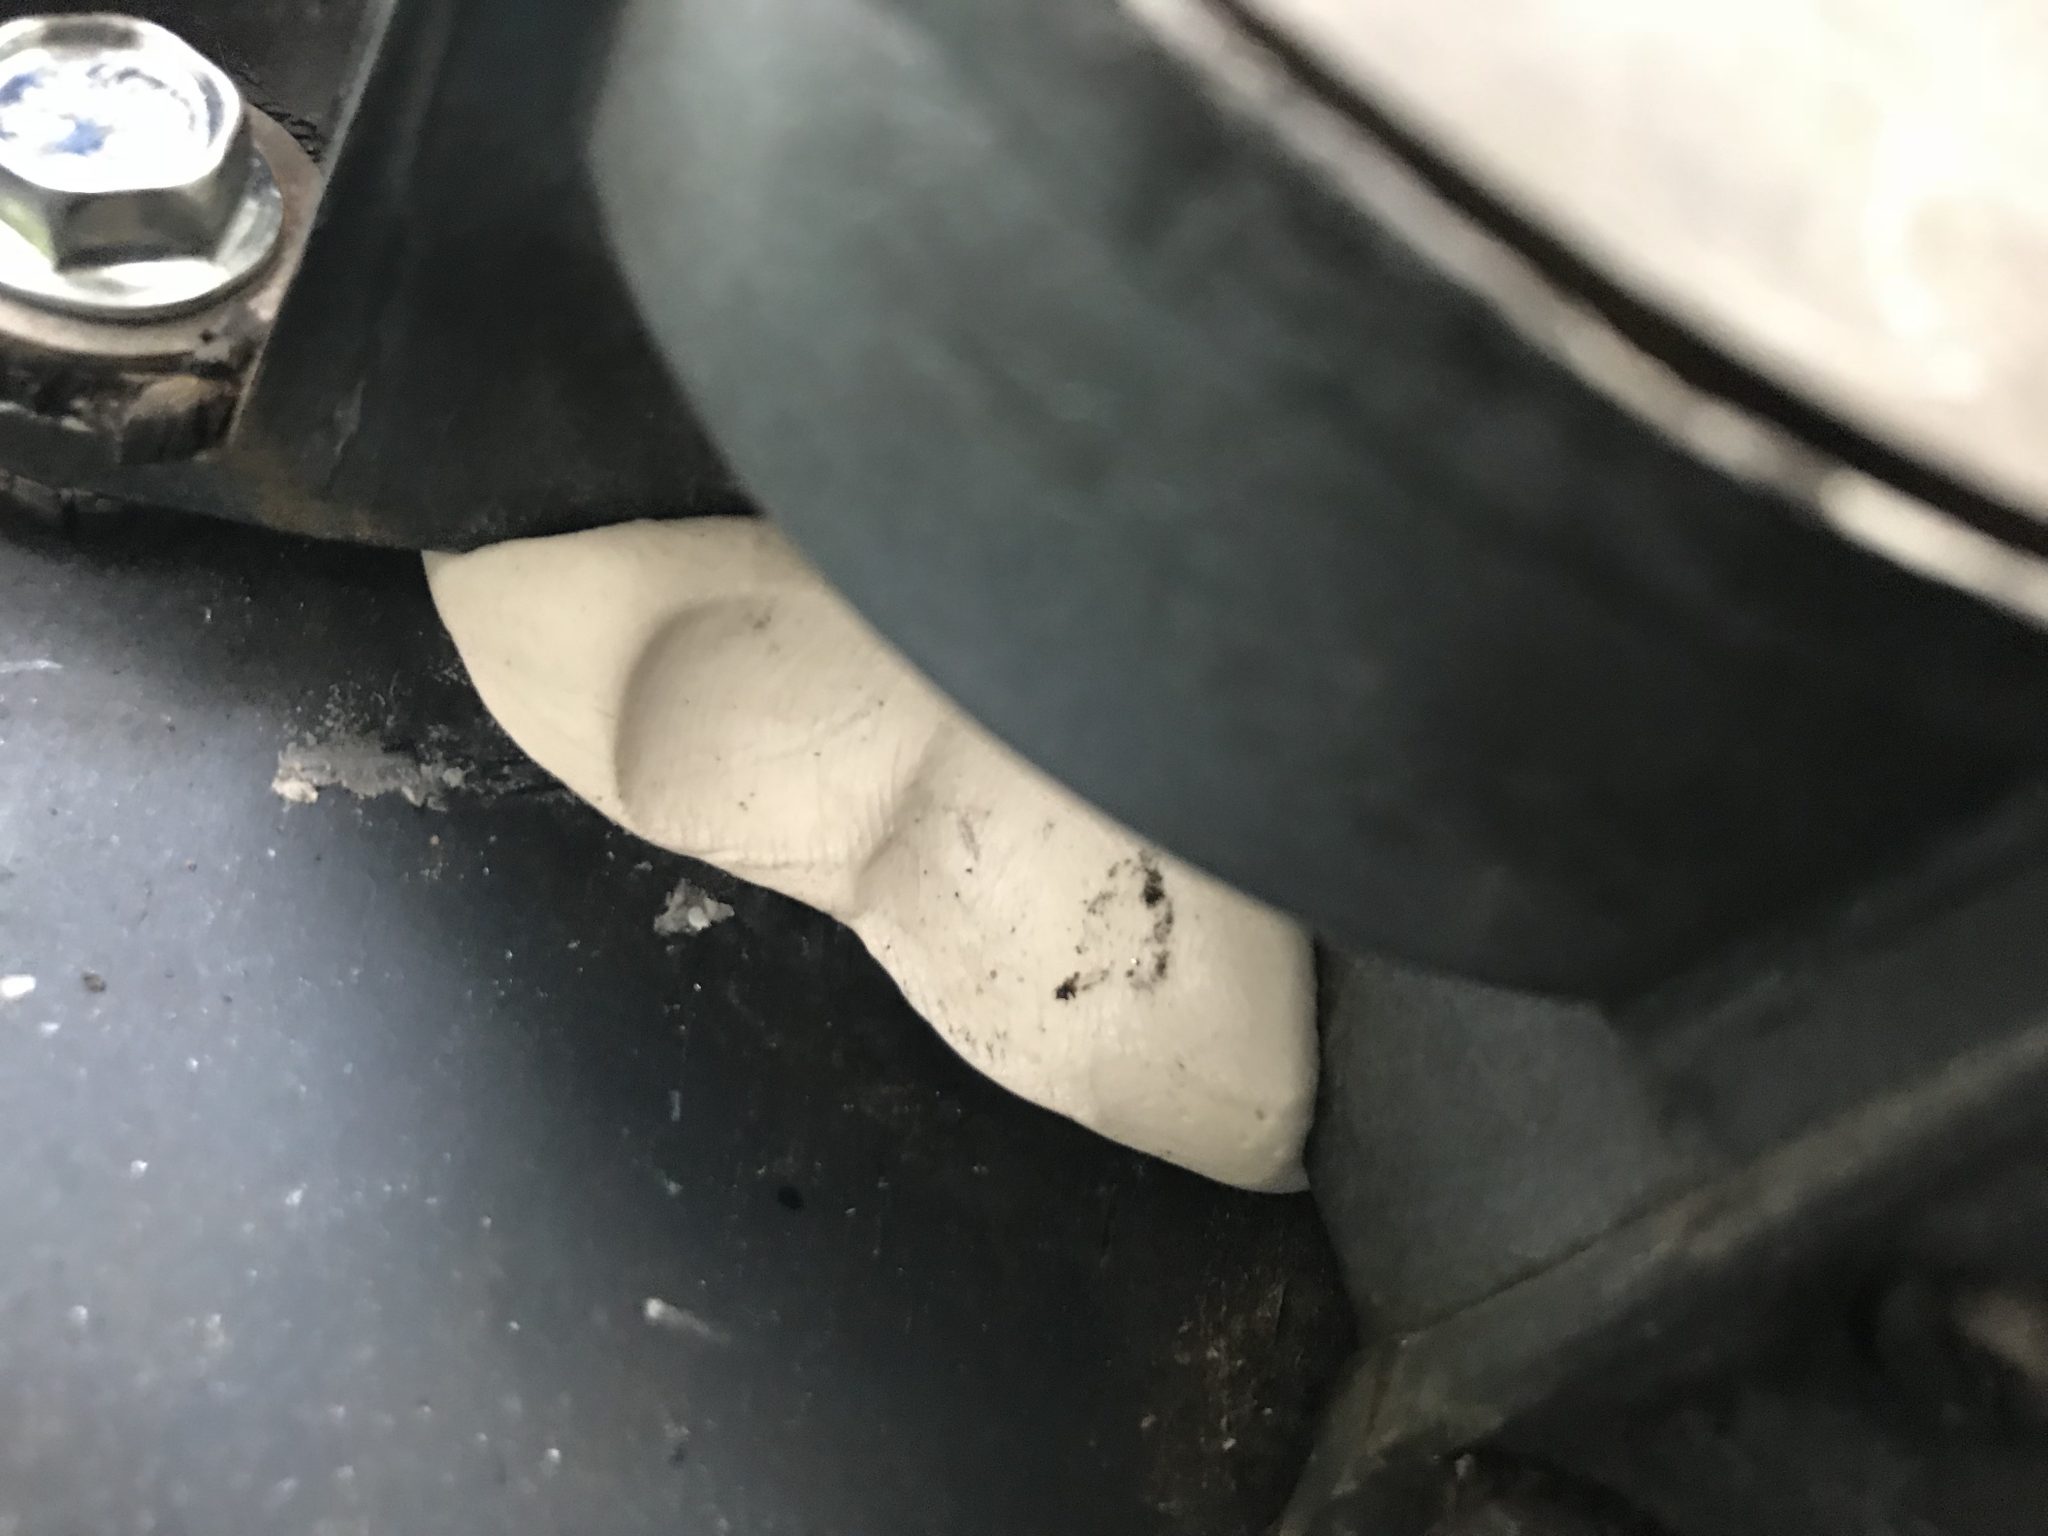
After rebuilding the windshield wiper motor the next obvious step was to put it back into the car. Two things conspired against completing this simple task. First, the weather has been crappy, and second, I needed to replace the sticky goop that was used to make the hole through the firewall water tight. I looked in a couple of auto parts stores and online for what I assumed was a widely available product but could never find what I needed. My recourse was plain old plumber’s putty. It’s not as sticky but it does the same job. I made a little donut about the circumference of the hole, placed it around, and bolted the wiper on.
I think that’ll do just fine. The results of the motor rebuild, however, were a bit disappointing. As you can see in the video below, while there was an overall improvement in function the wipers are still unacceptably lethargic. The low speed doesn’t work at all. I guess this means I’ll have to shell out for a new motor.
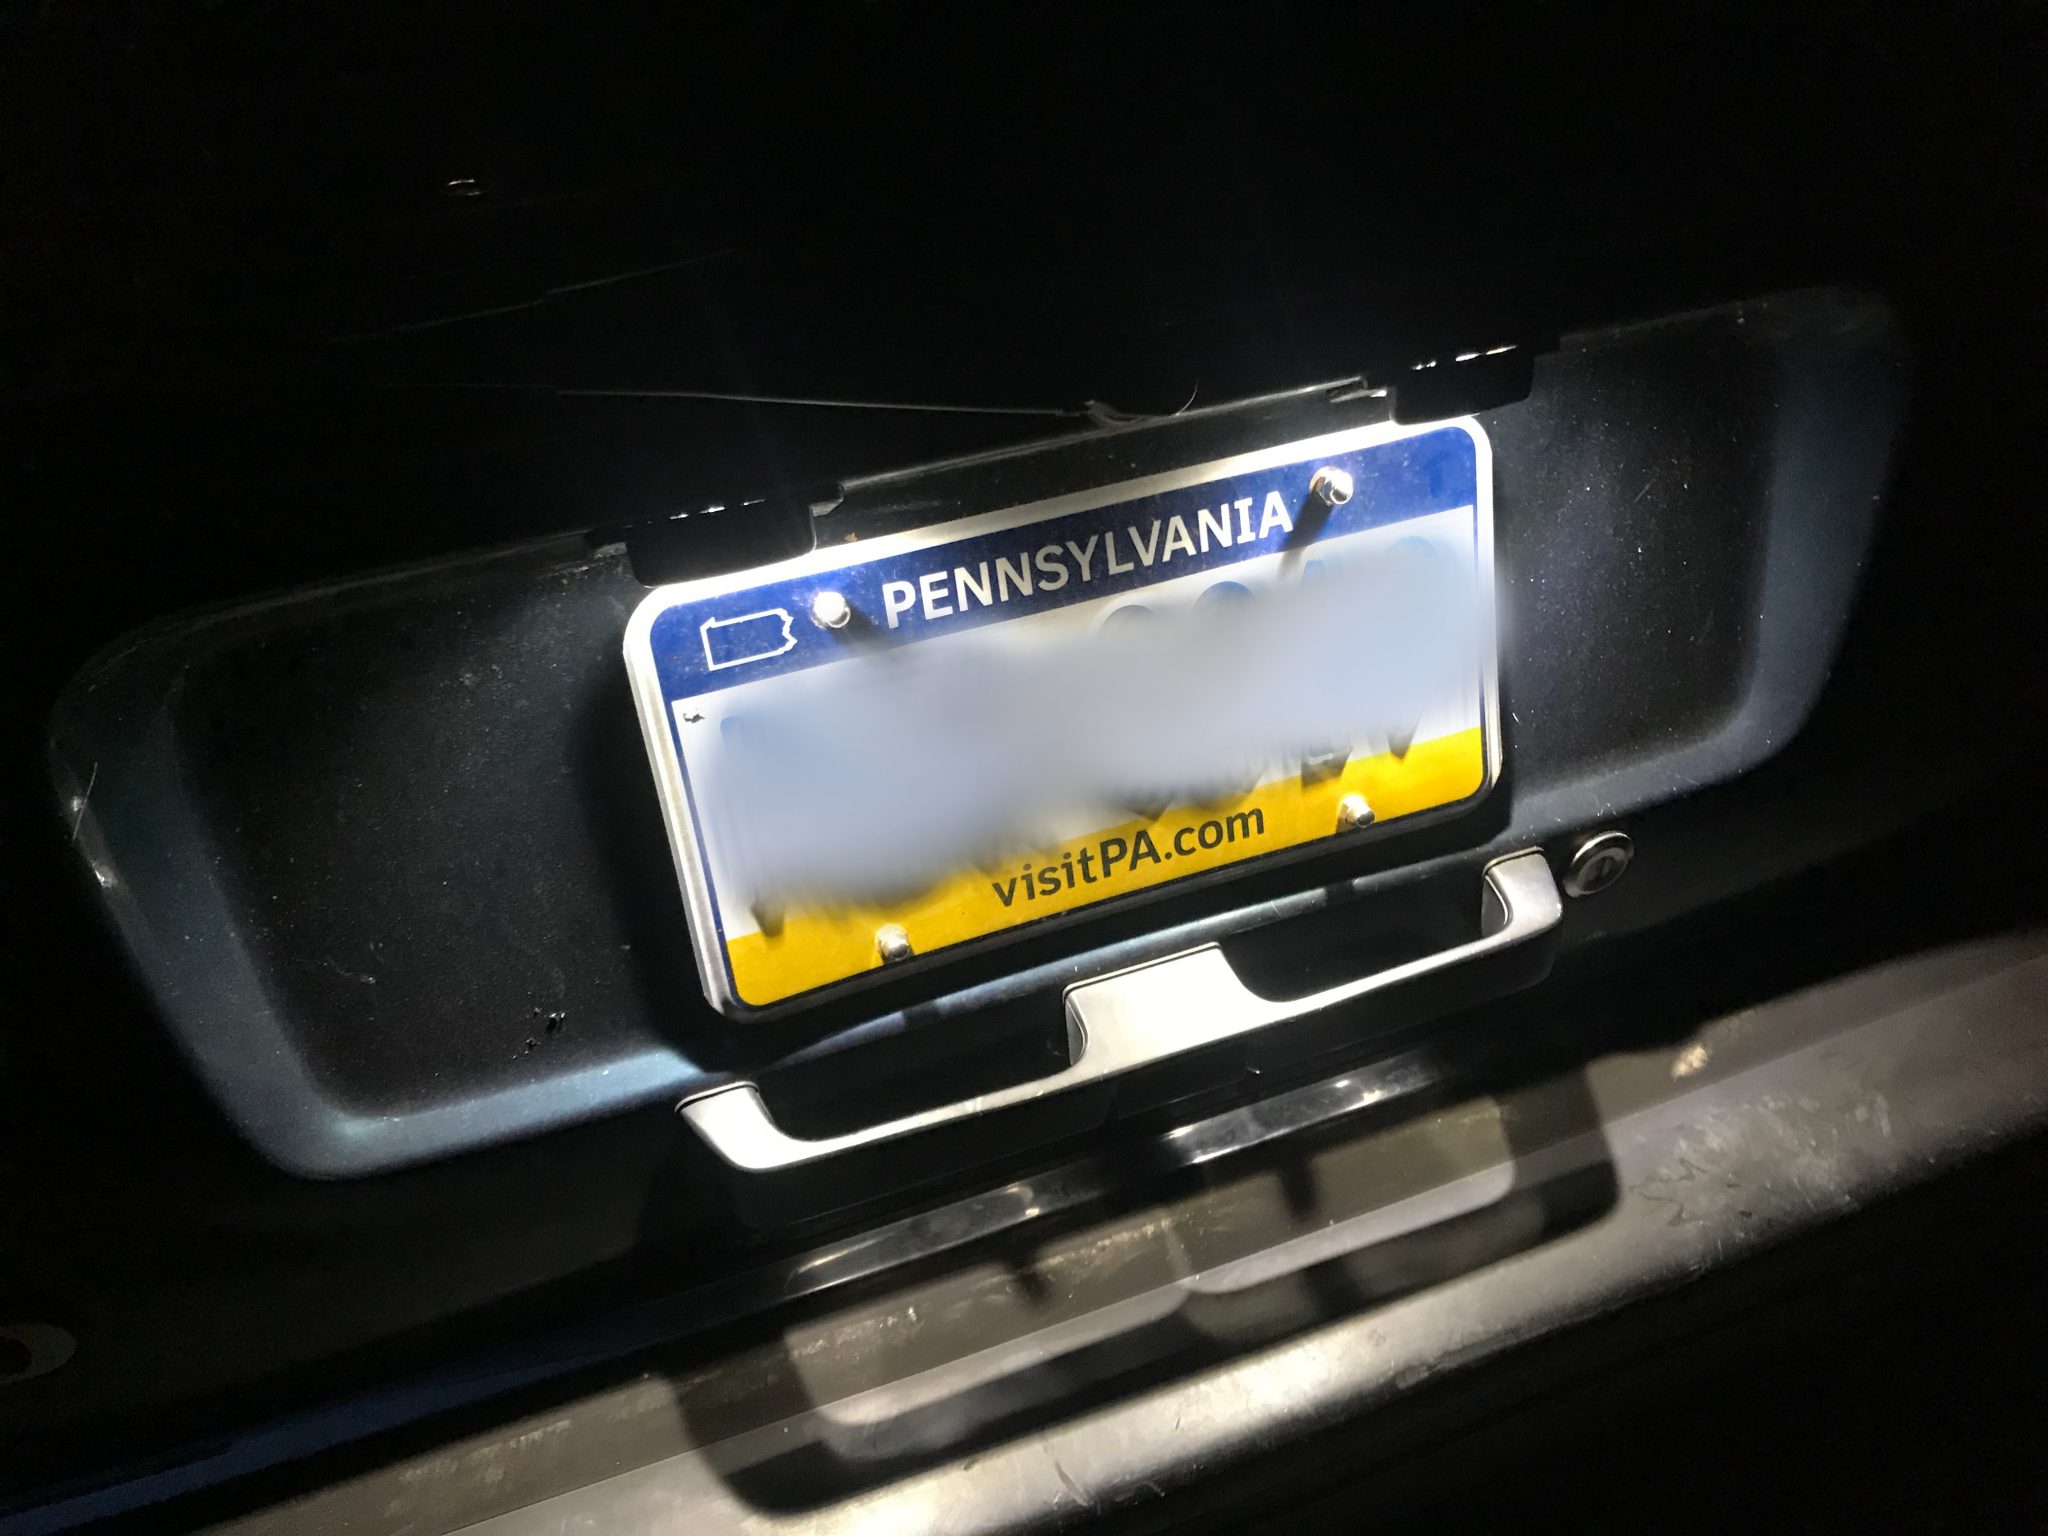
A tiny bit of work last night. I replaced the burnt out bulbs of the license plate lights with new ones. Also beforehand I cleaned up the assemblies themselves which involved scraping off the totally ruined gasket material. Replacements for those are around $8 per which seemed a bit high to me, so I just used black silicone adhesive sealant to do the job instead.
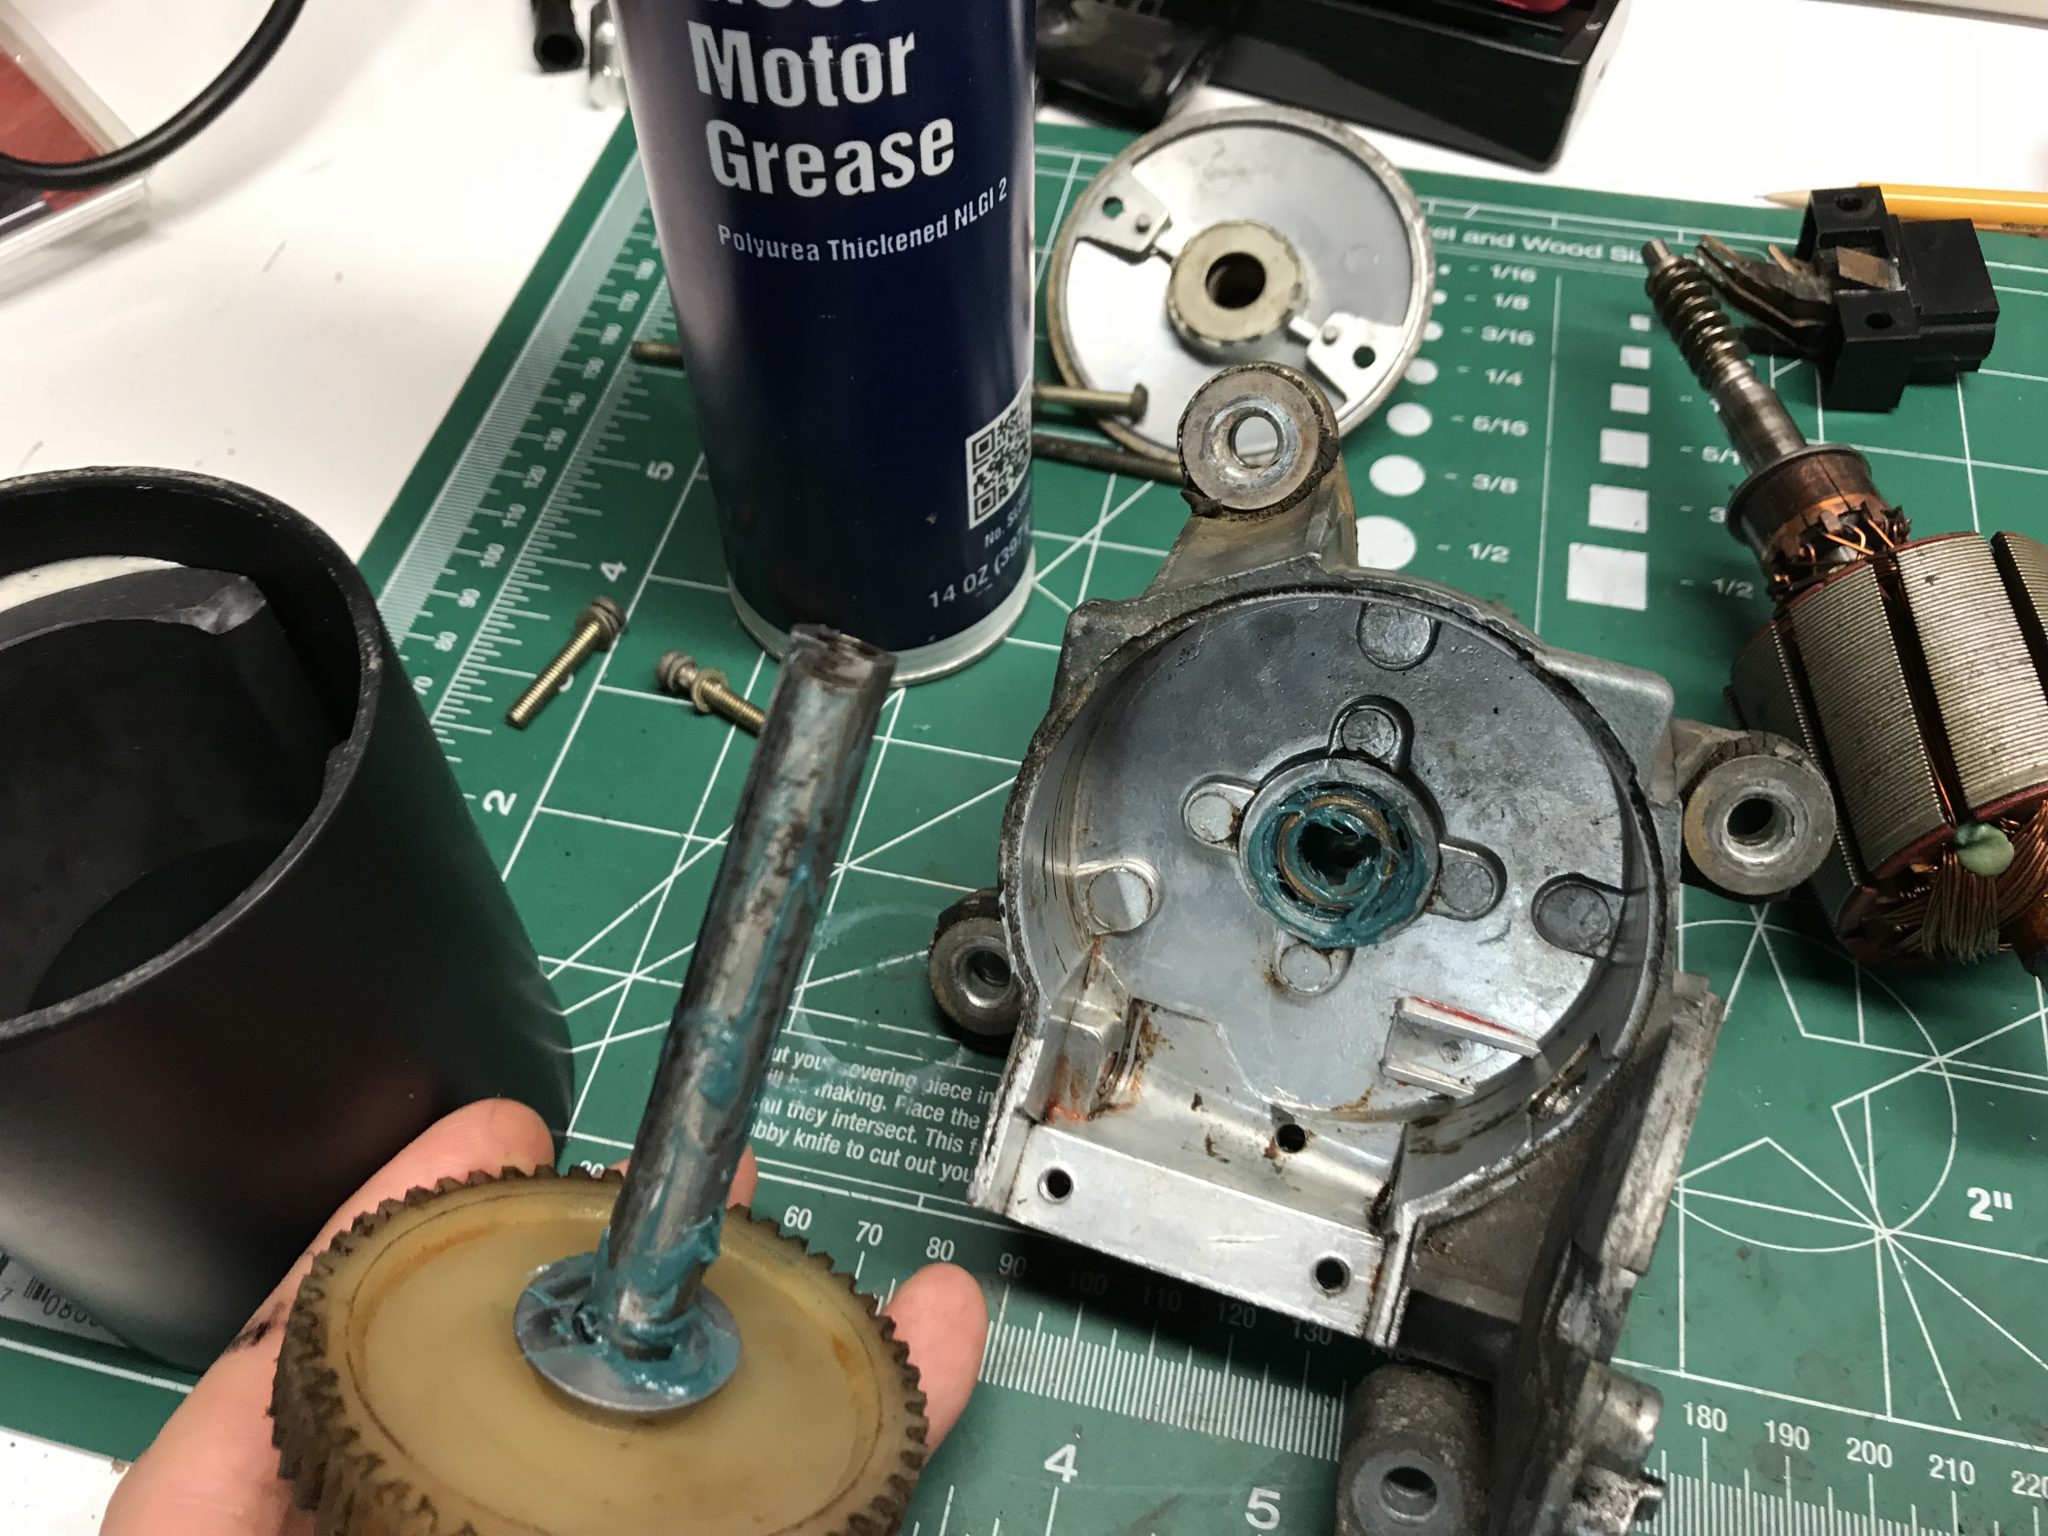
The weekend rolled around again, as it always does, and I was looking to make some progress on the car. The obvious choice, the windshield wiper motor, was still in pieces on my work bench begging to be greased and reassembled, but the replacement carbon brushes were literally on a slow boat from China. So I did the only logical thing: reexamined the existing brushes and called them “good enough”. Honestly they probably are. As best as I can tell only a few millimeters had been worn off and they were still making good contact with the commutator. So I put the thing back together.
A Few Tips
Use electric motor bearing grease. I’m not 100% clear on why this is a good thing because I don’t do a lot of greasing in my normal life nor understand the chemical properties of today’s space-aged grease technology, but from what I can tell it’s better for electric motors to use electric motor specific bearing grease.
The best (and possibly only practical) way to insert the armature is by removing the brush spring mechanisms that push them against the commutator. Put the armature in first and then put the brushes into their channels and attach the springs.
When you have the armature in and the brushes connected the next step is sealing it up by attaching the housing. That housing, though, has the two permanent stator magnets glued to its inside which will pull the armature straight up and out of contact with the brushes if you aren’t careful. While lowering the cover keep downward pressure on the armature until the cover is on.
The rest of the process is pretty straight forward. I tested the motor out and it definitely sounds quieter and less angry than before. The intermittent wiper mode now works too!
I didn’t actually reinstall and connect it to the wipers yet as I lost the wad of weatherproofing putty that was originally wrapped around the output shaft housing. Unless I want rain water leaking through into the passenger foot well I’ll have to wait until I get an appropriate replacement to do that.
Additionally, with the help of son #2, I got the rear window sprayer working.
See videos of both things by clicking the link below.
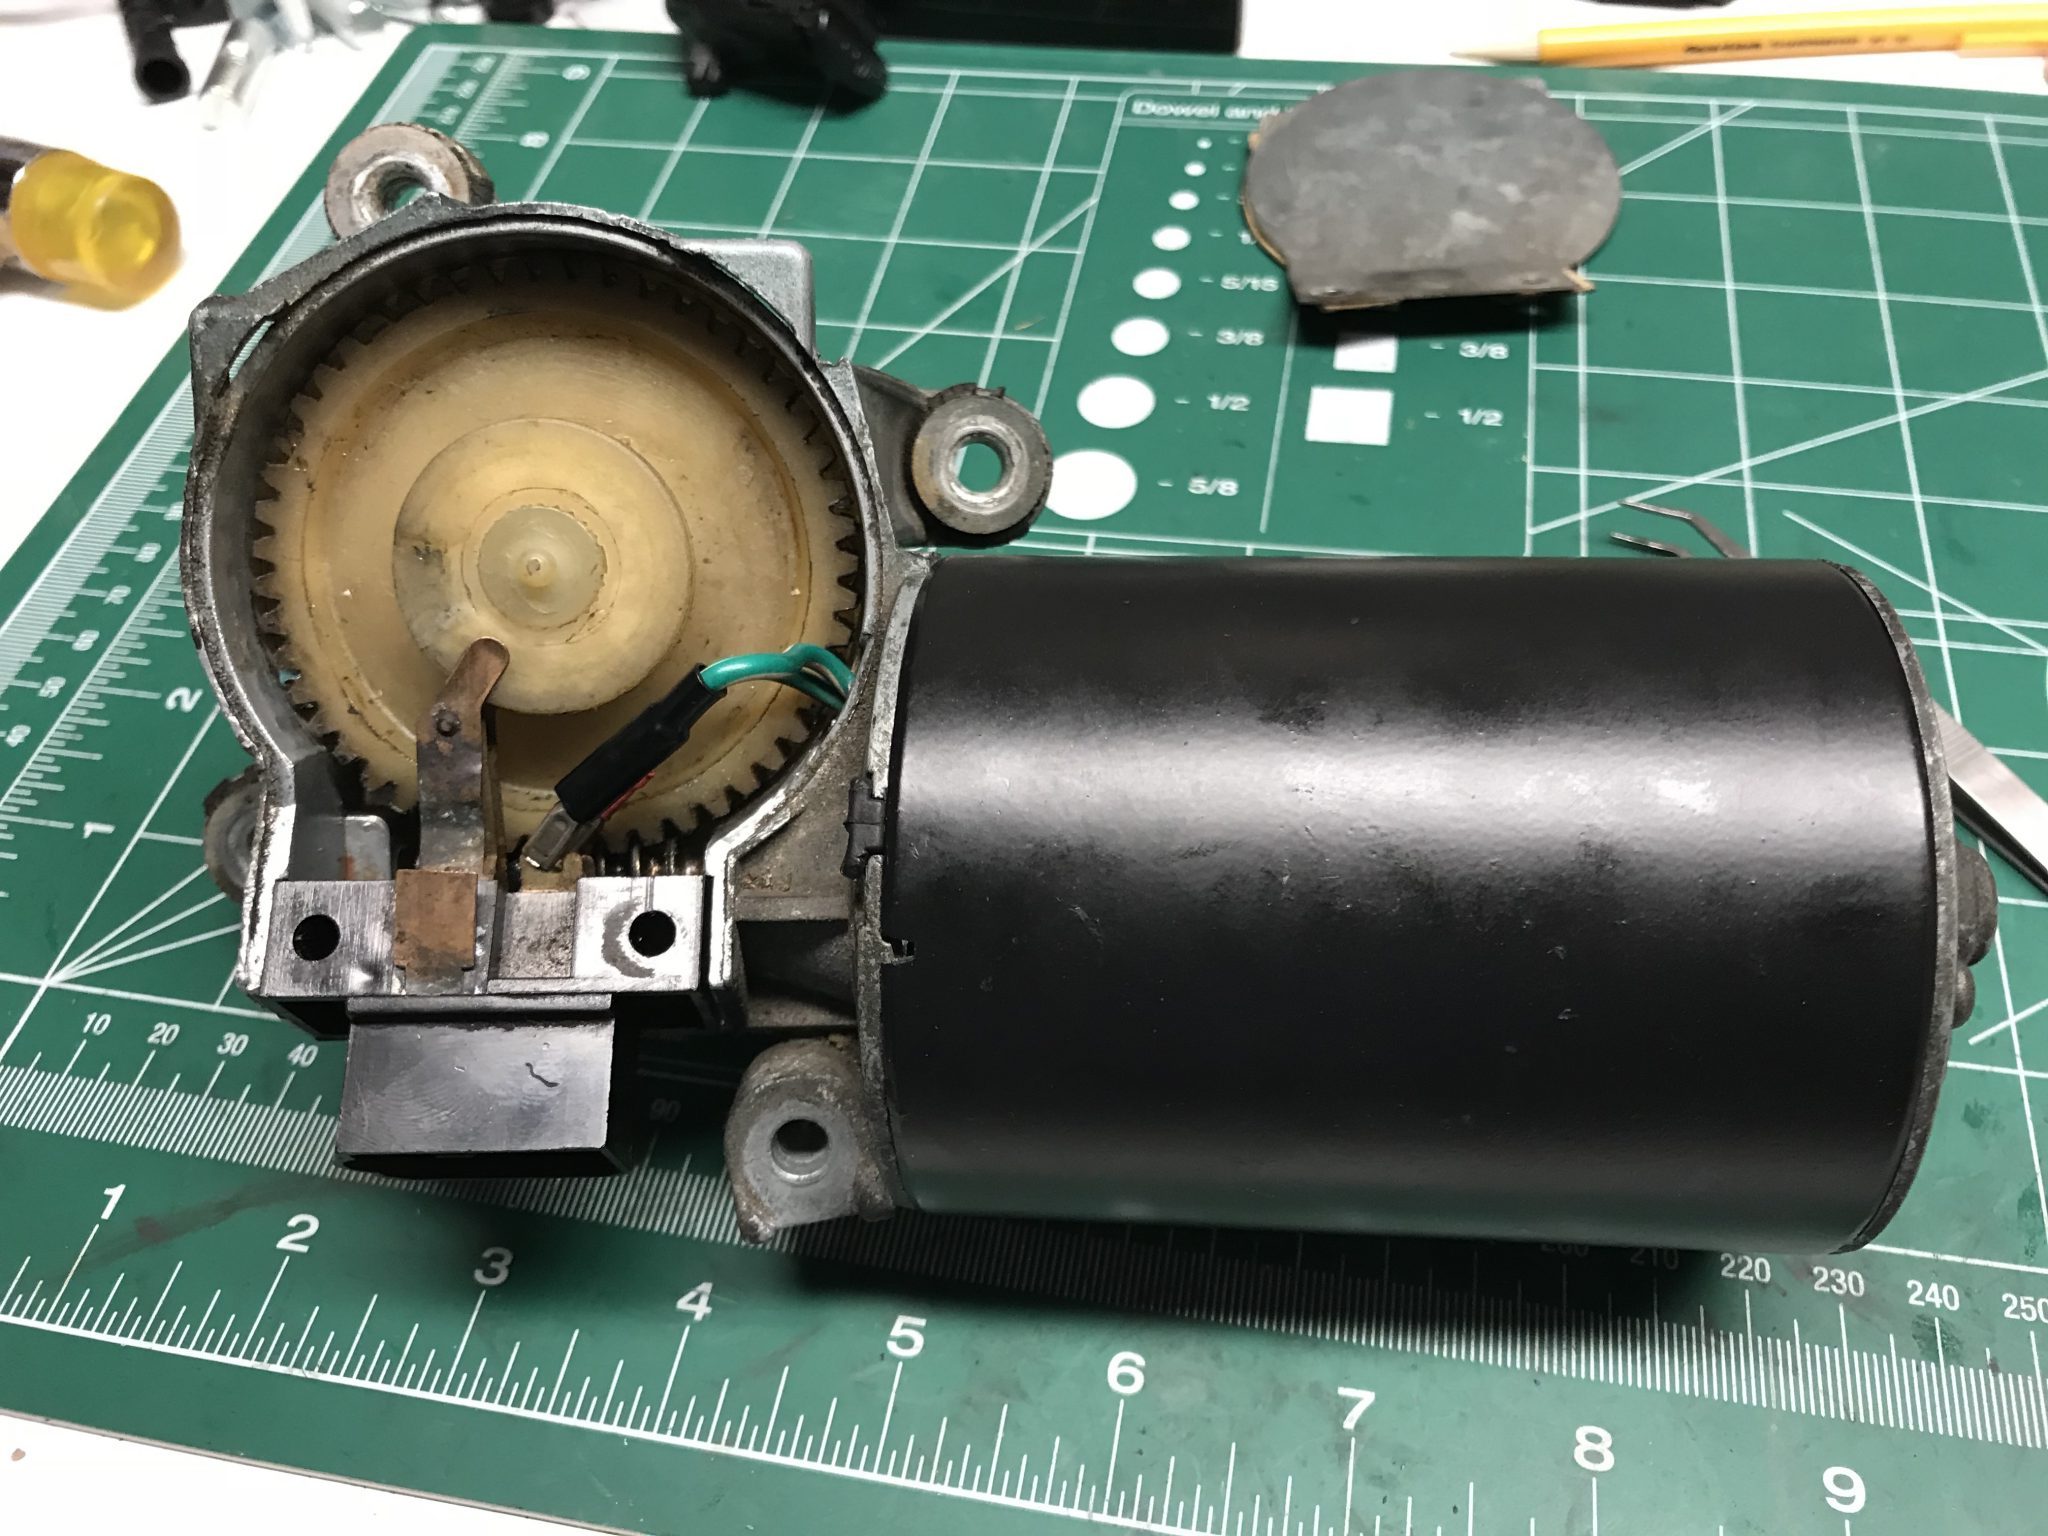
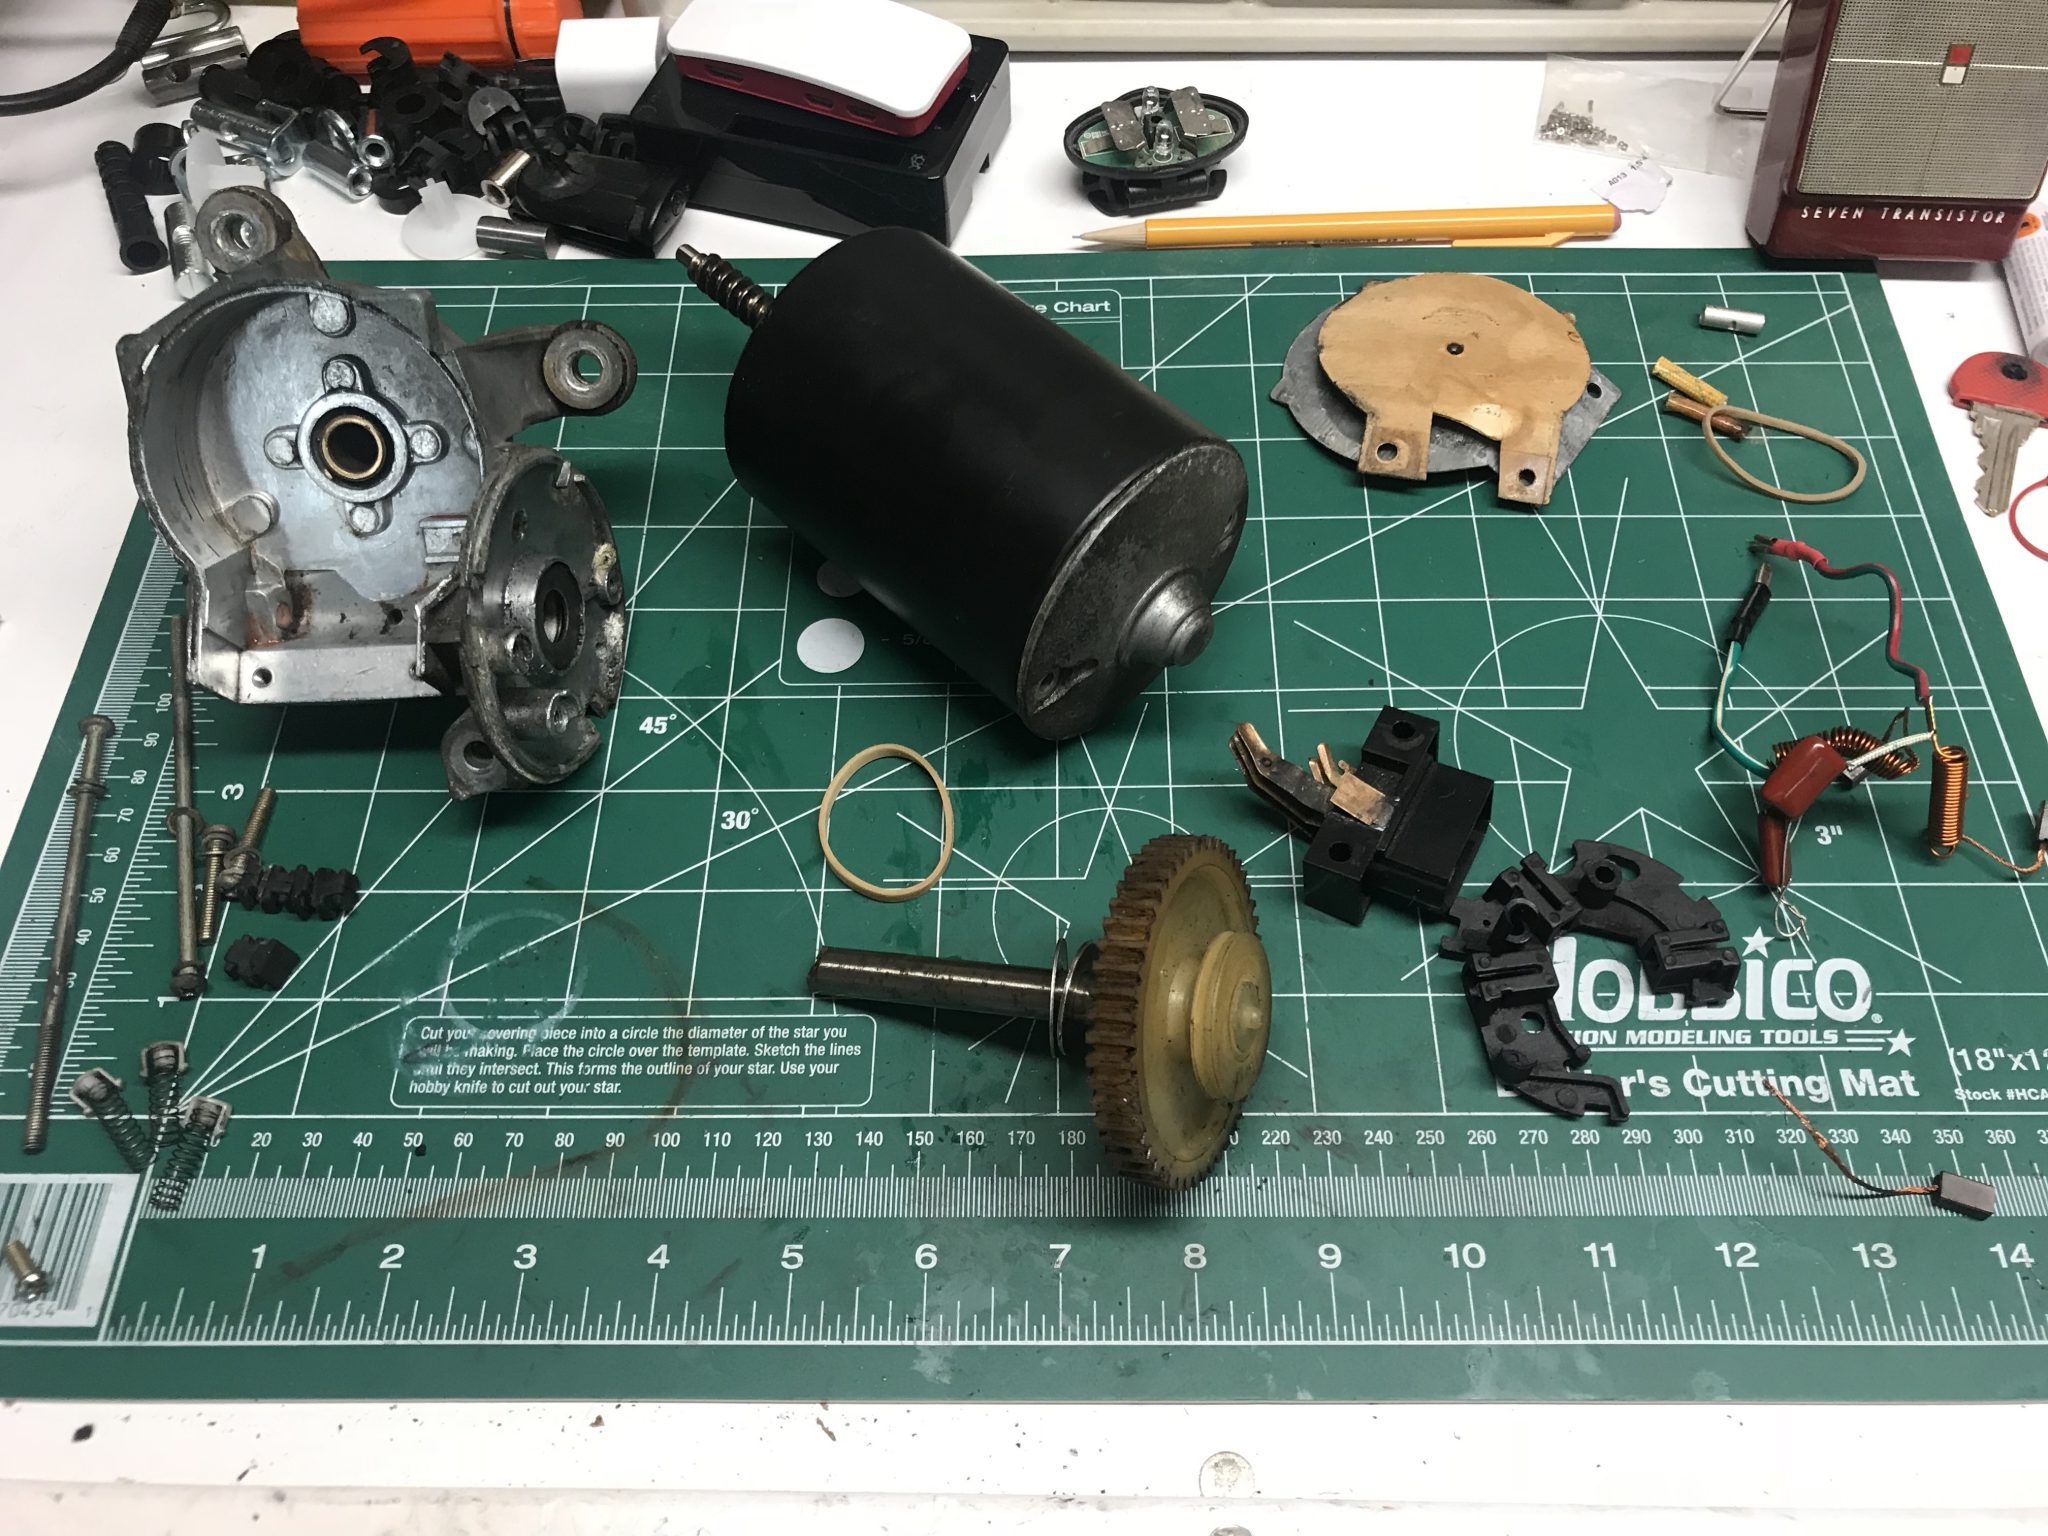
Now that (almost) everything in the engine bay has been cleaned up, reassembled, and in working order I’ve got to choose what’s next on the list of things to do, so I’ve decided to turn my attention to the windshield wipers. When I turn them on they only seem to function in “fast” mode. The “slow” and “intermittent” modes resulted in nothing at all. The motor obviously works to some extent, but not well enough. I uncoupled the motor from the mechanical parts of the wiper mechanism and turned it on. The results were not encouraging (see video below). So before buying a new one, which is a lot more expensive than I imagined given that we’re just talking about a simple DC electric motor, I resolved to try and rebuild the motor.
After disassembly everything looked pretty good in terms of physical condition. Nothing obviously broken or unusable. The switches that I assume tell the wiper relay the current position of the motor were not properly aligned which probably explains why the intermittent function wasn’t working, and the brushes did look worn. Those are easy to replace. I ordered a new set and, when they eventually show up, will replace them and put some new grease in. Hopefully this will improve the strength of the motor and also quiet it down.
Click the read more link to hear a nice, smooth cold restart of the engine along with the horrible sound of the wiper motor.