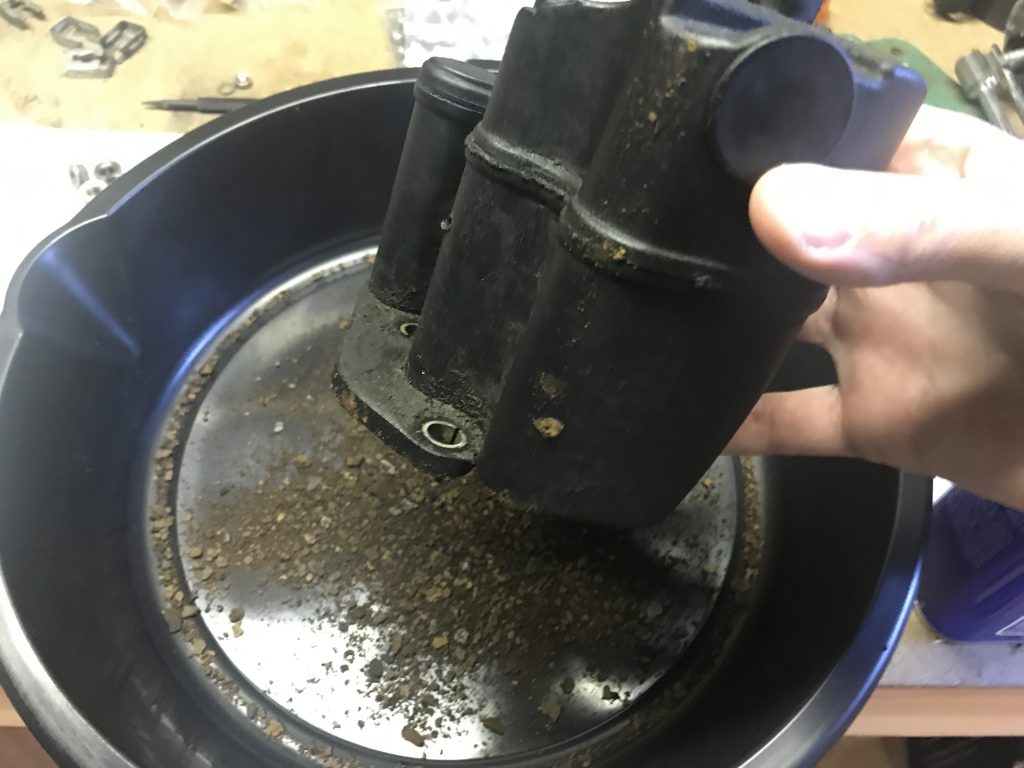
After consulting my Bentley manual and various discussions on the internet I decided on a two stage approach to cleaning out my oil separator. Step one consisted of gently tapping around the outside with a screwdriver. This immediately produced results. All that dried up carbon and oil mixture stuck to the inside began to come apart and flake off. Shaking the separator resulted in a shower of dirt and grit from the bottom ports.
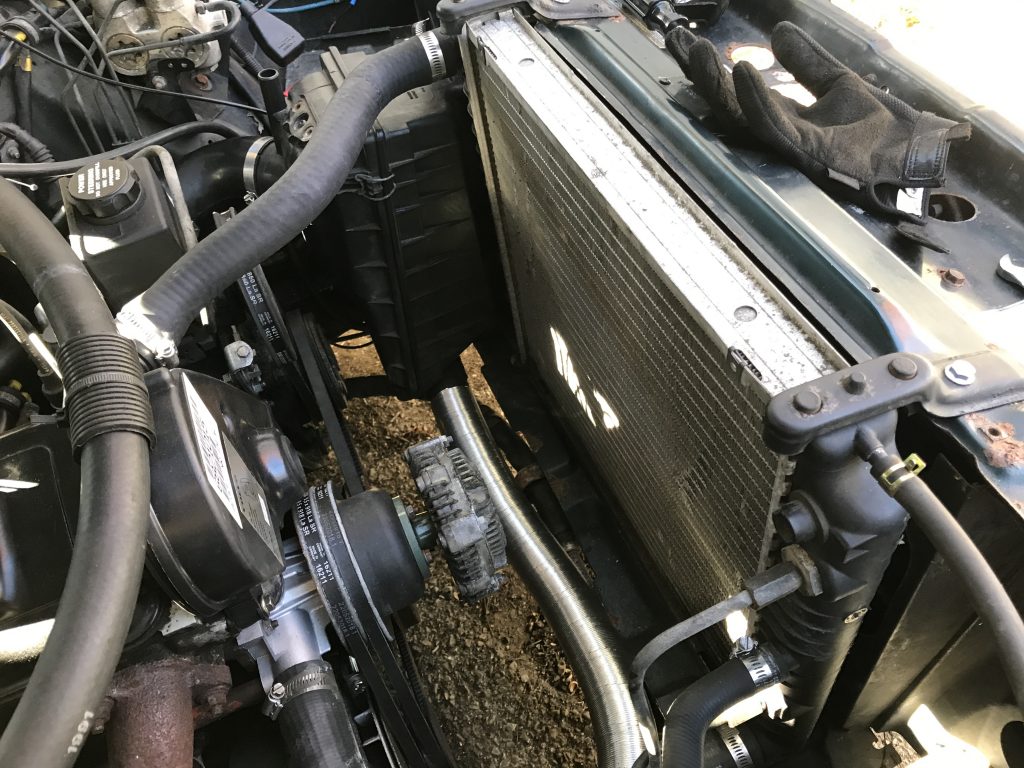
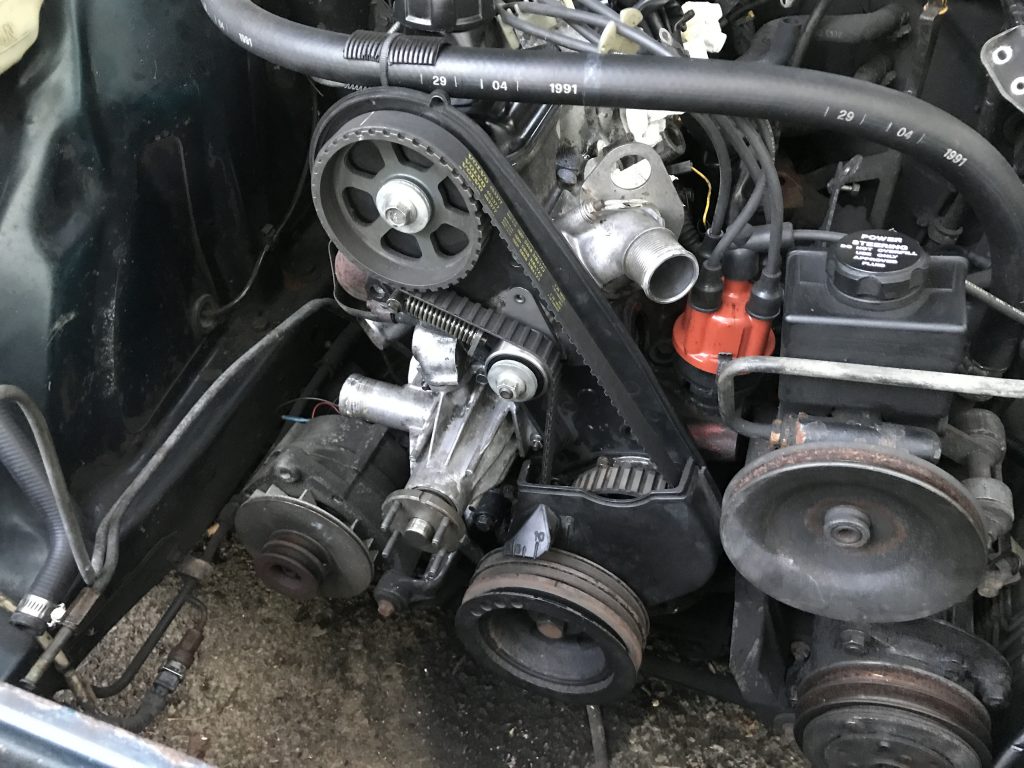
As I mentioned last week, my next steps were going to be adding in all the bits that precede the final installation of in the intake manifold. Moving from the front to the back the first bit on that list will be the radiator. So that’s what I put in first.
Radiator reinstalled
This was simply a matter of sitting the radiator back into its rubber mounts and securing the two top corner brackets. Then the two radiator hoses are attached to the thermostat housing and water pump, the feed and return lines to the coolant reservoir, and the oil lines screwed back into the oil cooler. I also ran the pre-heat duct from the outlet of the exhaust manifold to the air box.
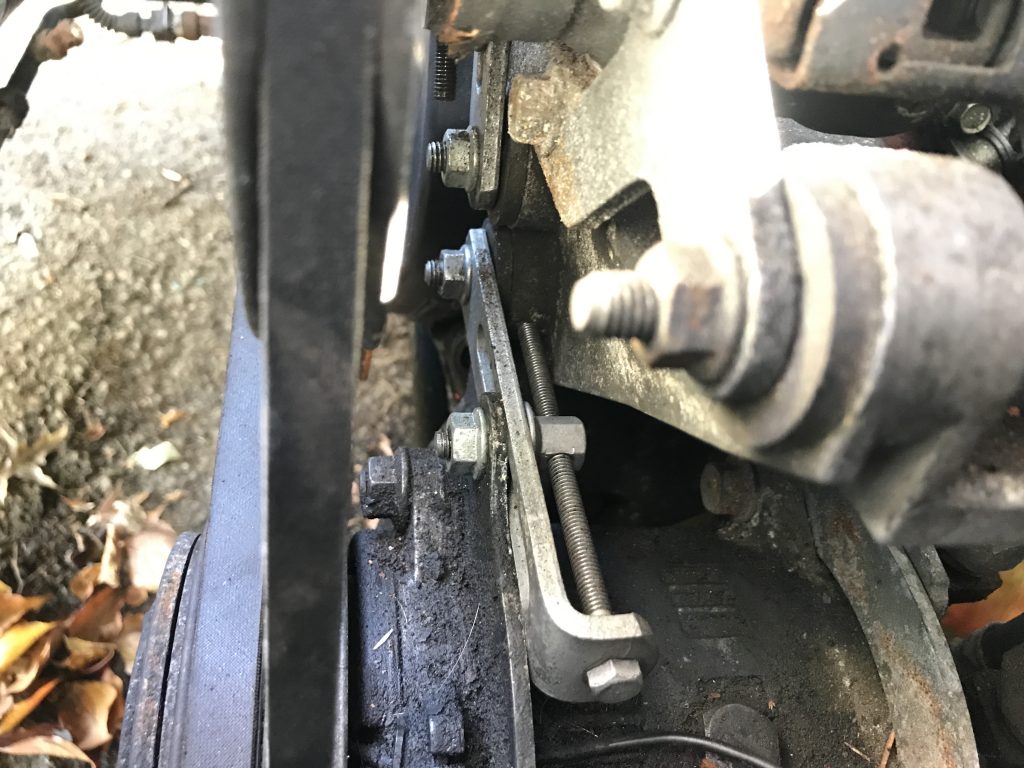
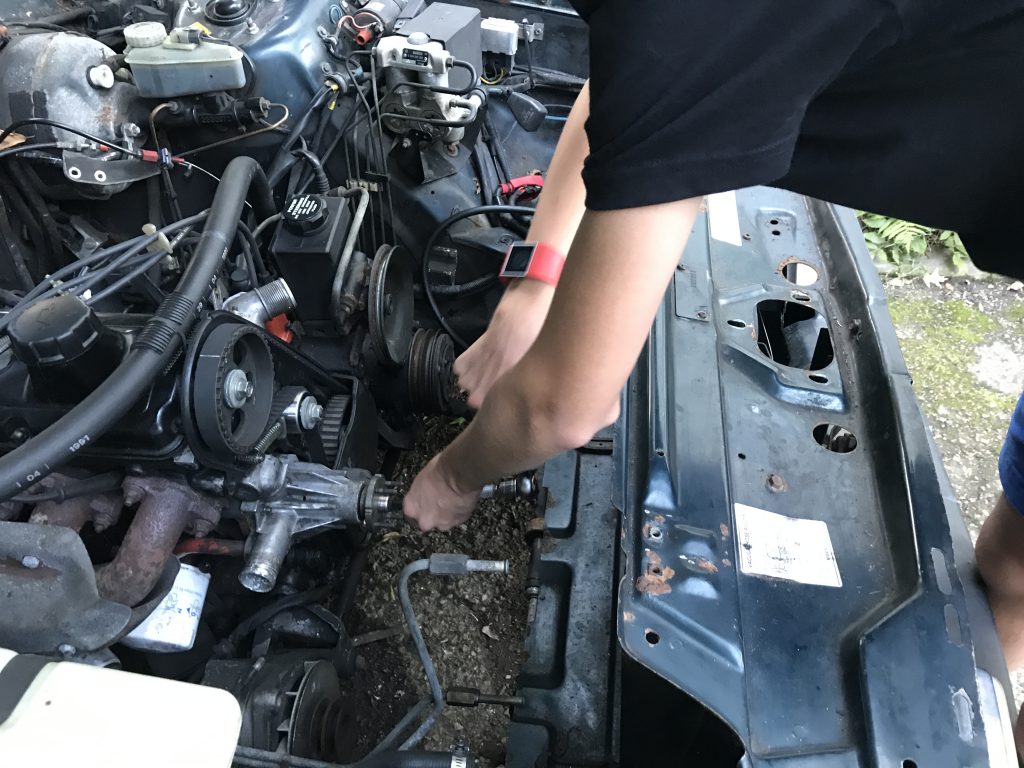
Now that the belts are all on I can start putting back all the things that would otherwise obstruct their installation. First I should note that I had previously forgotten to install a small carriage bolt that keeps attaches the AC compressor to another bracket midway down its length. I assume this is to add reinforcement to the compressor for when the clutch engages during use. Going from standstill to full speed like that probably packs quite a bit of a shock to the compressor’s body.
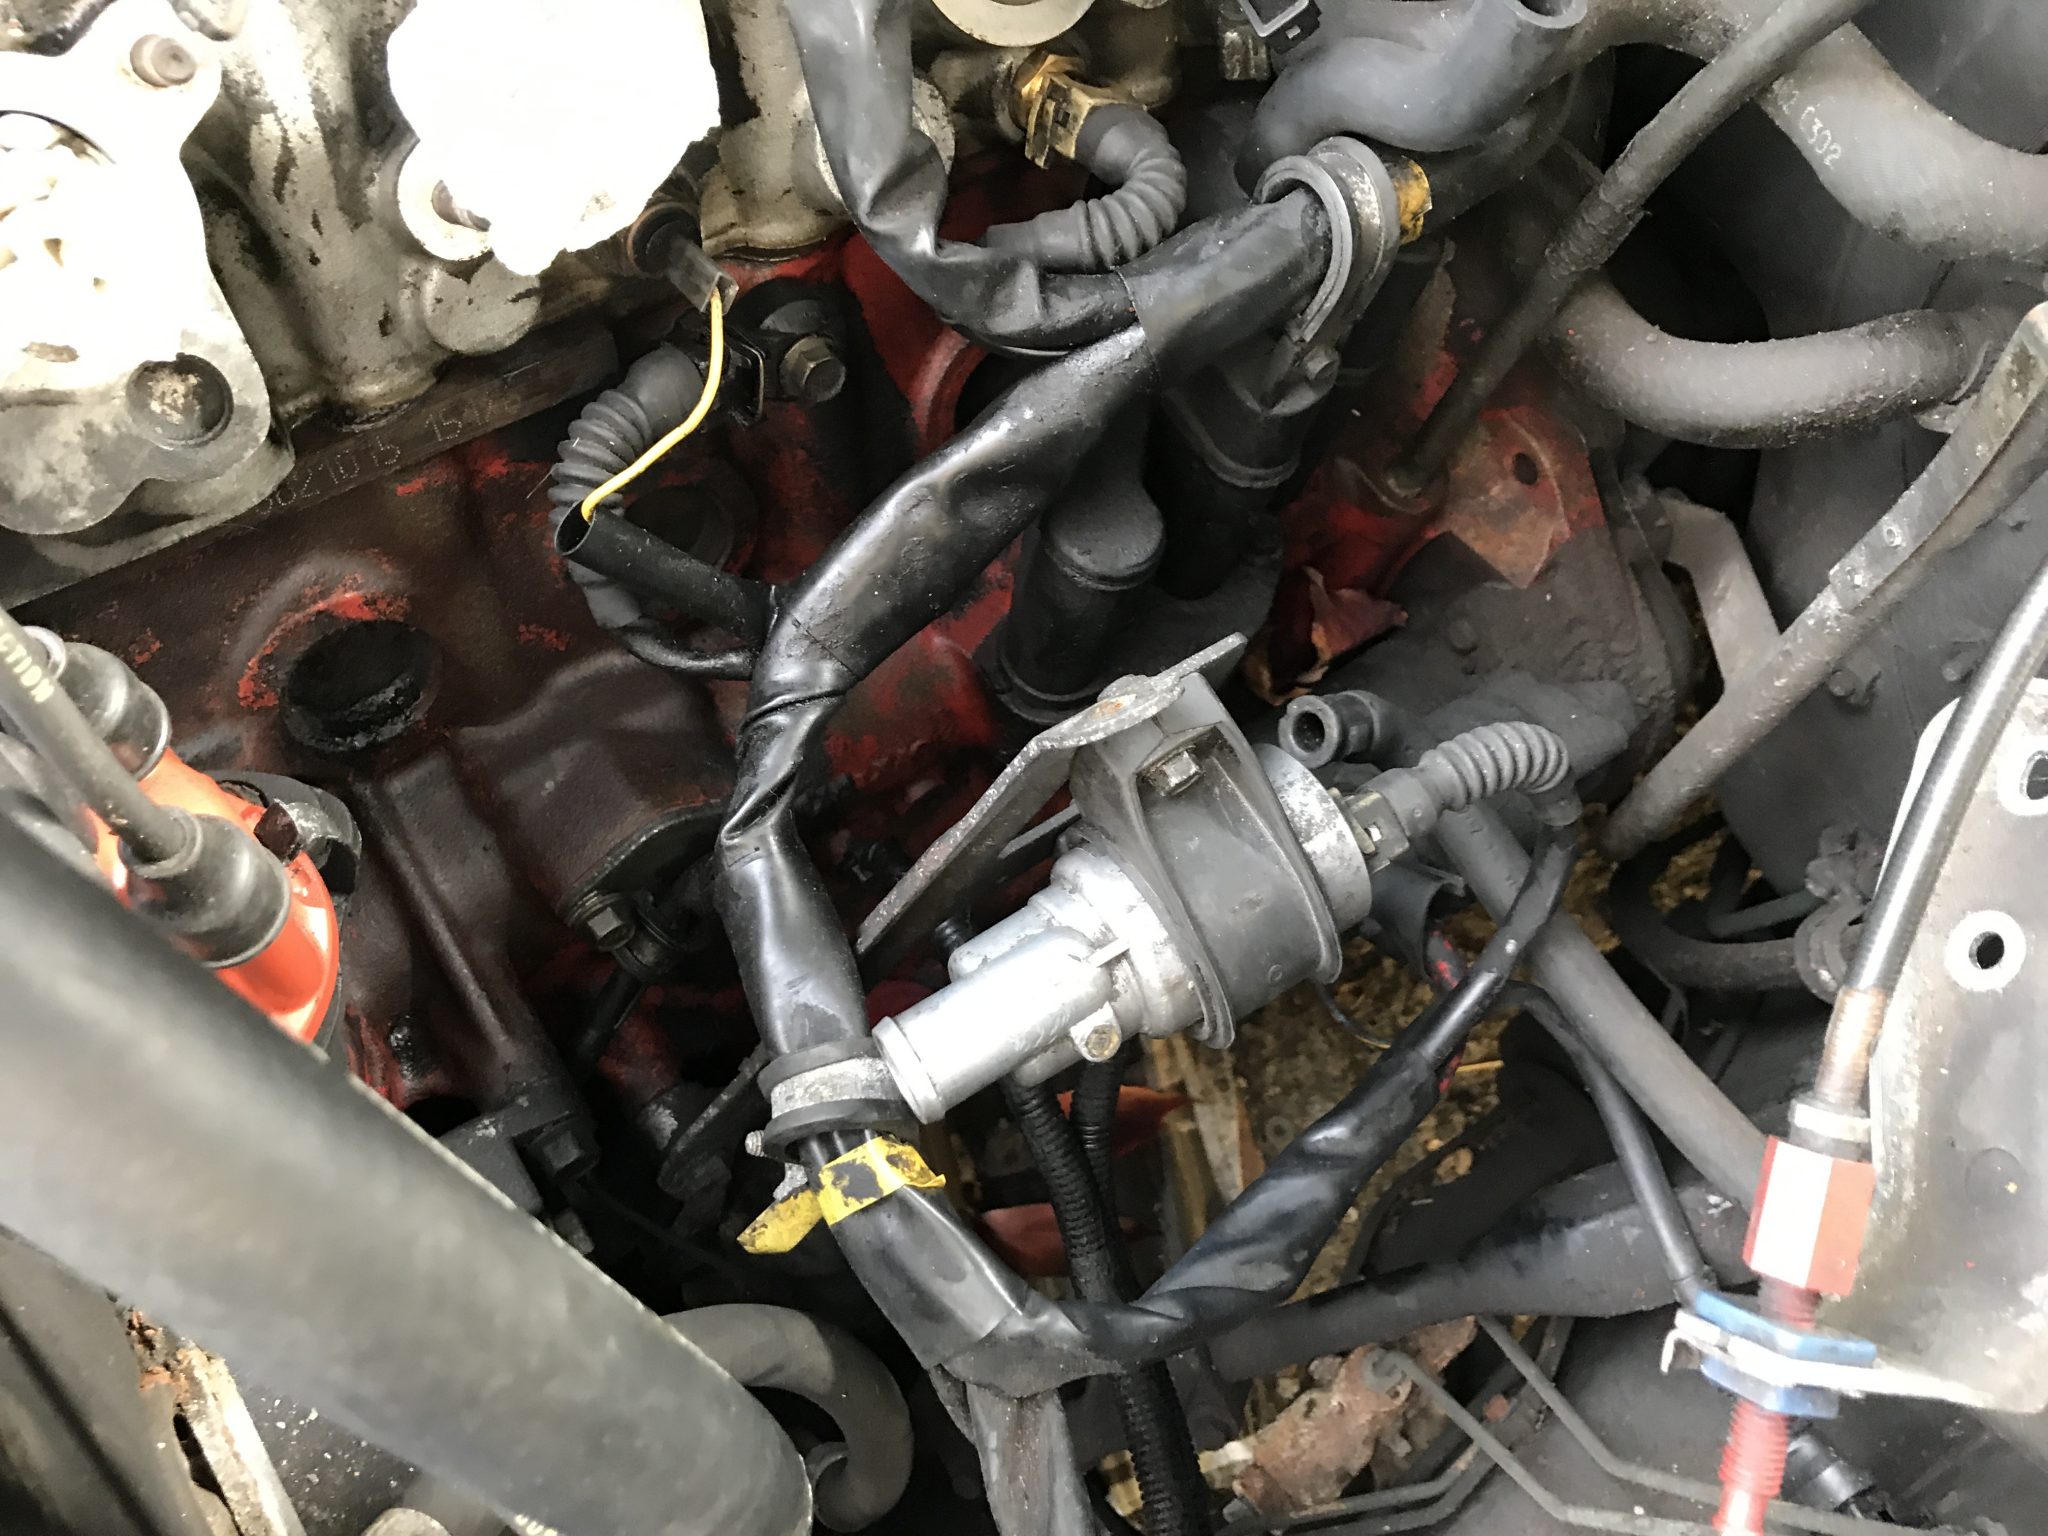
Then I reattached the idle air valve back to its bracket with two bolts that anchor the valve’s rubber sleeve and plugged in the control wires. No hoses yet as they come and go from the main air intake duct which has not been installed.
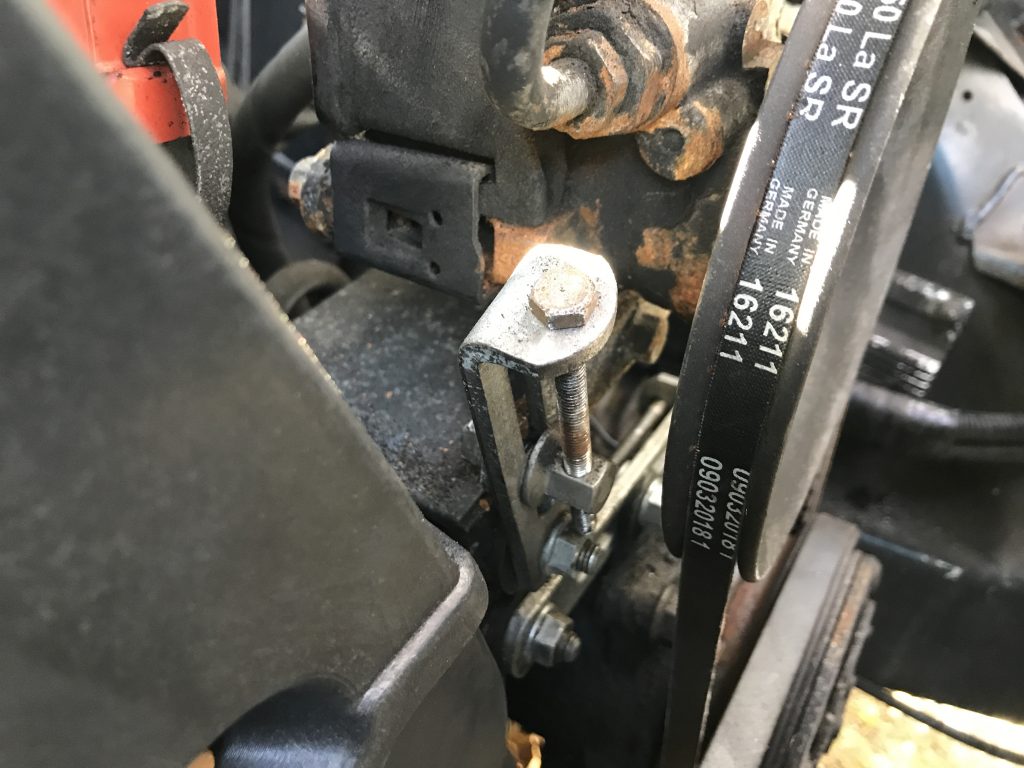
Just a quick bit of work on a busy weekend of yard maintenance and wood stacking. All I had time to do was install the tensioners for the AC compressor and power steering pump. Similar bolt-through-block mechanism as the alternator’s.
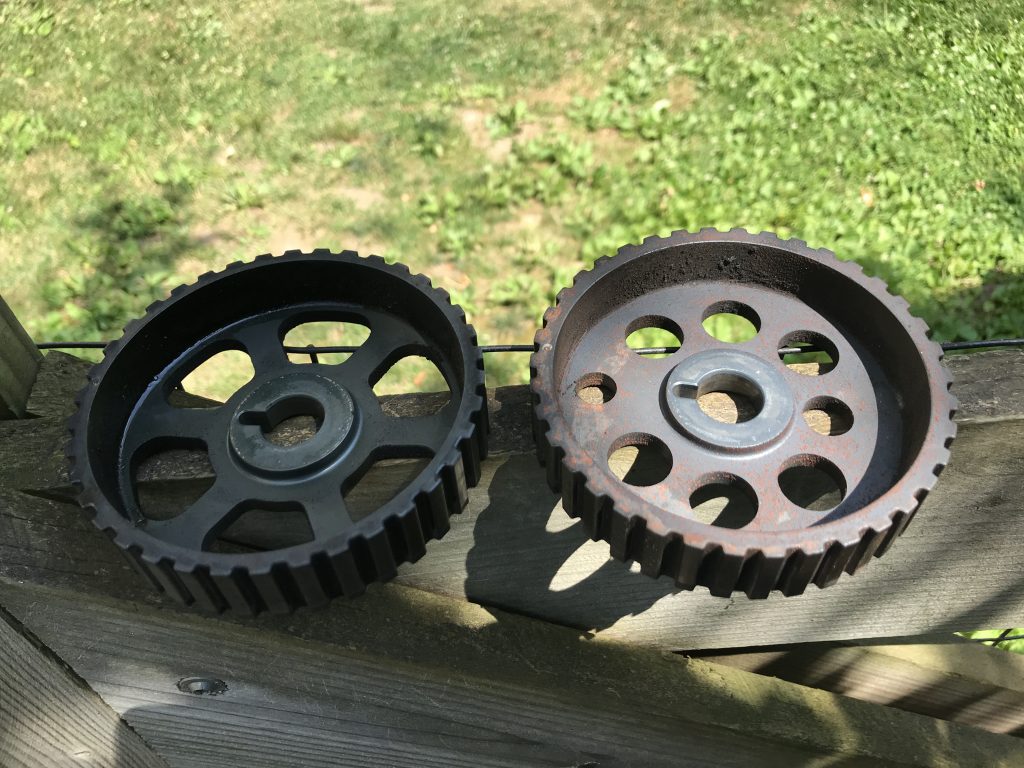
Over the last week or so the work I’ve done on the car has mostly taken the form of tinkering with the water pump and the timing belt cover to try and figure out why the one was rubbing on the other. I eventually landed on “maybe the water pump itself is somehow canted or otherwise no longer in spec”, and decided to remedy this by ordering a new, aftermarket pump.
Pump and Pulley
Thanks Japan
After unbolting the original pump, replacing it with the new one, and reinstalling the timing belt cover, pulley, and fan clutch I checked the clearance and found… no change! It obviously wasn’t a problem with the pump. Since the new one was already on the car I left it there. I’ll add the pump to the list of spare parts I have to keep, trade, or sell.
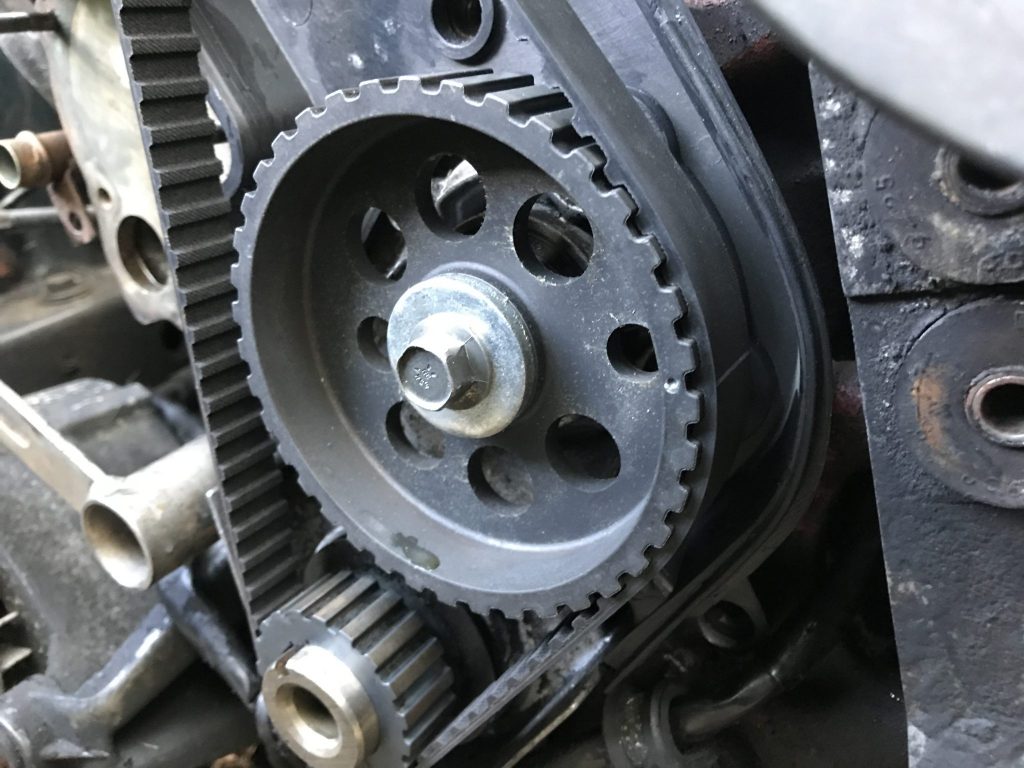
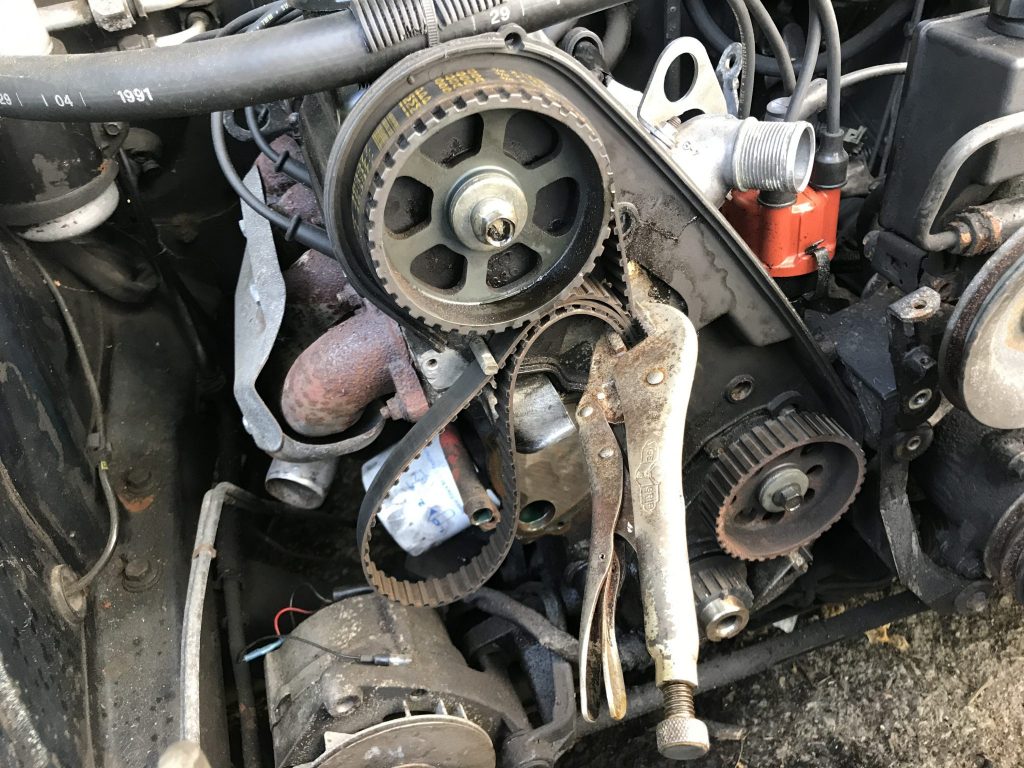
After previously getting the timing belt on and reinstalling the water pump the next logical step was to bolt the fan pulley and clutch. They simply attach in-line using the four stud posts on the pump. However when I put mine on I found that the pulley doesn’t quite clear the timing belt housing and rubs on it at a couple of spots. Looking at the old housing I saw significant marks from this rubbing so it’s not new, but I’m not sure why it’s happening. Perhaps the water pump shaft is bent over so slightly? Or the pulley itself is not even? I’m not quite sure yet. Before I continue putting things back together I should figure this out.
A quick bit of work after, uh… work this evening. I broke down and bought one of those crankshaft holding tools because it was on sale on Amazon. My chain-and-bracket method worked ok but I really wanted to torque the pulley on properly, and this tool really is best for doing that. It bolts to the tensioner post and holds the pulley with a set of crenelated “teeth” while you torque the bolt, in this case to 122 foot pound (164 Nm). I must admit it worked very well and was way more convenient.
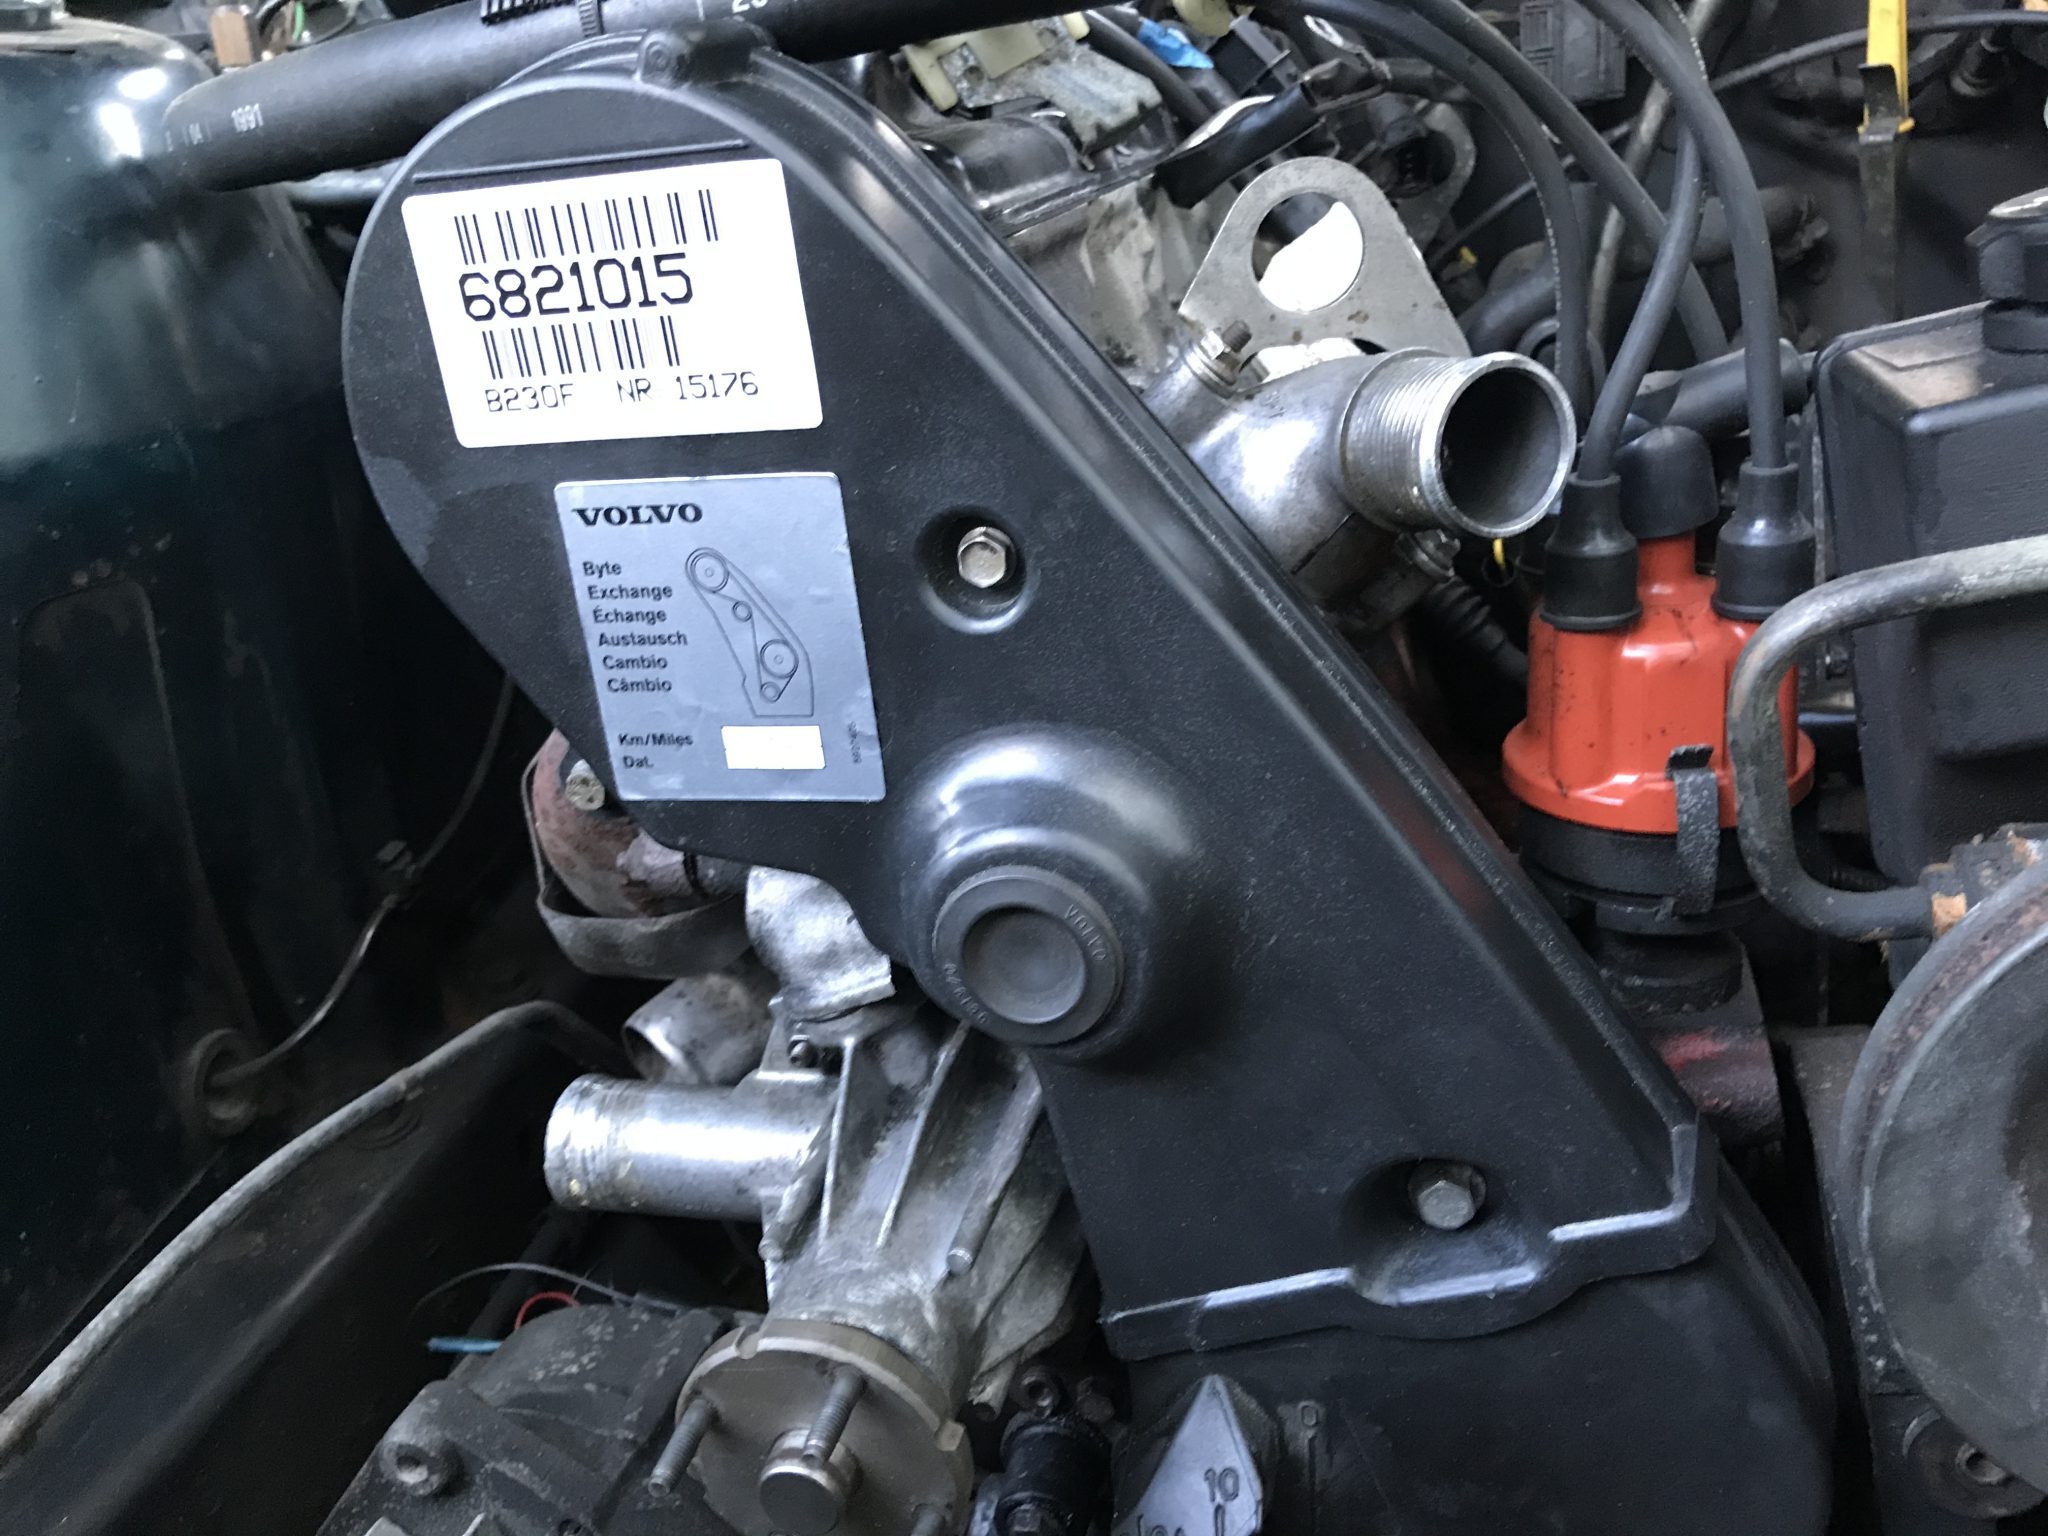
The timing belt having been set, it was now the moment to seal it all back up. I applied the reproduction timing cover informational decal I had bought from Dave Barton and the belt replacement service sticker that had come with the new timing belt, bolted it on, and called it a day.
I apologize for the break in updates, but as summer wound down, and school wound up, some work was done on my house, and, oh yeah, my oak tree decided to shed yet another gigantic branch right on top of my garage that I had the remove, there never seemed time to get back to that engine. Today I break that dry spell with two things.
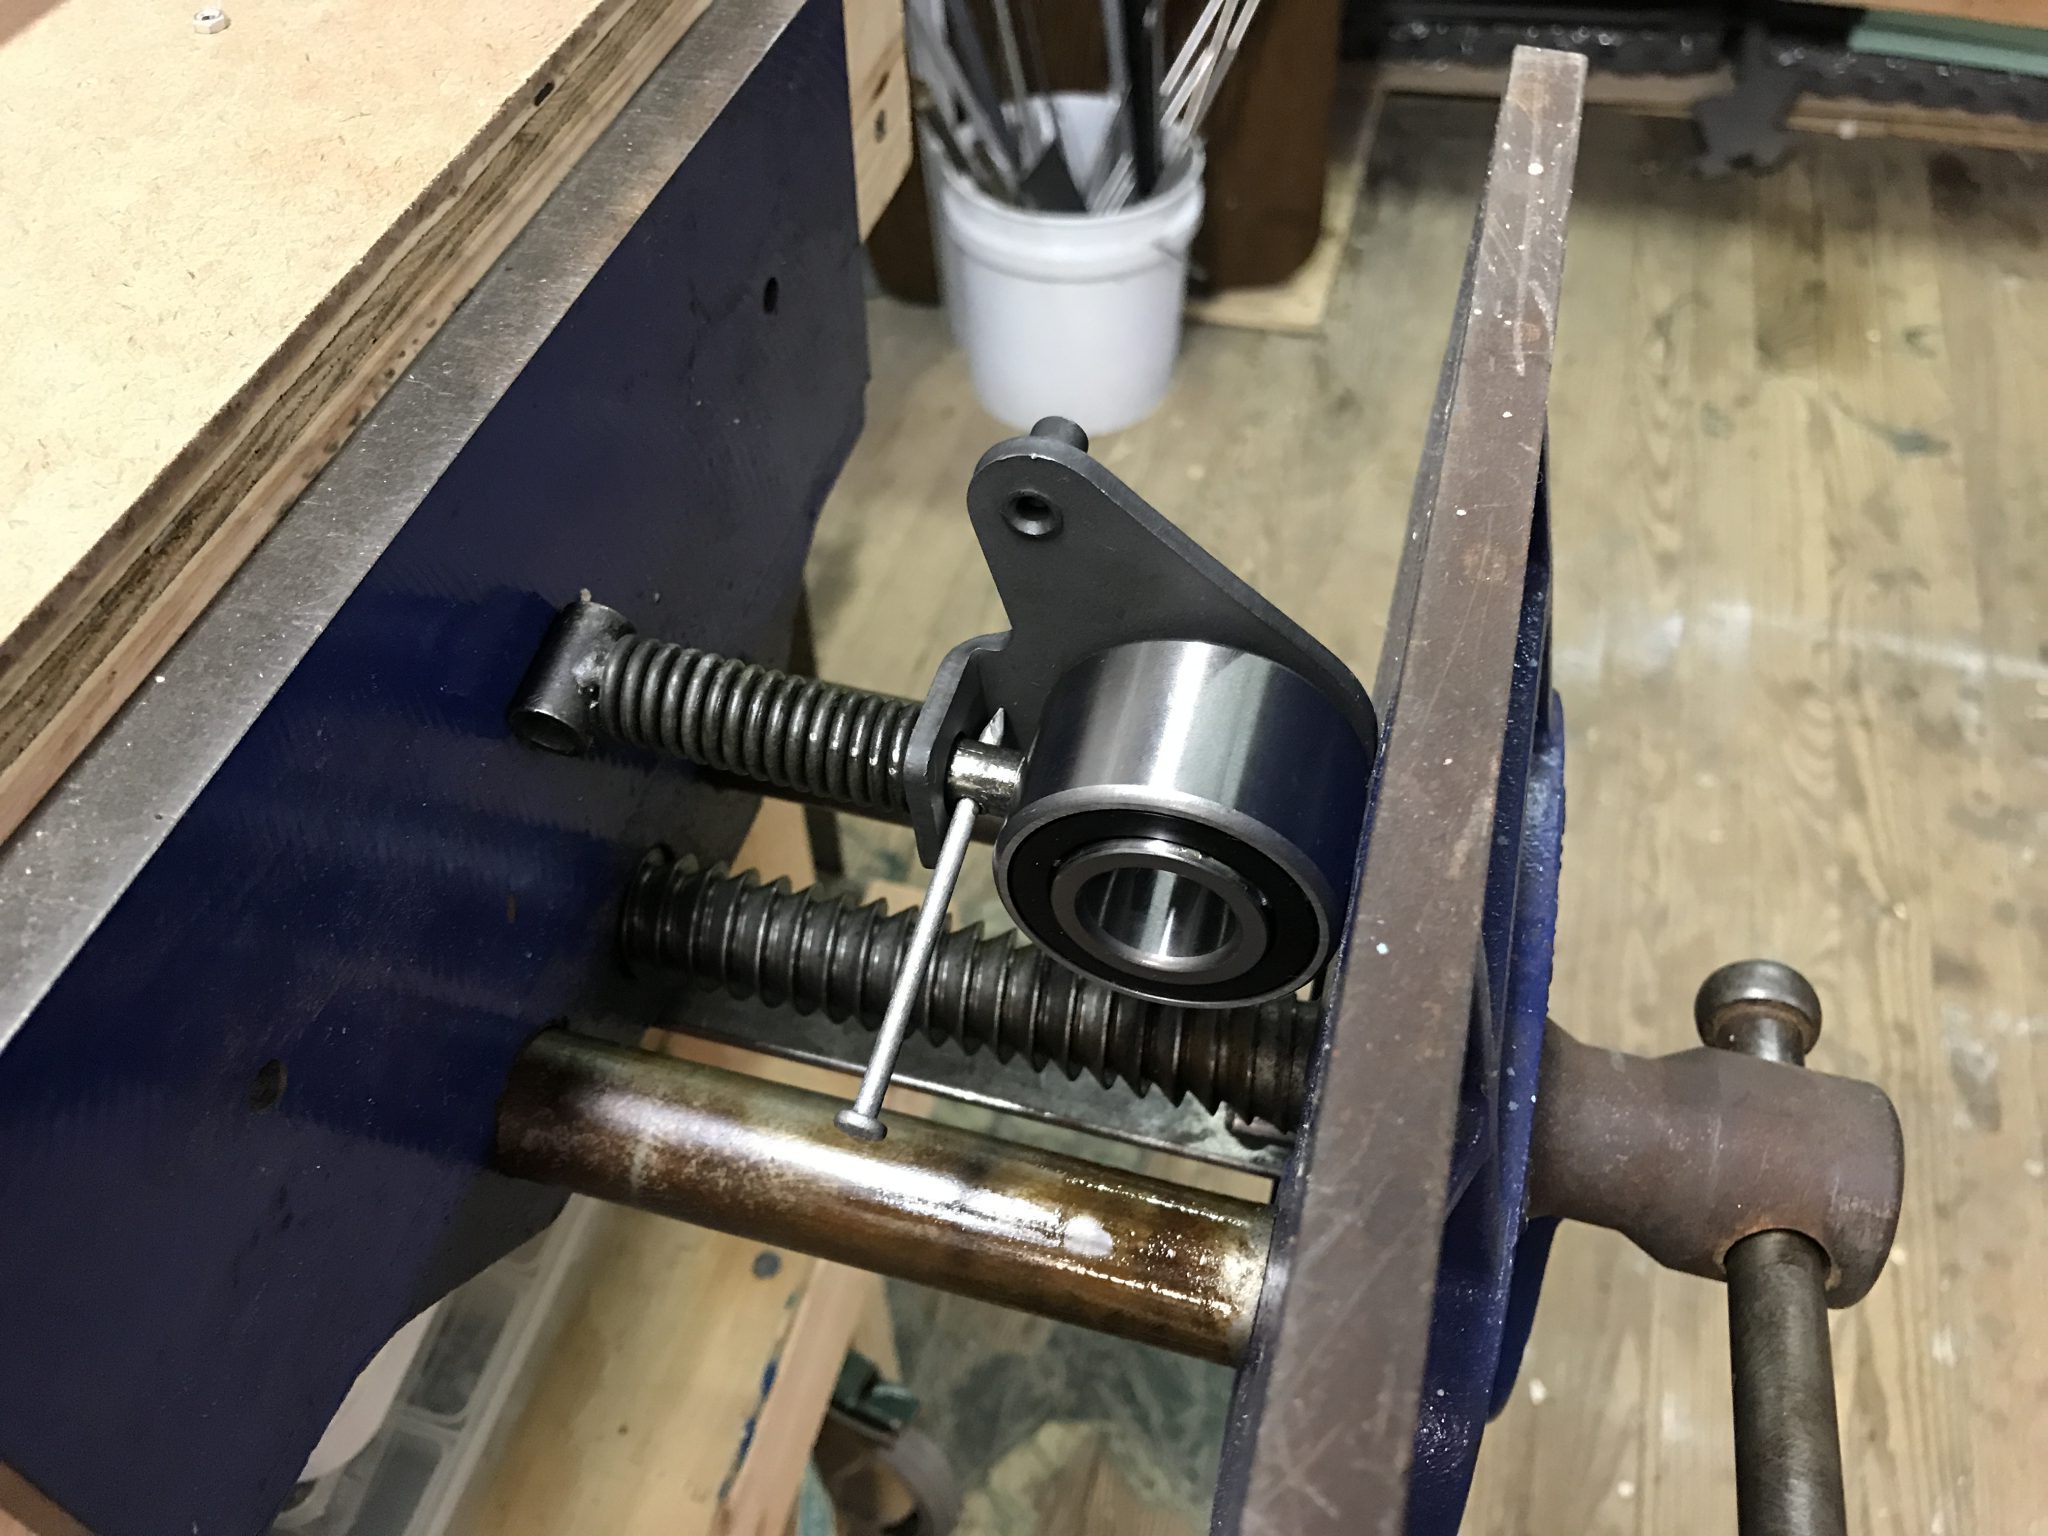
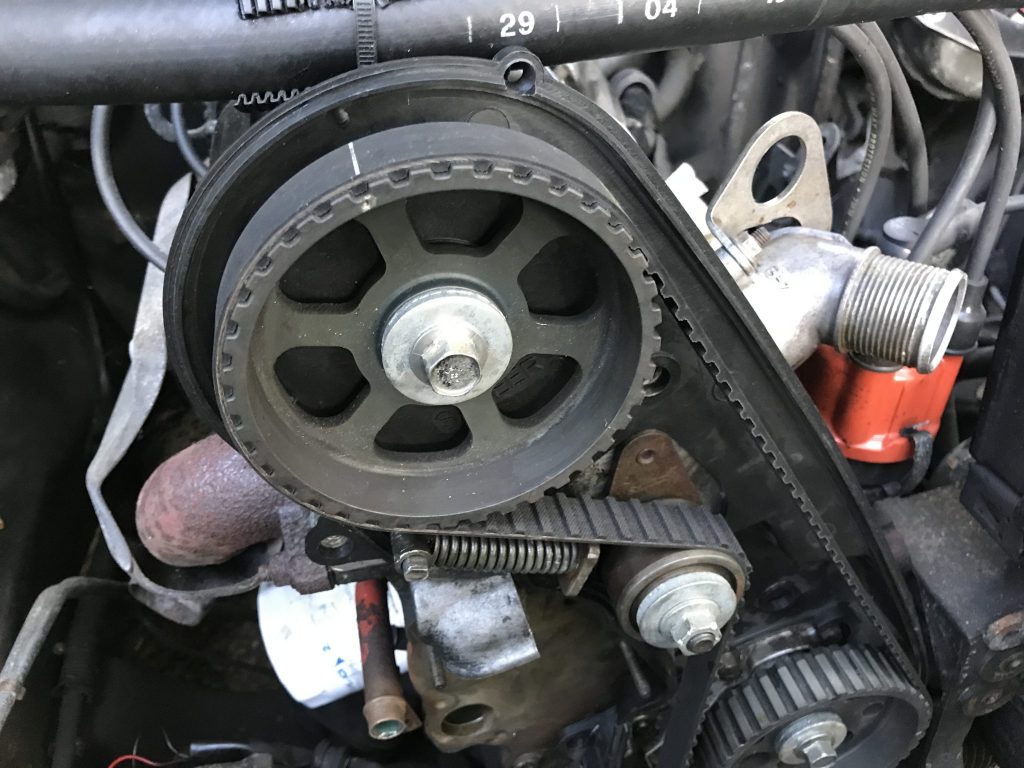
Timing Belt Tensioner
I had read somewhere that when replacing the timing belt it’s a good idea to also replace the timing belt tensioner. That’s the bit that keeps the timing belt tensioned so it won’t run off the gears. They’re not expensive and I had the timing cover off, so I figured I should do it.
The tensioner is actually two parts. The first is the roller bit that the belt rides on and the other is the spring tensioner that actually gives the assembly the ability to tension the belt. After taking it off the block, I compressed the spring in a bench vice, removed the nail I had inserted into the detent hole, and slowly opened the vice. The whole thing should pretty easily come apart, but I’d recommend wearing eye protection as the spring is pretty stout. 240s are awesome but probably not worth losing an eye. Reassembly was done in the opposite order and the whole thing reattached to the engine.
New Roller
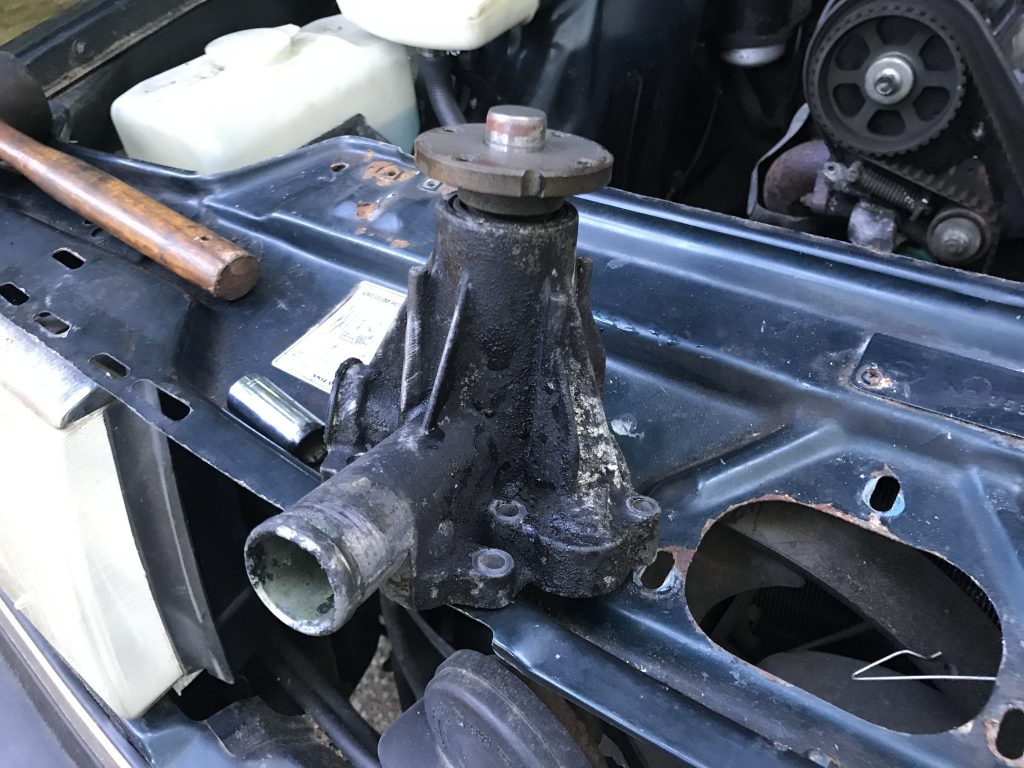
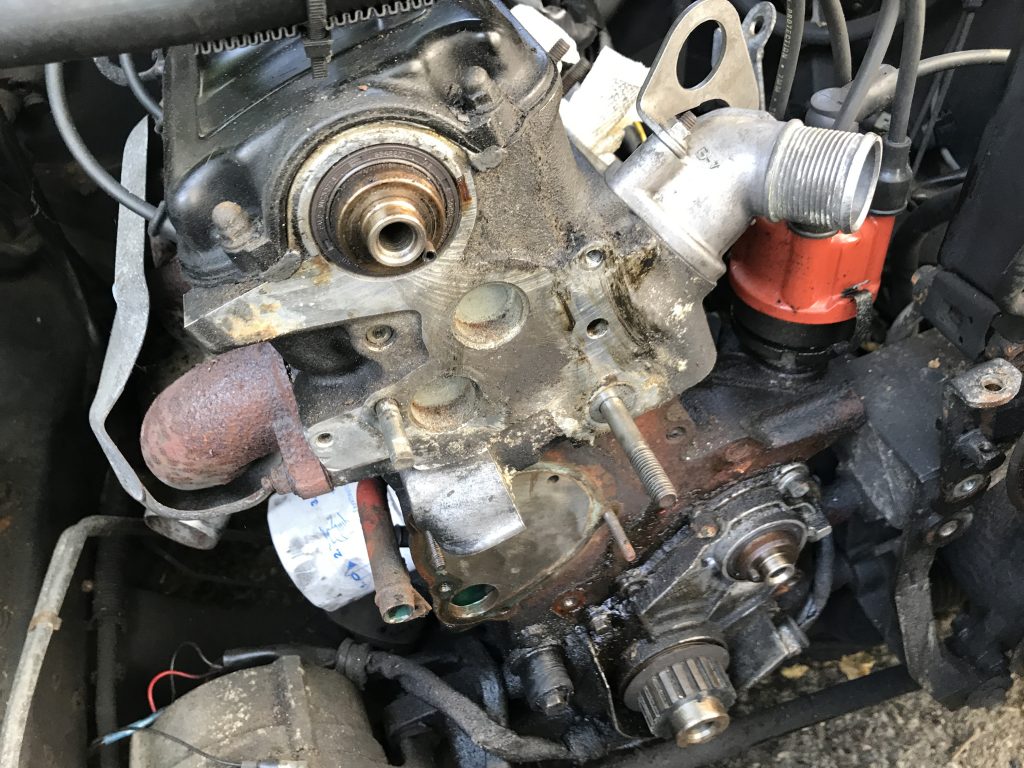
Water Pump
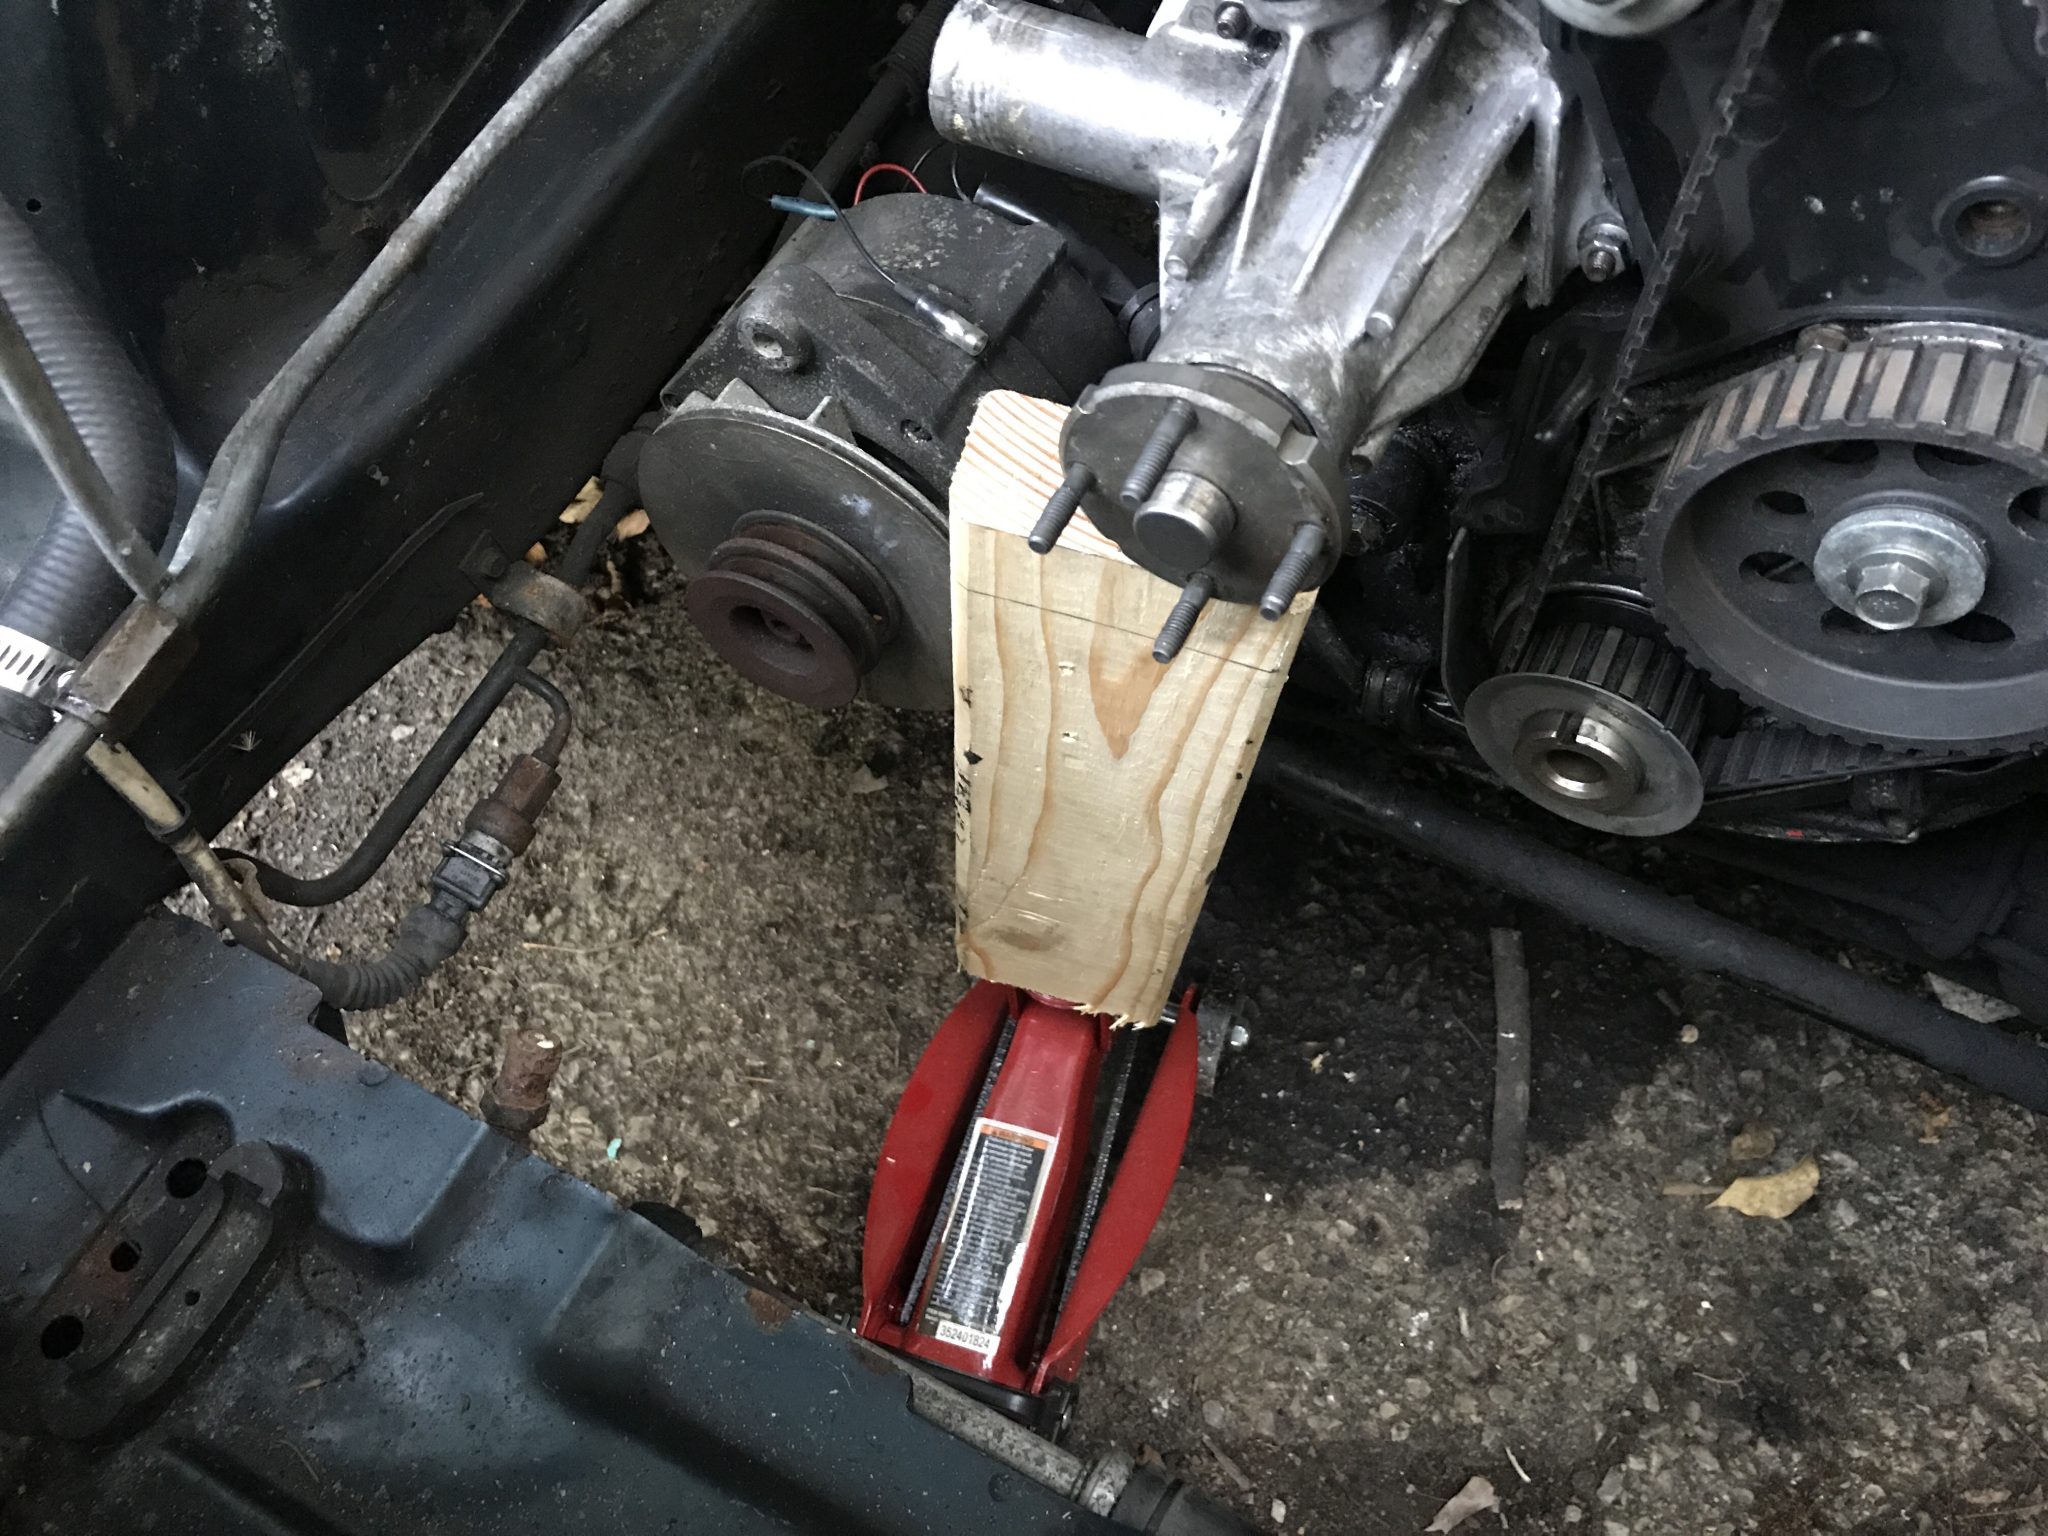
The other major part I’ve yet to reinstall on the face of the engine block is the water pump. It was in filthy condition when I took it off but otherwise in good mechanical condition. I have since cleaned it a bit and got a new gasket as well as rubber seals, all of which were on the edge of disintegration. Installation was straightforward with one catch. In order to get the bolts into their respective holes, upward pressure needs to be applied to the pump to compress the top rubber seal enough to get everything line up. Otherwise the bolt threads just won’t “bite.” I’ve seen this demonstrated by fitting the pump over the studs on the block then grasping the pump with one hand and pulling up while you fumble with the bolts with the other hand. I tried this, both alone and with the help of my son, but it never seemed to work. I eventually solved this issue with a small floor jack and a short length of 2×4.
Work smarter…
This eventually gave me enough force to line things up and get a bolt into one of the bottom holes. The rest of them followed, and the pump was back on.
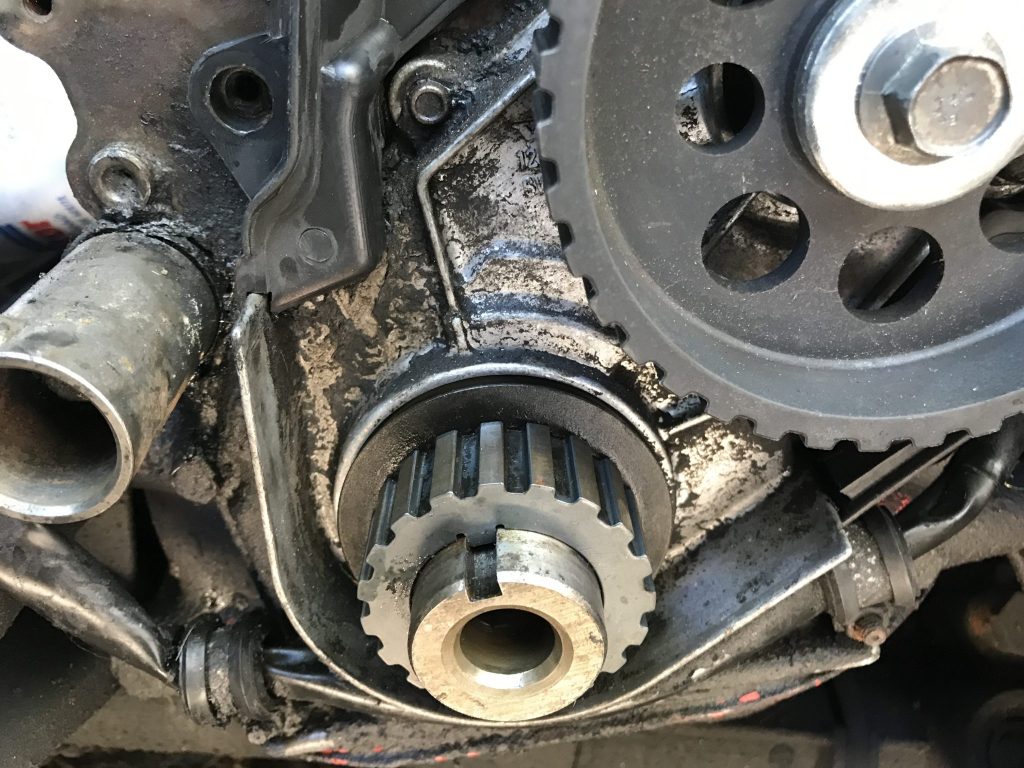
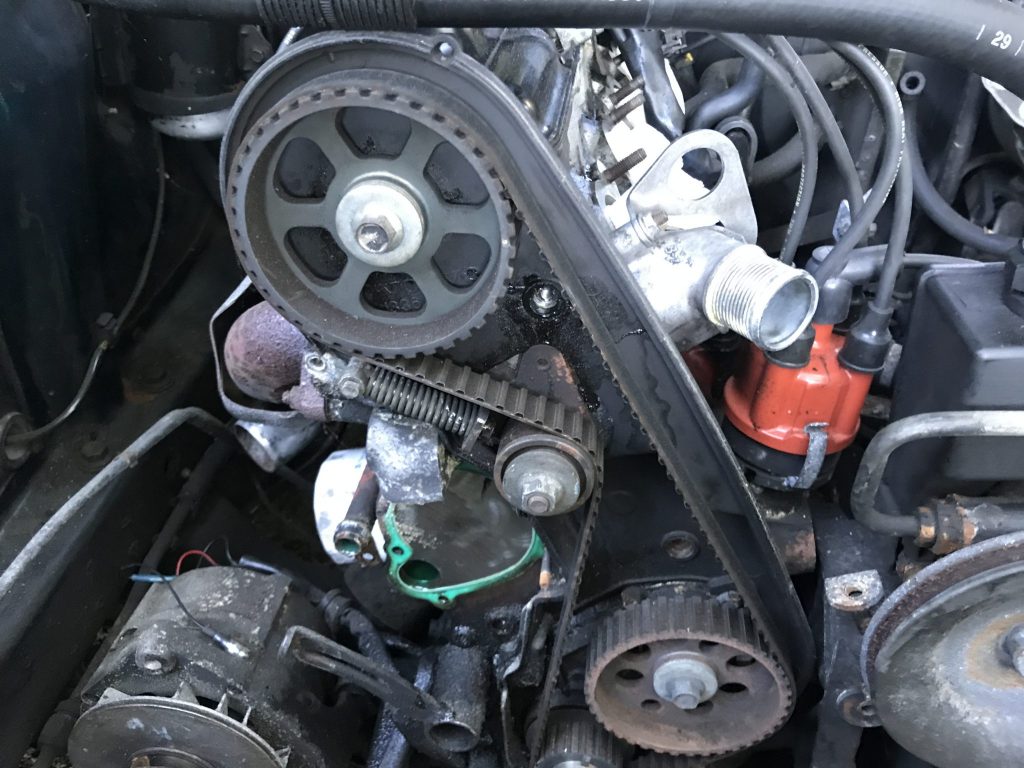
Now that the wasps are dead I can get to reinstalling my timing belt. There are already a number of goodvideos on the subject, so I won’t bother to reexplain the procedure here, but a few notes from my experience.
Don’t try to move the cam gear with your hand. Unlike the intermediate gear it’s very stiff. I ended up momentarily bending my thumb a weird way while trying to nudge it a bit, and while not damaged it’s now irritatingly sore.
The crank gear is relatively easy to move once the pulley is on. Larger moves require a breaker bar with a 24mm socket on the bolt.
Once all three are lined up properly getting the belt on might require some playing around with the tensioner. Mine needed to be compressed just a little but more than it was with the nail I was using to keep the spring compressed. I need to use one hand to lever the spring another 1/8 of an inch or so while pushing the belt onto the roller all while keeping it from slipping off the other gears.
To be honest, the whole affair was a bit more of a pain that I imagined it would be. I actually had to sort of back away at one point and take a break lest my frustration end in something breaking. Working while keyed up by frustration is a sure fire recipe for disaster. Anyway, everything is lined up and the new belt is on, so progress.
The slot on the crank gear should line up with the ridge on the plate
One of the single lines on the belt with the dimple on the cam gear
The other single line with the dimple on the intermediate gear
The double line should fall into the tooth in line with the slot on the crank gear
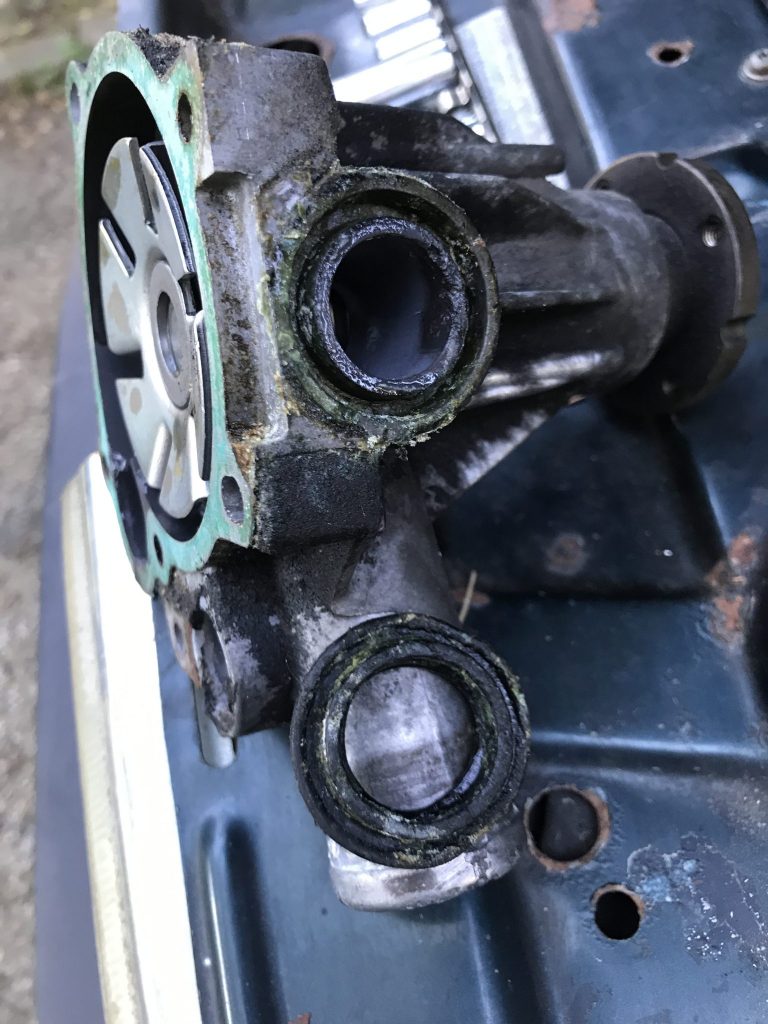
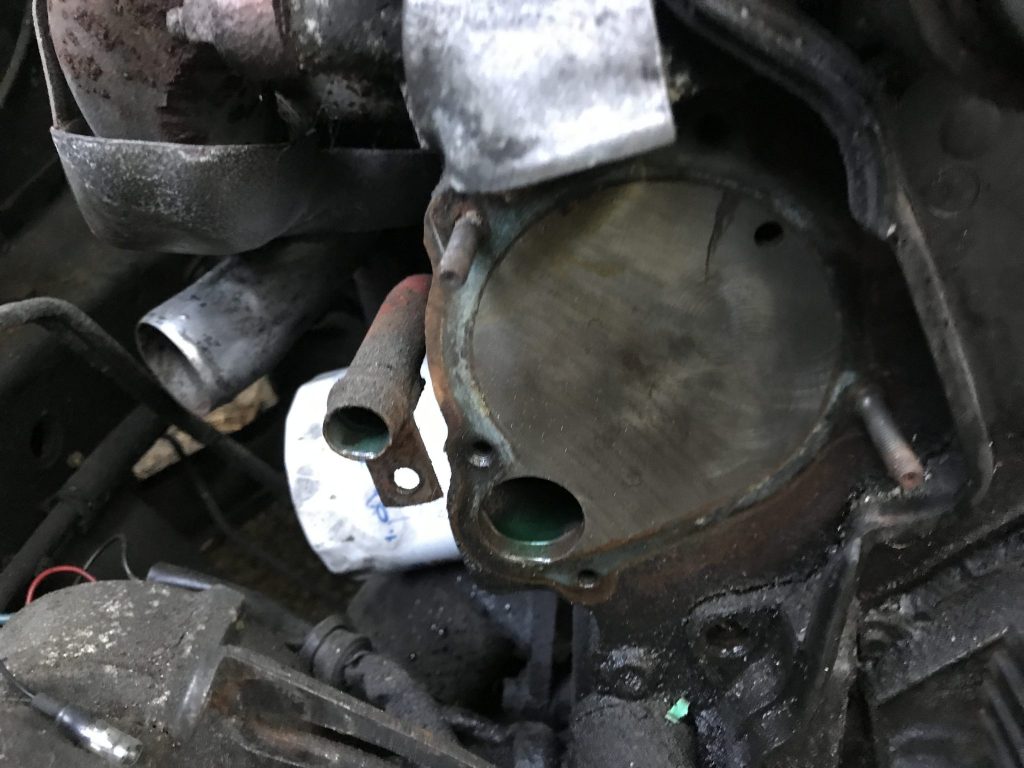
In the week since my last post, I’ve continued to tear down the front of the block. This includes the cam and intermediate pulleys, timing belt, and perhaps most dramatically the water pump. I did the pump first mostly to get it out of the way of the timing belt tensioner (part #463633) and the timing belt itself. I also wanted to make sure the bearing were still good. Unbolting it was straightforward, but the gasket was pretty well stuck to the block and required some scraping and peeling to get it off.
The pump seems fine. It doesn’t rattle and turns smoothly, but there was an alarming amount of crud inside of it. I’m not sure what it was – perhaps just dirt or more likely antifreeze that has crystalized over the years. I washed it out and set the pump aside for cleaning. Also, on the advice of a friend who has experience with 240s, I replaced the thermostat. There didn’t seem to be anything wrong with the existing one but since I was in there I figured it was as good a time as any.
Next I wanted to get the timing belt off. The first step was to loosen the bolt on the tensioner pulley and, using channel locks, compress the spring. This part was easy and allowed me to slip the belt off relatively easily. It wasn’t in terrible shape, to be honest, but the belt change sticker that was on the timing belt cover had no discernible date written on it, so I figured since I was changing all the other belts I should do this one too. I also wanted to take the cam timing and intermediate gears off to better clean them up. Do do this you need to keep both the cam and intermediate shafts from turning which it is wont to do if it’s not arrested by the timing belt itself. I accomplished this by first hitting the bolt with lots of WD-40 to loosen it up a bit. Then I took the old timing belt and fitted it to the gear, wrapped it around the tensioner peg, and used locking pliers to keep it on. This gave me the leverage to get both gears off.
Next step is to clean the front of the block up with some degreaser and WD-40, clean the gears, de-crud the water pump and replace the rubber seals, and put it all back together.
My replacement ECT sensor arrived. The time has arrived to really get serious about cleaning and reassembling this engine. First (obviously) comes the disassembly part. I’ve already got the intake section off. Next on the list was the various belts. Well, maybe the second thing. The first hing I did was put the ECT and temperature gauge sender back in and reconnect them.
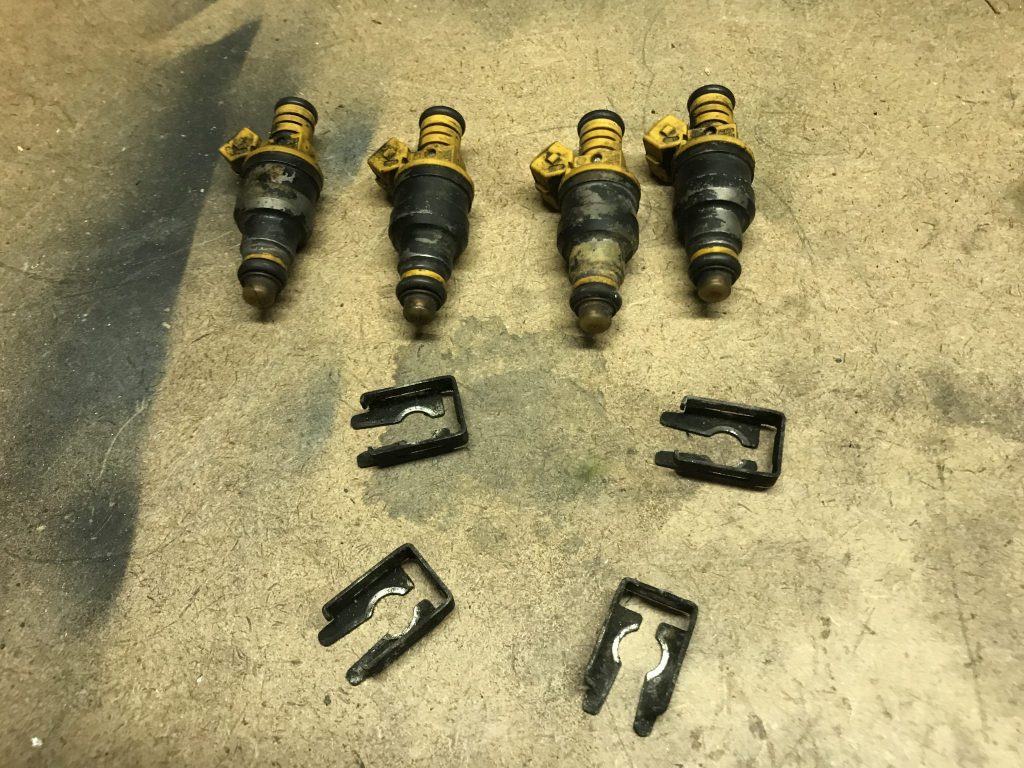
After disassembling the intake manifold I was left with four loose and very dirty looking fuel injectors. I had originally intended to clean them myself, but in a moment of startling honesty I admitted that I’d more than likely either ruin them or not really clean them very much. So I looked around the internet and decided to turn this job over to the aptly named Mr. Injector. Unlike me, he has both the experience and the equipment to do this right, and his prices aren’t terrible especially when compared to having to buy new injectors because I broke one in my own half-assed attempt at fixing it. So I boxed them up and sent them off to Idaho.
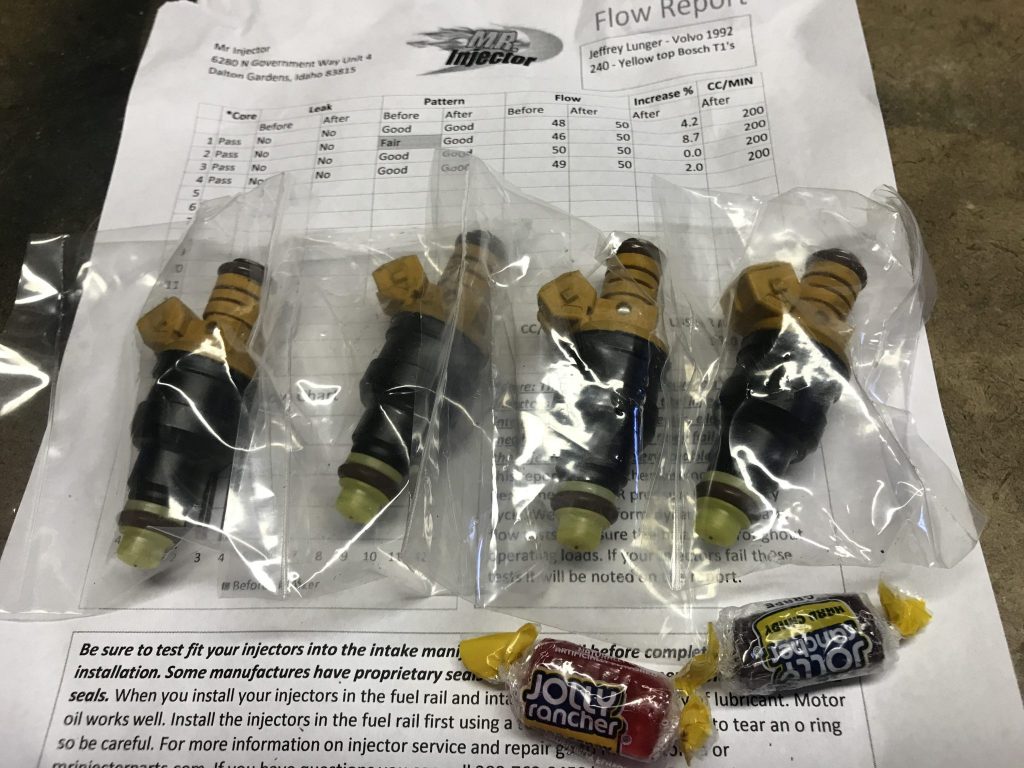
His site told me that I’d be getting a baseline electrical, spray pattern, leak, and flow test followed by disassembly of the “soft” parts, an ultrasonic bath, a flush for contaminates, and finally a new set of tests to measure the improvement in function. Then they’d be oiled, have their soft bits replaced, and finally repainted with corrosion resistant paint. About a week from when I sent them they arrived back at my house and I must say I am very impressed.
Before
After
As you can see they’re obviously much cleaner looking, and the flow test suggests they’re much cleaner on the inside as well. Interestingly, one of the injectors was still in very good condition while another was merely in fair shape. Overall they were still functioning quite well, but I’m glad to know that they’re now in tip top shape with new filters and pintle caps. And he also sent me candy! That’s service.
So it’s been a year or so since I bought this Volvo. When I first took it home it (obviously) drove, but not well and would probably not pass inspection. It was a project from day one. Now that better weather has arrived, I’m determined to get the car running reliably well and road worthy. At that point I can pivot to making sure the rest of the car is good.
So, given a day with a few hours free my oldest son and I began taking off the intake system. These parts include (starting from the out and moving in):
The air box and filter
The mass airflow sensor (MAF)
The throttle body
The intake manifold
The idle air control valve (IAC)
The fuel rail, fuel pressure regulator, and fuel injectors
The engine coolant temperature, engine temperature gauge sender, and knock sensors
The plan was to first drain the coolant system and remove the radiator and fan to provide some working room and then start removing the above listed parts. They would then be cleaned and tested for function before being either replaced or put back on.
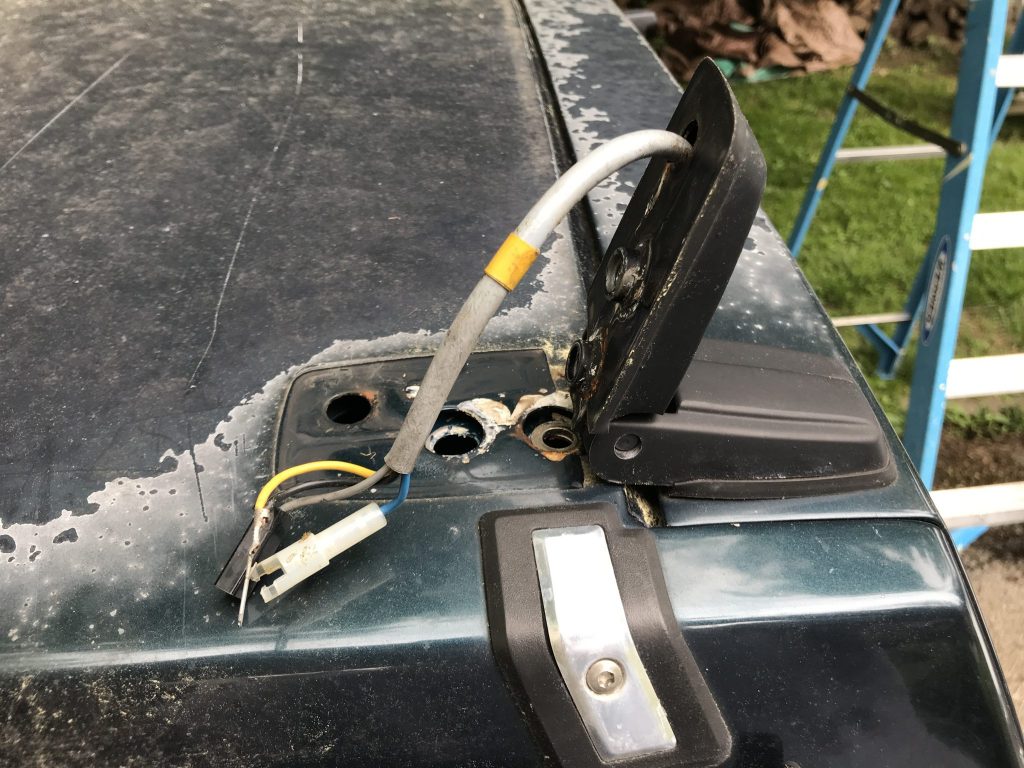
After a long while, the weather decided to cooperate and be pleasant on a weekend day where I had some free time. So I decided to tackle the rear wiring harnesses.
Disassembly
Armed with instructions I had downloaded from our friends at iPd, I dove in. The first thing that needed doing was detaching of the headliner in the rear. I had previous dithered on this because my initial meek attempts at removal were unfruitful. It turns out that this was because I was following the instructions too closely and attempting to remove the liner with just my fingers. I had purchased a set of hooks and probes awhile back for a different purpose and decided to see if they helped. Indeed they did! Using a hook the headliner peeled back perfectly and with almost no effort. I was in! The next step was to star loosening the retaining bolts. On my car these consisted of two bolts that held the hinges to the body and two large screws that held them to the tailgate. With the help of my older son, who was gracious enough to climb inside and actually remove the fasteners while I held the tailgate to keep it from falling, we got them all out and lifted the gate from the back of the car.
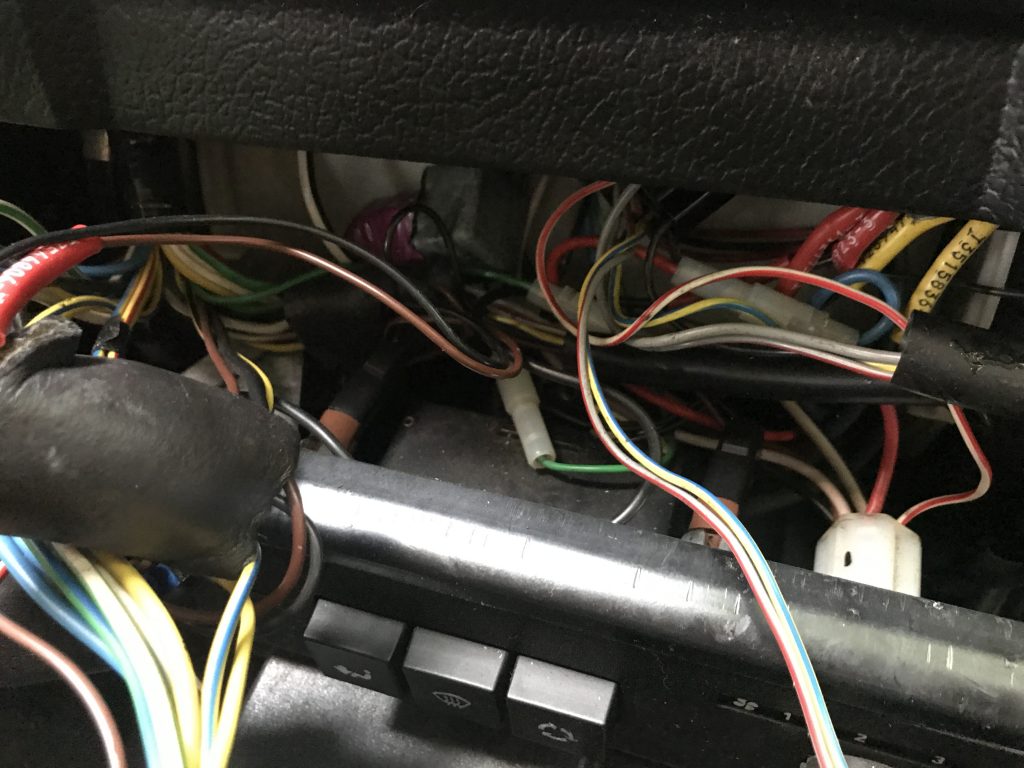
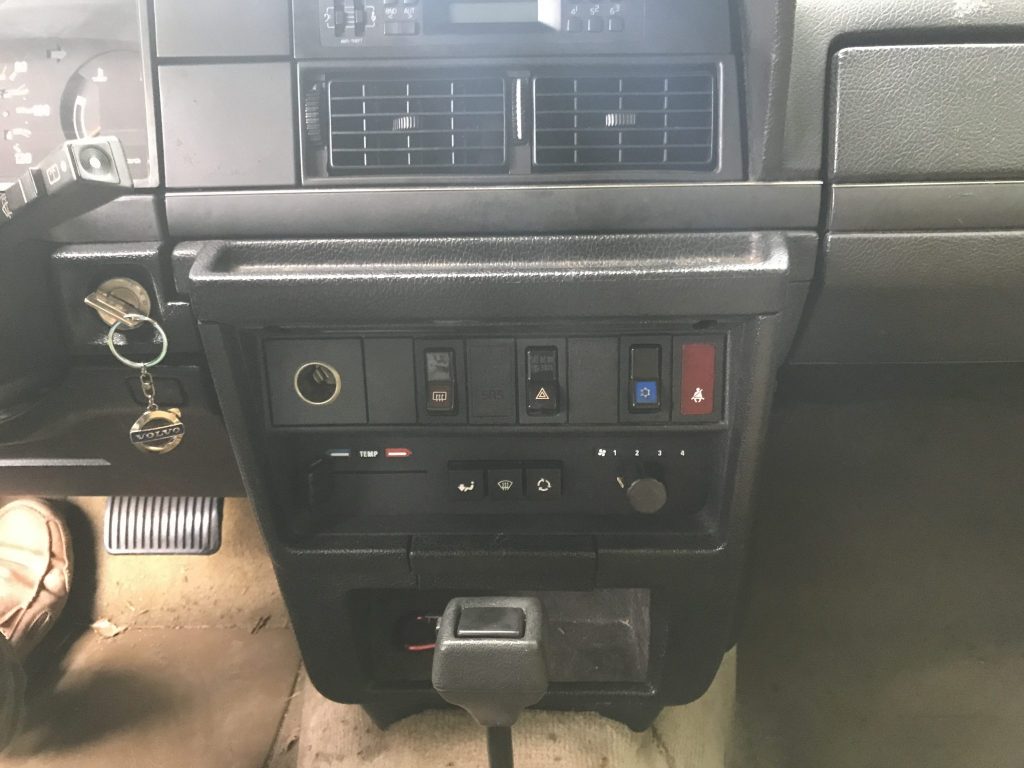
After a little hunting around I realized that those two stray bulbs mentioned in my last post where actually part of the climate control panel. I removed the two screws holding the panel in and was able to slot the sockets back in so that the blower and temperature controls are properly back lit.
After everything is back together it all seems functional. However the rear defroster light doesn’t like to turn off after being turned on. This may be because of the damaged wiring in the rear gate hinges that I have yet to replace. Also the AC switch doesn’t light at all. I was told the AC doesn’t actually work so it might be related to that, or the switch itself is bad. AC functionality is way down the list of stuff to fix, so I’m not concerned right now. I’m just glad all the bulbs are functional.
Speaking of those rear wiring harnesses, I’m very eager to get those done but for two things. First, as usual, is the weather. It seems that every time I find space to work on the car the heavens open and pour rain (much like it is doing literally as I write this). The second is that to gain access to the wires I need to pull off a section of the headliner in the back and thus far my small attempts to do that have shown the thing to be very stubborn. I have read how it stays on – there is a rigid lip over which the headline is stretched and clamped – but I’m hesitant to yank as hard as is seemingly required to get over this lip. I think I’ll eventually just have to bite the bullet and pull the thing until it comes off. Once those wires are fixed the back end of the car should be pretty much done.