My new Bosch brand ECT sensor has arrived from iPd, so I thought I’d take a moment to talk about part numbers for anyone reading who may also want to replace this part but not know which one to get specifically.
Volvo has part numbers assigned to almost ever piece that goes into their cars. However not every part is actually made by Volvo. Parts that are shared across not only Volvo’s but other company’s cars are usually made by third parties called “original equipment manufacturers” or OEMs. In Volvo’s case, one of the biggest OEMs is Bosch, a German manufacturer of, well, lots of things. Bosch also has a part number for their own products separate from those assigned by the companies that buy from them.
In my case, Volvo’s number for the ECT sensor used in my particular model and year of Volvo is 1346030. Bosch originally numbered this part as 0280130032. However, at some point Bosch decided to renumber this part as 0280130069. Why? I have no idea, but it did leave me scratching my head a little until I gathered enough evidence from the internet to confirm that this is the case.
So I now have a Bosch 0280130069/Volvo 1346030 ECT sensor to replace the FAE 33090 sensor that probably replaced the original Bosch 0280130032.
Today I attempted to test my ECT sensor. The procedure went like this:
Boil some water
Connect my multimeter up to the sensor
Dip the sensor into the water and take occasional temperature readings. Compare the resistance readings to the temperature to see if they should be where they are expected
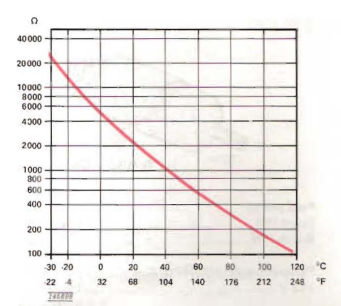
I did all this and got wildly unexpected results. Way higher resistance than I expected. For reference, here is the chart showing what I should have seen.
Part # 1346030
Looking at the sensor I noticed that it actually wasn’t Bosch branded. It was made by Spanish manufacturer Francisco Albero S.A.U (aka FAE). I’m not sure that company was ever an OEM supplier to Volvo, so I’m sort of suspecting that this sensor had been replaced at some point and that the not so good FAE replacement has since failed. Regardless, I have a Bosch replacement on the way. Since this thing is such a pain to access I want a good part going in before I reattach the intake manifold.
This past weekend was a bit of a bust in terms of car work. Aside from several obligations, a big tree branch broke off and fell onto the roof of my garage. I did have a moment the other day to put the multimeter onto my MAF sensor to what I could see. According to my intake system green book, the MAF should show a resistance reading of between 2.5 and 4 Ohms between pins two and three, and mine was reading somewhere around 3 Ohms. A visual inspection shows the wires still intact, and I’m assuming it’s clean because I had already cleaned it many months ago and haven’t really driven since then. So, I’m willing to move this part into the “working” pile along with the IAC. Stay tuned to see if the two engine temperature sensors can go there too.
The Idle Air Control valve, commonly just called the IAC, is a servo motor controlled valve that helps maintain the engine at idle according to the demands of the engine control unit (ECU). Given that my engine was having a hard time idling for more than a few seconds a failure here would not be surprising. I had already taken it off, so I figured I’d get it on my workbench and poke it a little to make sure it’s still working as expected.
Testing Procedure
The IAC is a pretty simple device. It’s a tube with a servo motor inside that opens and closes a valve to control airflow into the intake manifold. How far open the valve is depends on the voltage supplied. 12 VDC should open the valve up all the way. I also referenced the Volvo “green book” on the intake system and found that the resistance across the two input terminals should be 8 Ohms. So those are the two tests I performed. I’m happy to report that my IAC is just fine. It wasn’t difficult to test, but just in case here’s a video to illustrate how I did it.
In the course of replacing the gate wiring harnesses I also had to disconnect the rear window washer nozzle. The nipple over which the fluid hose connects is actually inside the gate. This meant that I had to remove the nozzle in order to reconnect the hose. I Googled around for instructions on how to do this and found a number of people also asking the same question but no real answer. So for the benefit of the internet, I bit the bullet and tried to do it myself.
From memory (and photos of the part I found online) I knew the nozzle was kept in place by plastic tabs. This meant that they probably would be flexible enough to be removed, maybe even without breaking! I selected a plastic trim removal tool with a notch in the end and worked it down around the stem of the nozzle where it entered the gate.When I felt that I had pushed it down as far as possible I levered the tool back. After a bit of tentative attempts I finally used enough force and the nozzle popped off, thankfully still intact.
The anatomy of a washer nozzle
As the photo shows, the nozzle is actually a three part assembly. There is the main section, the part that actually attaches to the gate and provides a fitting for the fluid hose, the outer housing that provides a small slit that constricts the flow of washer fluid and creates the spray, and a foam gasket that helps keep water and other liquids from entering the inside of the gate. You might notice that my foam gasket has ripped a little, probably a result of the levering action required to remove it from the gate. This is probably unavoidable unless you’re super careful as the section of foam that ripped it quite narrow. Perhaps inserting the tool from the bottom might have worked better. Anyway, I might be able to fix it with a dab of rubber cement or I could cut a new one from the neoprene I used to rebuild the air box gasket.
I know I haven’t had an update in awhile. I’m sorry about that, but no worries. The weather is improving which will give me more opportunities to get things done. In fact, last weekend was quite lovely. However lovely also makes yard work possible, and I had a huge amount of hedges to trim and branches to clear from my back yard. That made car work impossible, sadly.
Also not so sadly, I’m about to take a vacation for a week in sunny Florida. That makes tomorrow a wash in terms of car stuff, but I will be back in time for next weekend. I very much hope to get something going then. Please stay tuned.
If you’ve ever done a little maintenance on your car you’ve probably owned a Haynes Manual. The man who gave his name to those manuals recently passed away. Take a moment and spare a thought for him and his family.
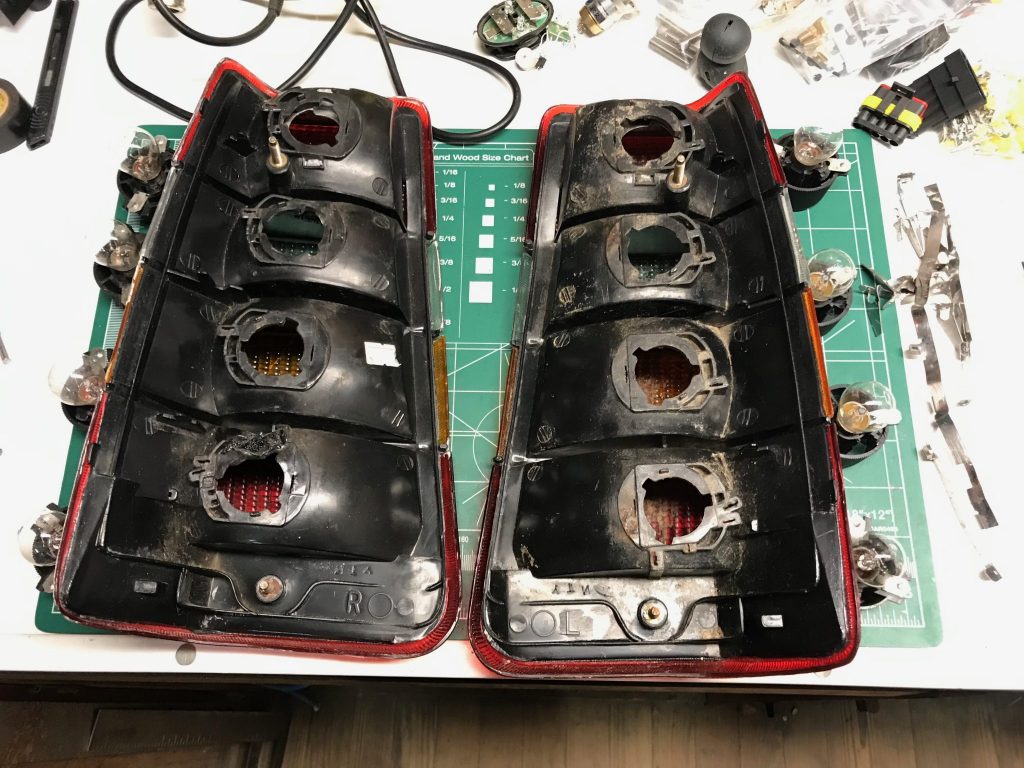
You may remember that I had bought a new set of tail lights from someone one the internet. I actually tried installing them pretty soon afterwards but found that even though I knew all the bulbs to be good, once the lights were in the car they intermittently stopped working. Electrically, Volvo 240 tail lights can be a bit problematic. They make heavy use of spade connectors and the ground connections are done along a bus bar of thin metal, all of which are prone to corrosion. On top of that the plastic of the assembly and the sockets in which the bulbs sit can warp over time and disrupt contact between the tabs and the connectors. The solution to this has been to remove all that stuff and solder the connectors together, and this is what I decided to do.
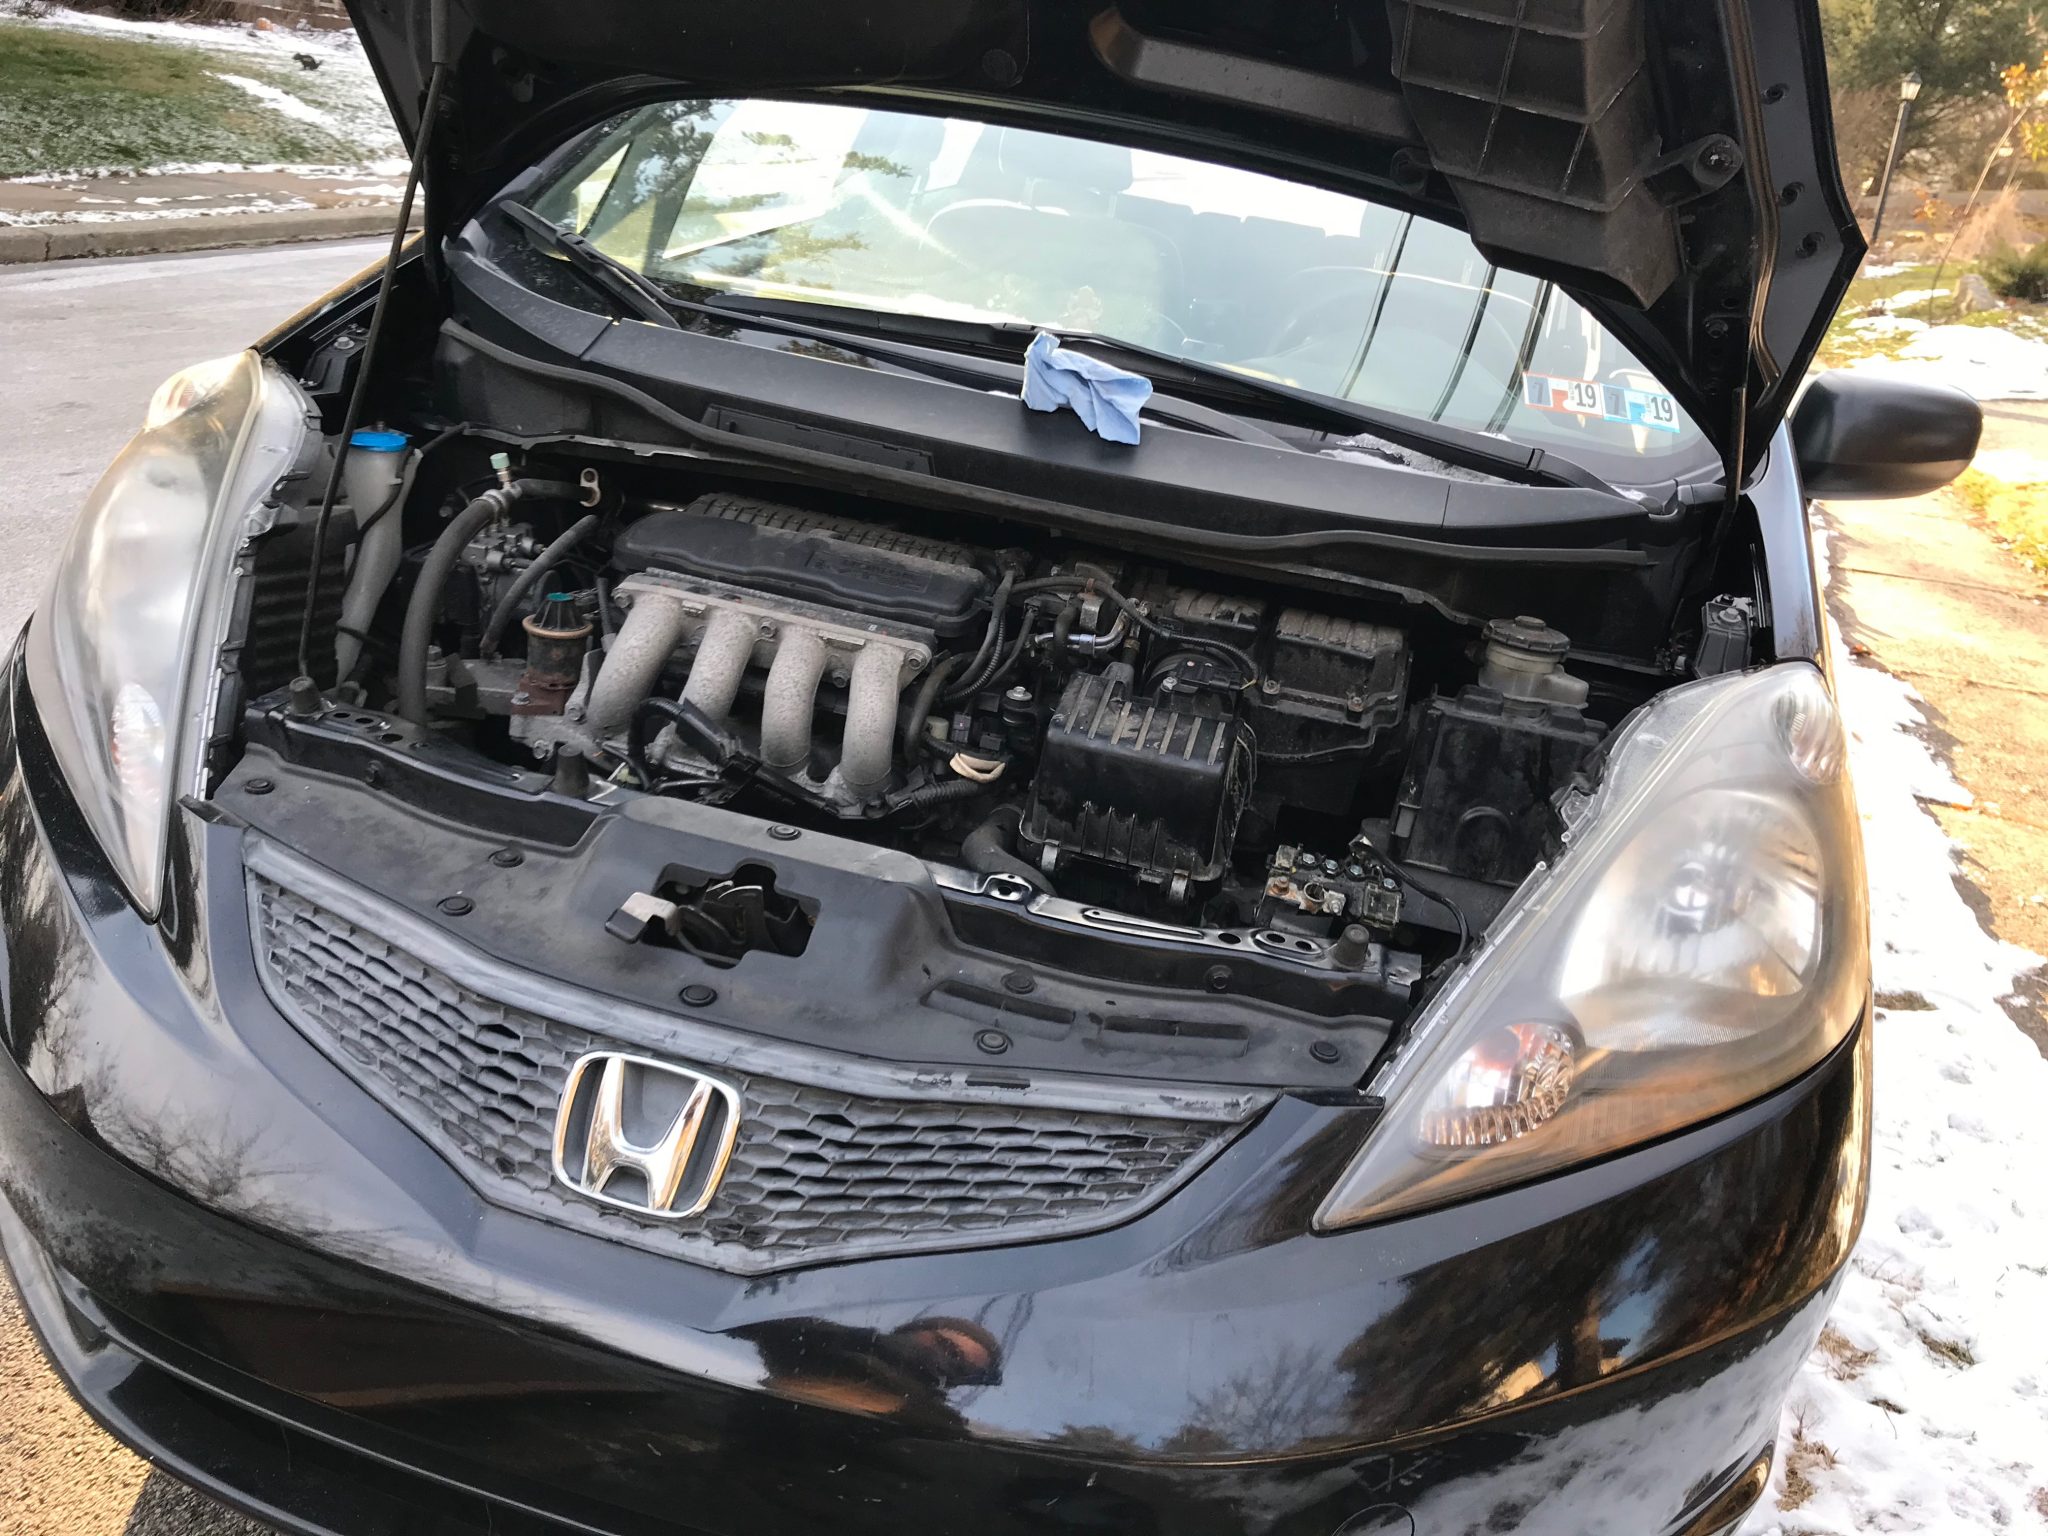
I am still here, and I am still working on my 240, but currently I have three main impediments keeping me from doing much of anything. First, the influx of tools mentioned previously has overwhelmed my tiny basement shop so I’ve been spending a bit of the little free time I have devoted to cleaning up and incorporating them all into my collection. The resulting confusion and mess has left the shop very difficult to actually use for fixing and building things. Second, it’s gotten really cold here in the last week and it even snowed a little last Sunday. Personally I find it super no fun to work on cars in below freezing temperatures, and the aforementioned shop mess has made it hard to even take parts (such as the intake manifold) indoors for repair. Third, and perhaps most importantly, my real, actual, daily driving car’s starter decided it had enough and quit. My wife and I pushed it out of the driveway and onto the street where it has sat while I look for time to work on it.
A Sad Fit
So far I’ve managed to get the old starter out and put the new one in. The next step is to plug all the electrical stuff back in and hope that this solves the problem. After that’s taken care of, the shop is cleaned up and made usable, and perhaps the weather gets better, I’ll move back to the Volvo.
The nasty cut on my hand has sufficiently healed to allow me to fiddle with the car again. I’ll probably have a pretty gnarly scar, but my hand still works and scars can be cool so I won’t complain. It’s also now a new year and I am ready to get to it!
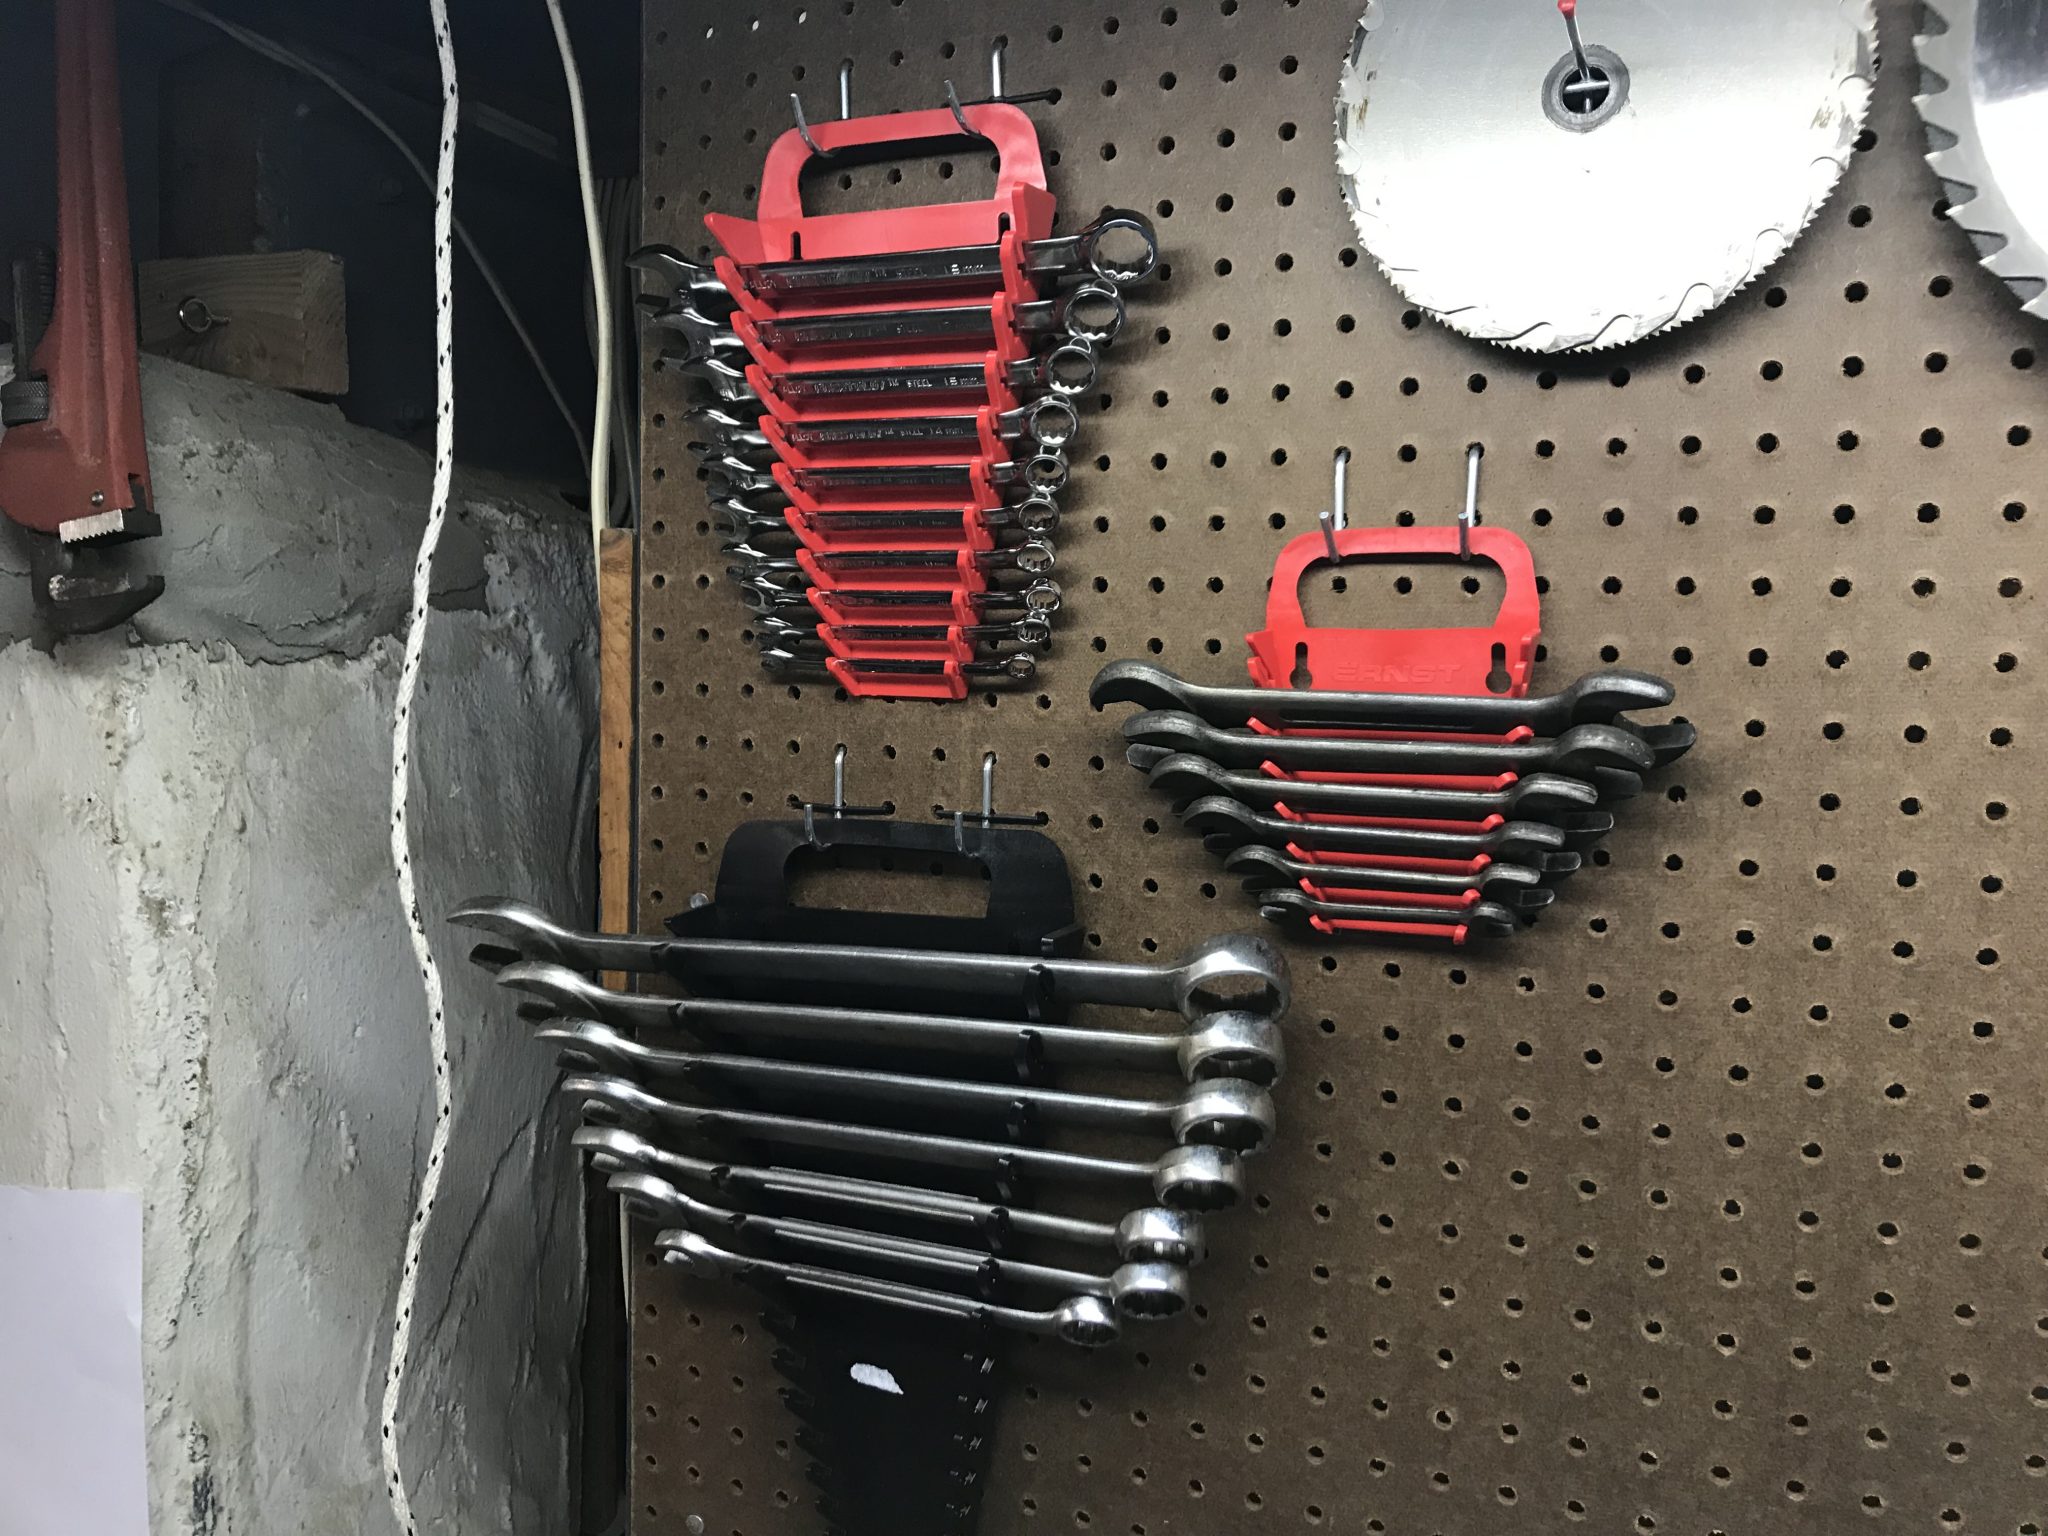
Tool Heaven
New Tools!
There have been several developments since my accident. First, I had the supreme luck to be friends with a person whose parents are downsizing before a move. One of those parents happens to have been a shade tree mechanic himself years ago and had literal mounds of wrenches, sockets and other tools in his garage and basement that needed a new home. Some of them were a little worse for the wear, but, given a little treatment with Evapo-rust coupled with a light coating of oil, they came right back to life. So I’m pretty set for now in terms of the ability to turn bolts and screws.
New Parts
Next, I am happy to say that I managed to snag a set of good condition rear tail lights from a 240-centric Facebook group I’m on, and I got them for what I’d call “a steal.” I’ve not attached them yet as I need to test and clean up all the electrical connections, but they are very nice, especially for the price, and a far sight better than the busted ones my car used to sport.
I am also now in possession of an Engine Coolant Temperature sensor (ECT) and an intake manifold gasket. This is all in preparation for removing the intake assembly, cleaning it up a bit, replacing the ECT, and remounting it all. Additionally, harkening back to that list I found in my glove-box, I have a Fuel Pressure Regulator on the way too. Perhaps I’ll also disassemble the fuel rail and clean it out, or at least remove the injectors and clean them. I’m not sure about that yet, so stay tuned. Even further still, I went and got an overdrive bypass plate from iPd. My plan is to install that and see if I can fix the actual solenoid. If I can manage that I’ll take the bypass back off and reinstall the solenoid.
(Re)Fixing Stuff
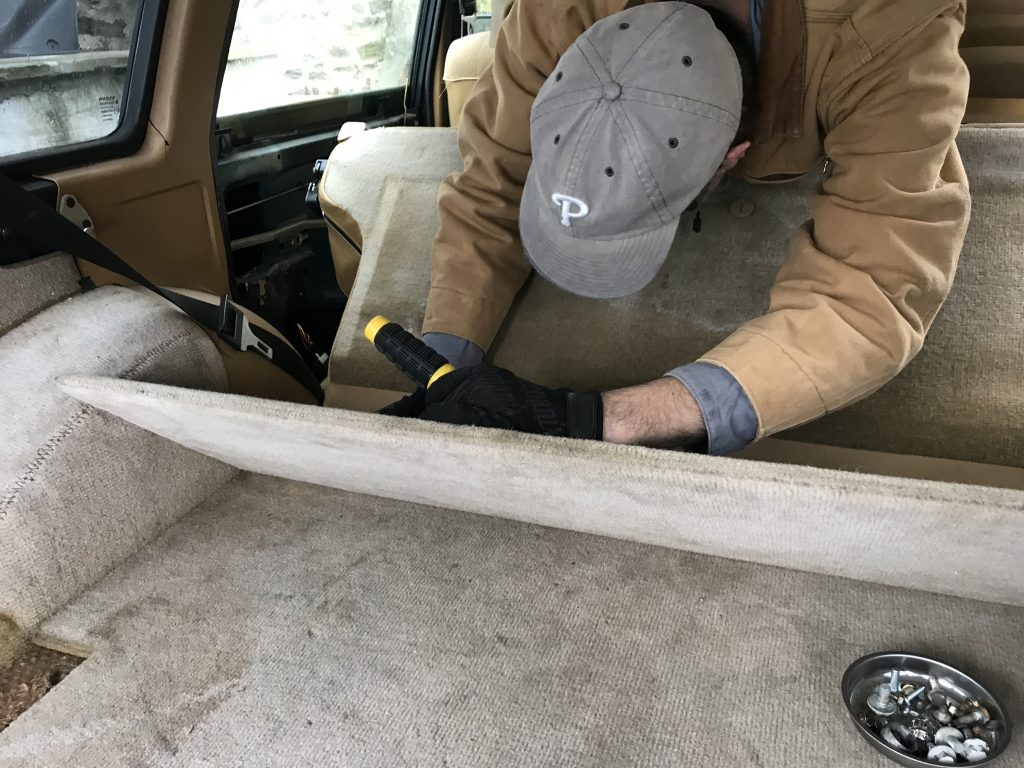
Finally, a small amount of actual work. Sort of a revisit to previous work, really. When I had originally installed it, I hadn’t noticed that my pre-pump assembly was missing the rubber o-ring that helped keep the gas fumes from coming from the tank and into the car. So I took it back out, added the o-ring, and then sealed it back up, this time using a new and not corroded to heck lock nut. After a quick test to make sure the pump was still operating I sealed the whole thing back up and reinstalled the floor of the cargo area.
In the process I also located the previously missing center lap belt! One tiny step at a time.
In a cruel twist of fate (and clumsy fingers) I have recently injured my hand with an X-Acto knife in a way that makes doing fiddly things awkward. This plus cold weather have curtailed my work on the 240 in the short term. Longer term I have a number of things lined up. This includes reinstalling the last door panel, replacing the engine temperature sensor in hopes that it improves cold start, replacing the fuel filter, and changing out the rear wiring harnesses. Look for that in the very near future (read: after I get these stitches out).
I’m back from the Thanksgiving break. I hope all of you who celebrated had a nice one, and those of you who did not had a good time doing whatever you were doing too.
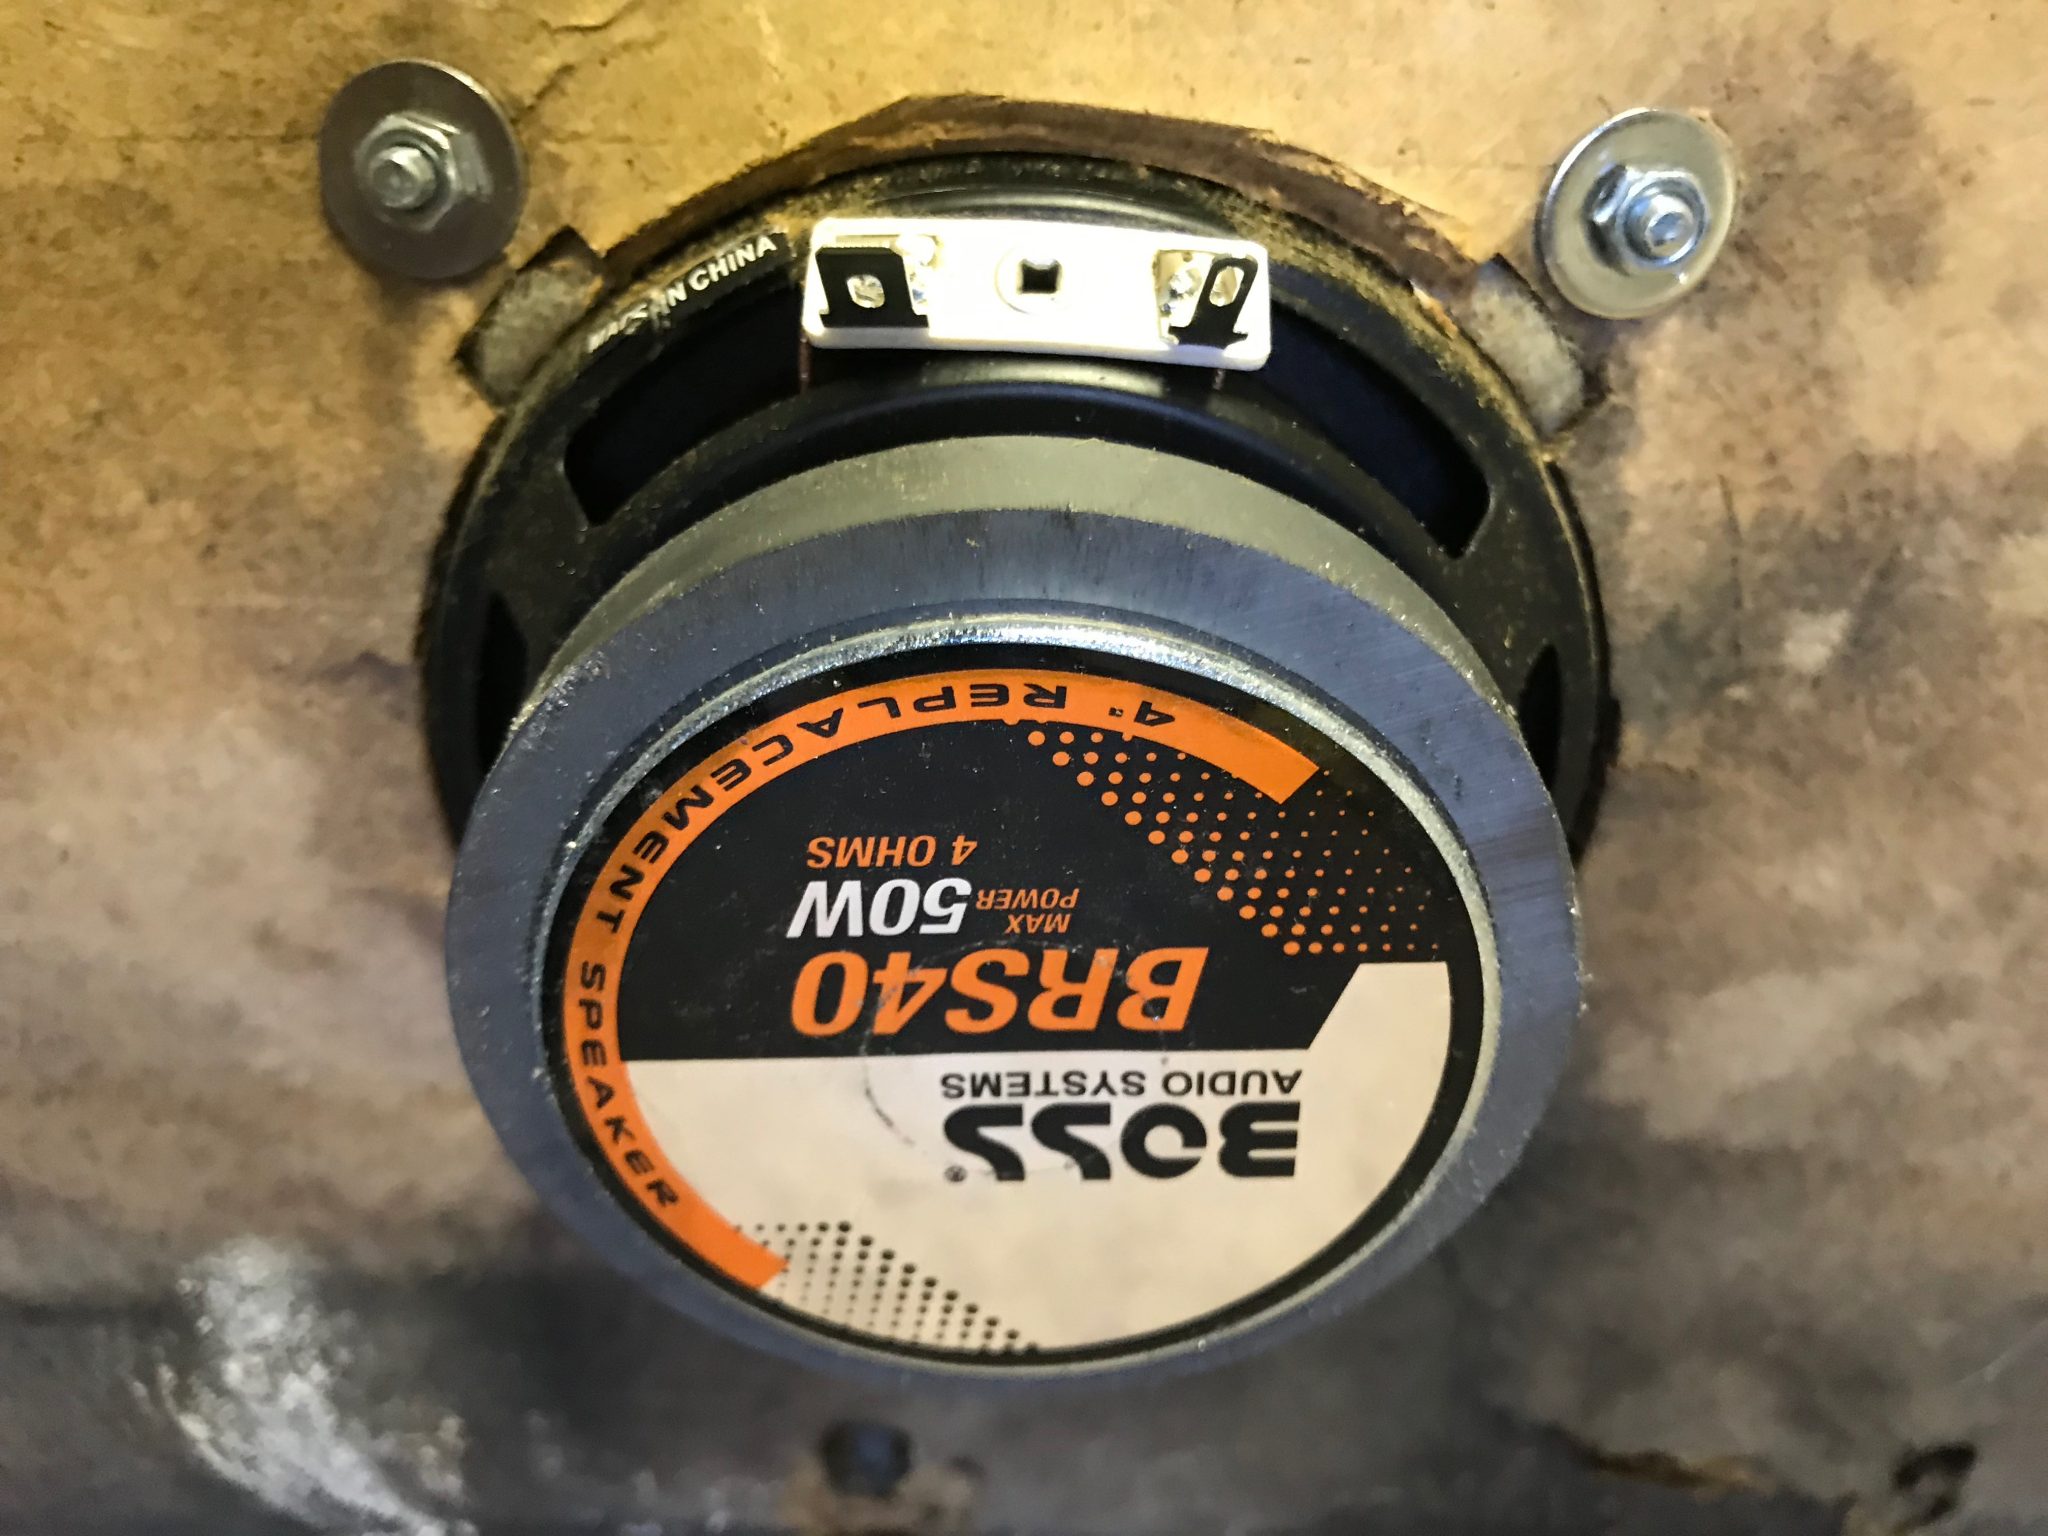
Having beaten the front speakers into submission in the ugliest way possible it was now time to do the same in the back. I did this already on the passenger side and promised to show how I did it. The “how” here is tied to the mechanism by which the plastic speaker grille is attached. The edges of the grille have tabs that lock into slots cut into the metal part of the speaker bracket. Unfortunately the speaker and the bracket are integral so it’s not like you can just mix and match. That leaves the options of either fabricating a new adapter bracket or doing what I did – hack up the old speakers for the bracket part.
This is the post Dremel (the choice of half-assed fixes the world over!) cutting away the speaker from the bracket. The metal is quite thin so it only took a moment to cut through using a fiberglass reinforced cut-off wheel. I don’t recommend using the non-reinforced wheels for this as they will wear down very quickly against steel.
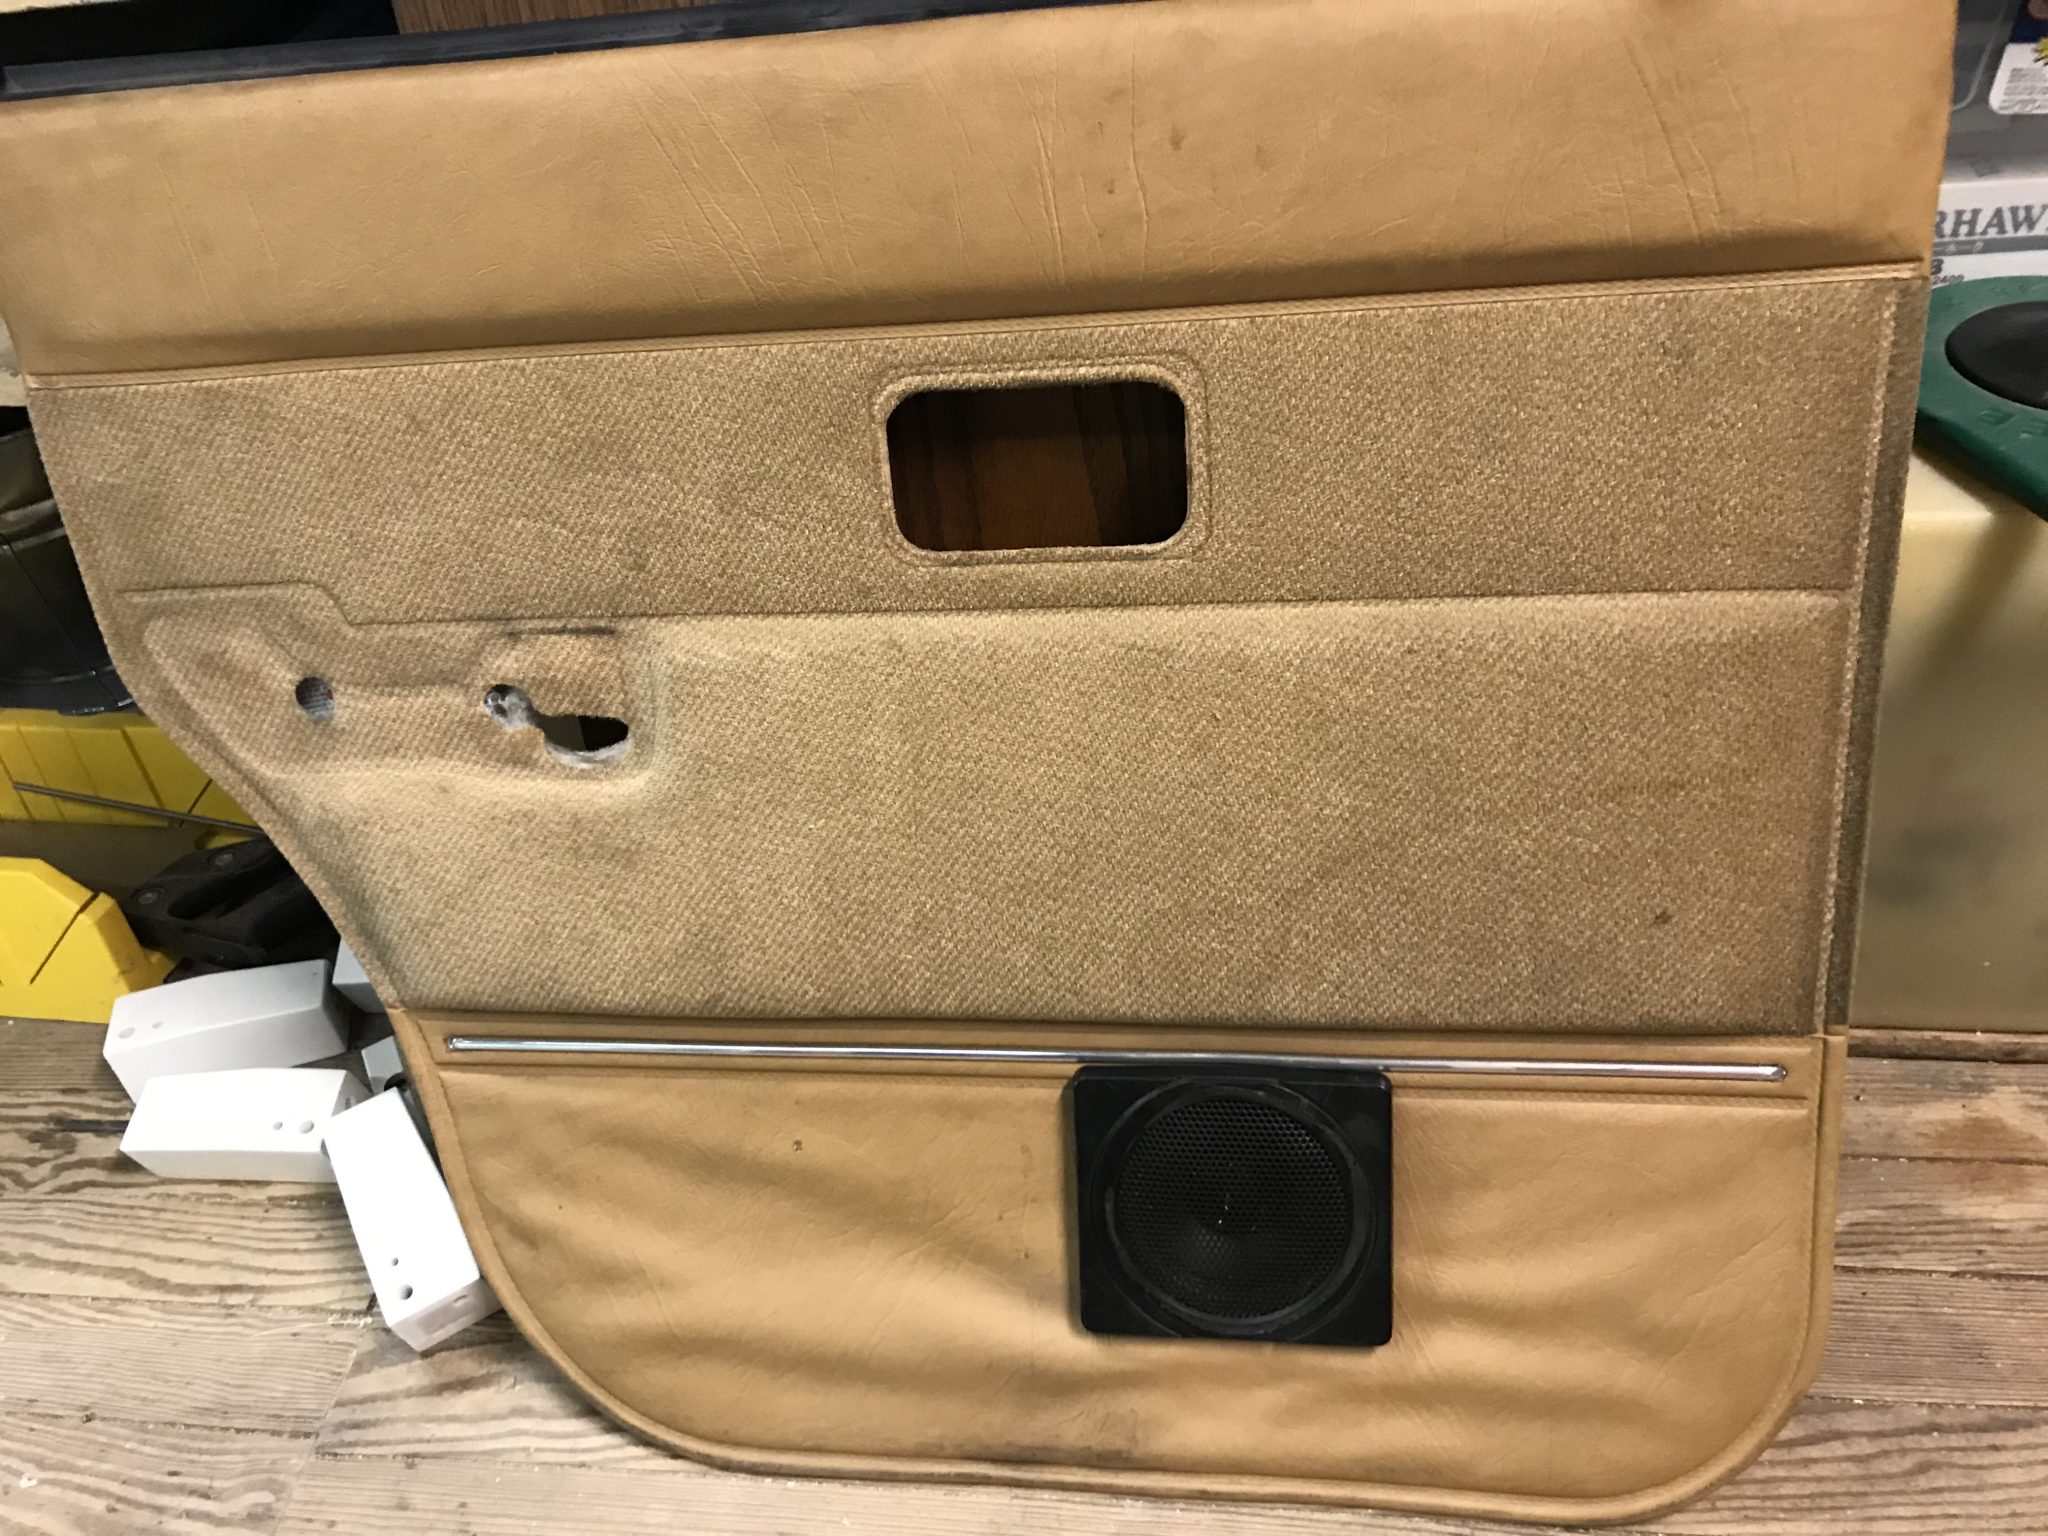
As you can see, my speaker sits quit nicely beneath the bracket. Instead of the pain-in-the-butt blind rivets Volvo used I elected to use a few M4 sized screws. This will make it much easier to change speakers if I ever desire to do so.
And here it is back on the door card. I have to paint up a guide casing to go on the door itself before I can install the card. I actually did that this past weekend but didn’t have an opportunity to actually put it in. Stay tuned for that.
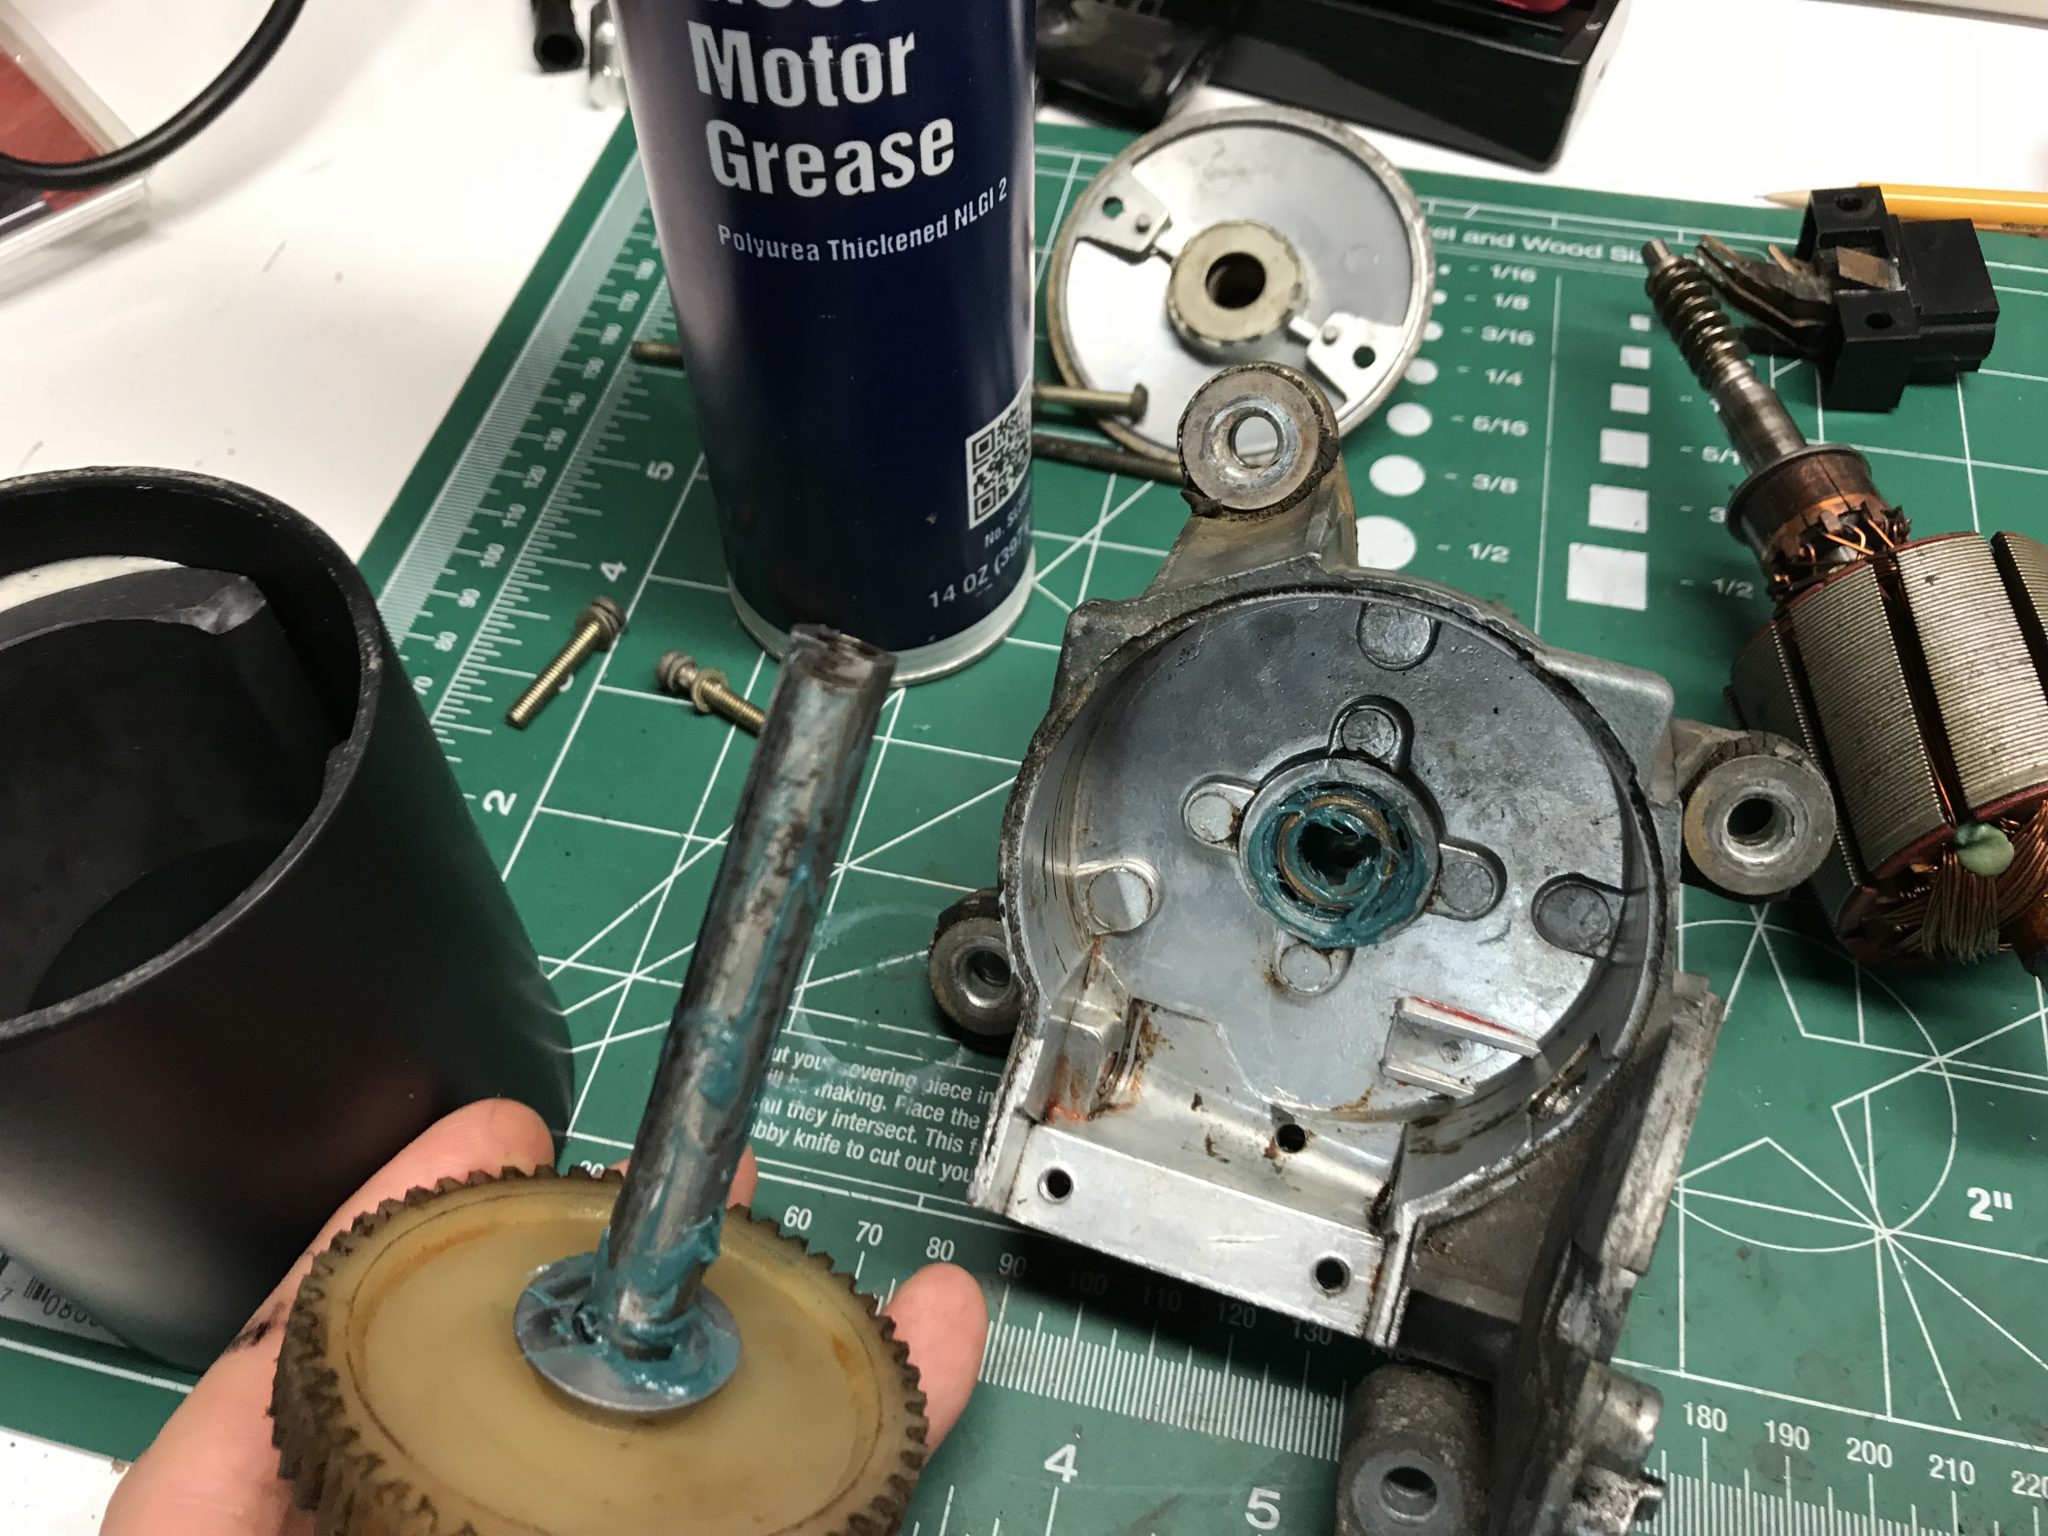
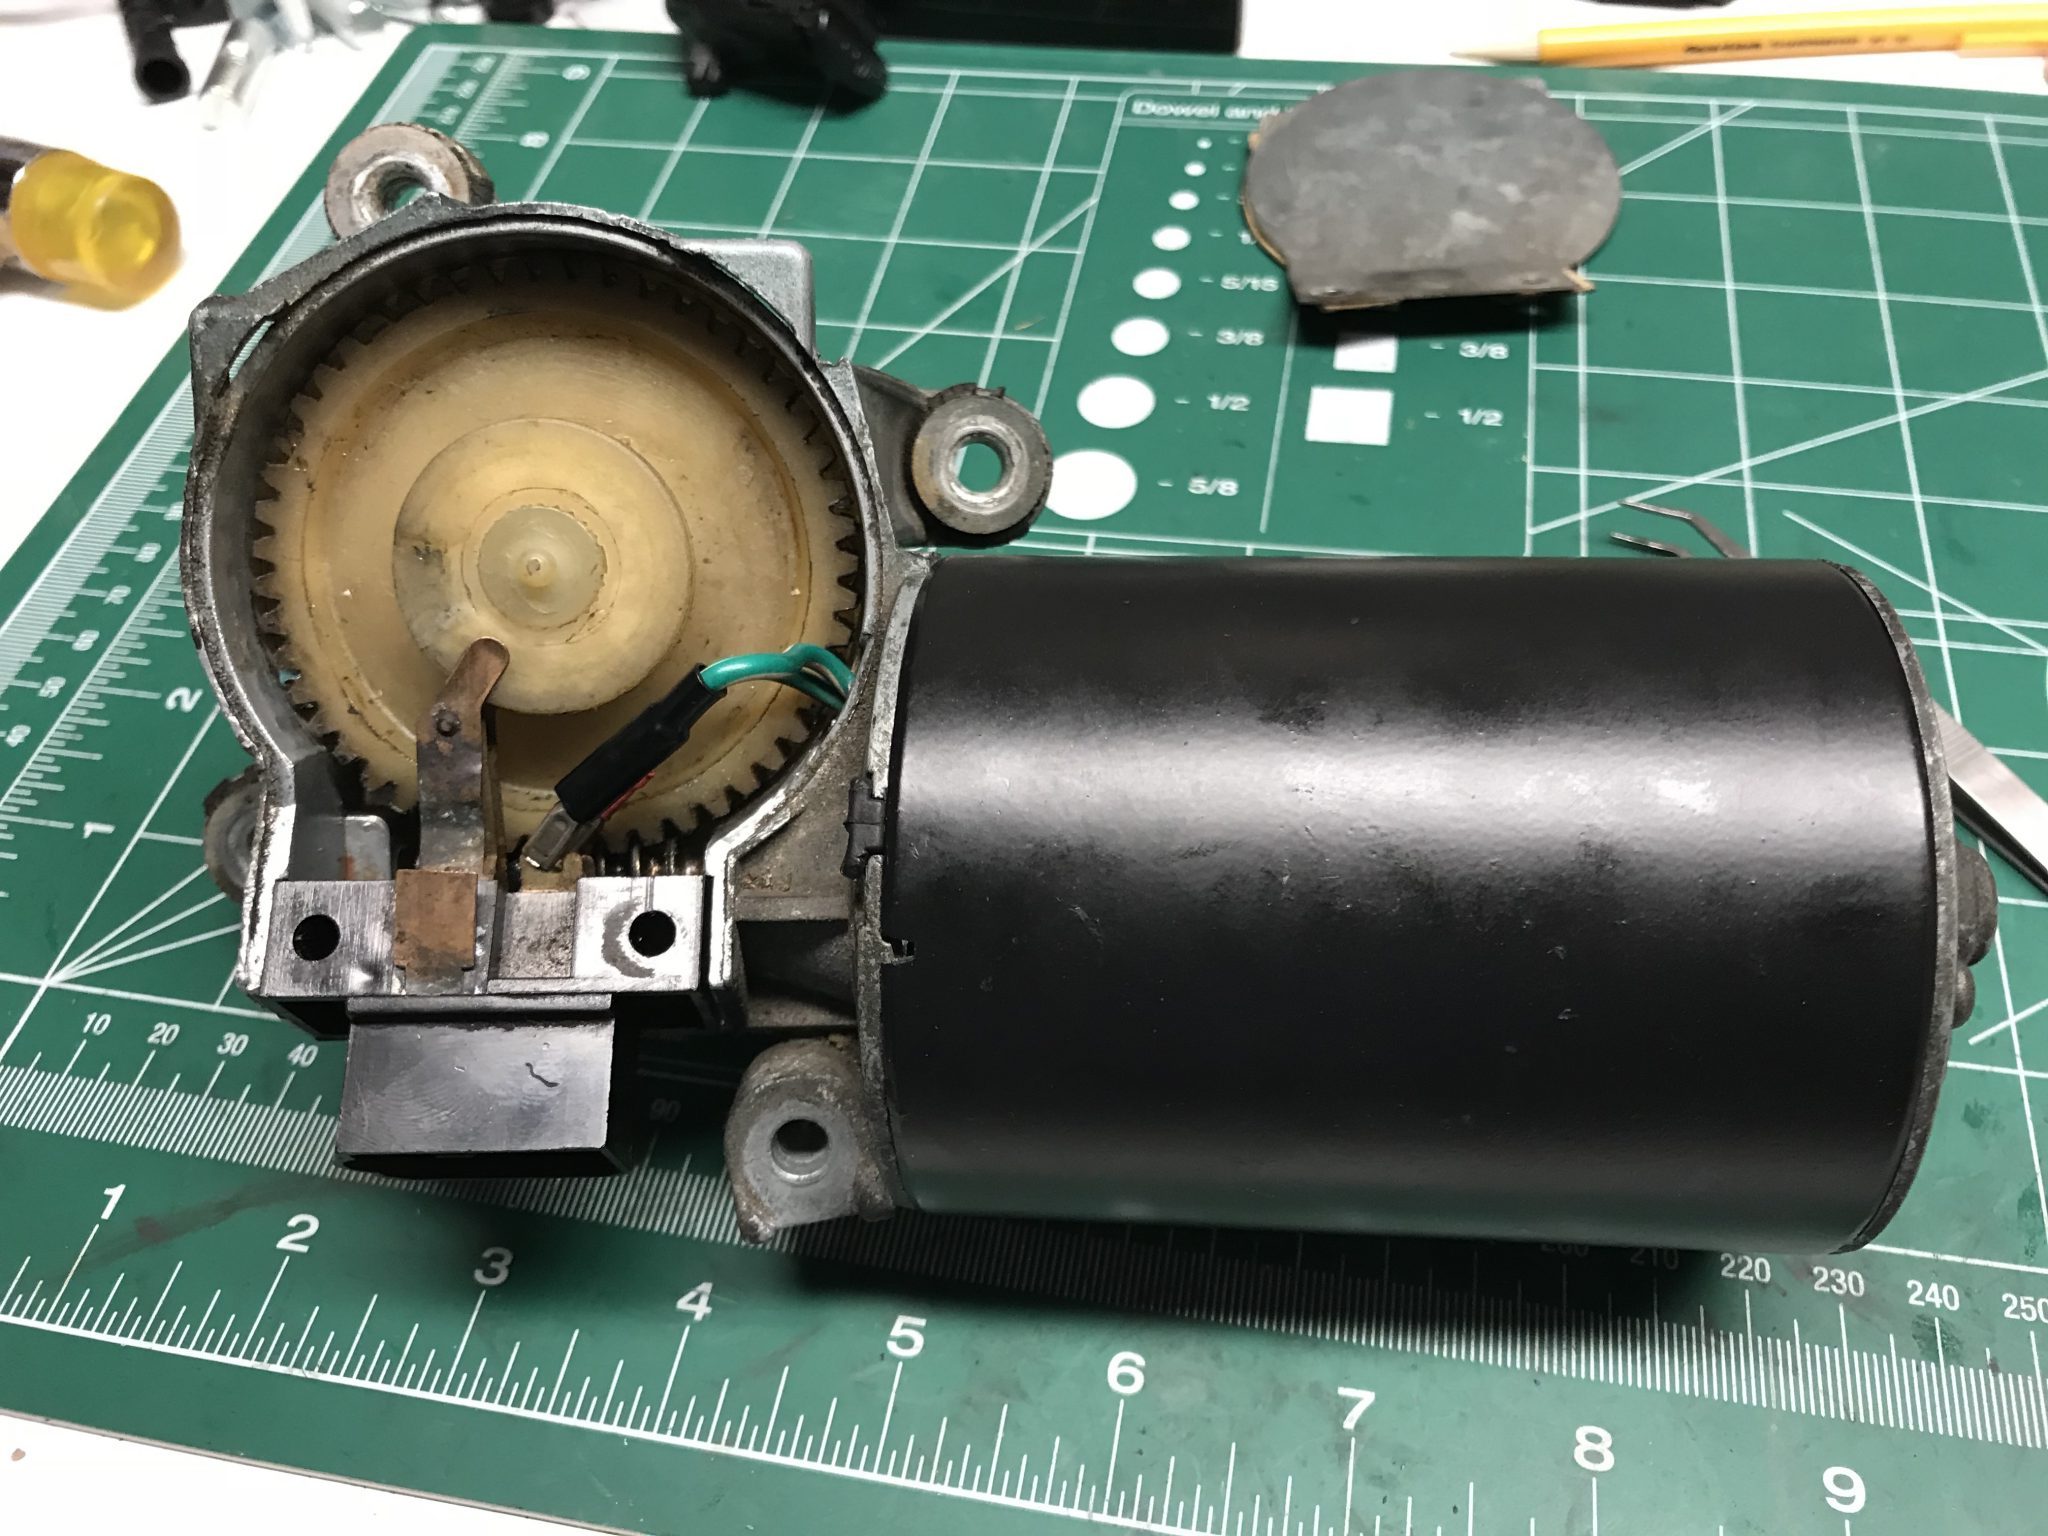
The weekend rolled around again, as it always does, and I was looking to make some progress on the car. The obvious choice, the windshield wiper motor, was still in pieces on my work bench begging to be greased and reassembled, but the replacement carbon brushes were literally on a slow boat from China. So I did the only logical thing: reexamined the existing brushes and called them “good enough”. Honestly they probably are. As best as I can tell only a few millimeters had been worn off and they were still making good contact with the commutator. So I put the thing back together.
A Few Tips
Use electric motor bearing grease. I’m not 100% clear on why this is a good thing because I don’t do a lot of greasing in my normal life nor understand the chemical properties of today’s space-aged grease technology, but from what I can tell it’s better for electric motors to use electric motor specific bearing grease.
The best (and possibly only practical) way to insert the armature is by removing the brush spring mechanisms that push them against the commutator. Put the armature in first and then put the brushes into their channels and attach the springs.
When you have the armature in and the brushes connected the next step is sealing it up by attaching the housing. That housing, though, has the two permanent stator magnets glued to its inside which will pull the armature straight up and out of contact with the brushes if you aren’t careful. While lowering the cover keep downward pressure on the armature until the cover is on.
The rest of the process is pretty straight forward. I tested the motor out and it definitely sounds quieter and less angry than before. The intermittent wiper mode now works too!
I didn’t actually reinstall and connect it to the wipers yet as I lost the wad of weatherproofing putty that was originally wrapped around the output shaft housing. Unless I want rain water leaking through into the passenger foot well I’ll have to wait until I get an appropriate replacement to do that.
Additionally, with the help of son #2, I got the rear window sprayer working.
See videos of both things by clicking the link below.
It’s a family car. It’s an ambulance. It’s a hearse. It’s a COP CAR!
Apparently Volvo offered 240s with a police package. Falls Church, Virginia, an affluent suburb of DC, bought one and kept it around for decades until it sold on Craigslist.
When I bought my car I knew it had problems. As I’m slowly working through the issues I’ve begun to wonder what the previous owner (and those before him) had known about what the various bits and pieces of the car needed attention. This is not to say I think the PO was hiding anything or being dishonest. The car was represented as needing attention, and indeed that was a big part of the reason I bought it as well as why it was priced the way it was. I’m sure happy with the car thus far. It’s been a blast figuring it out and learning how it’s put together. But then I looked more closely at what was in the glovebox.
I don’t know why it didn’t occur to me to look through the box before I started working. I knew there were some original items in there like the owner’s manual and such, but I guess I didn’t think to much further than that. Having been the owner of a glove box or two in my day I know that they can be sort of a garbage dump. I’m glad I took the time to look yesterday because amongst all the old receipts for tires service and window tinting I found a list of what I assume were pre-identified issues.
Potential Problem List
The list was hand written, presumably by a mechanic. Among these were some I was already familiar with like the broken odometer and overdrive solenoid. Others weren’t. They included:
Throttle position switch
Fuel pre-pump
Fuel pressure regulator
Front passenger side ball joint
Blower motor
I’m a little surprised to see the TPS on the list. It’s a simple potentiometer device that limits a 5v input signal. 0 to around 1.5V indicates to the ECU that the throttle valve is closed and a value of ~5v that it is wide open. That should be pretty easy to test if not a bit expensive to replace. The fuel in-tank pre-pump sounded like it was working but that’s not always a 100% indictor of good health. Given the idle issues I’ve been seeing there is a chance it is functional but underpowered and might merit replacement sometime soon. The fuel pressure regulator is also a bit of a surprise. The limited tests I did on it suggest it’s working fine. It’s easy to replace, but as it’s a $30-$50 part I’ll hold off until I’m sure it’s no good. Ball joints are not expensive to replace but require a bit of effort and a torque wrench. The blower motor I more or less know about as I was told the AC did not work. Replacing that is complicated and was always towards the bottom of the to-do list.
Overall I’m glad I found this paper as it gives a bit more of a handle on the list of known issues I’ll have to solve. Plus it doesn’t list anything horrible or insurmountable, even by inexperienced, shadetree me.