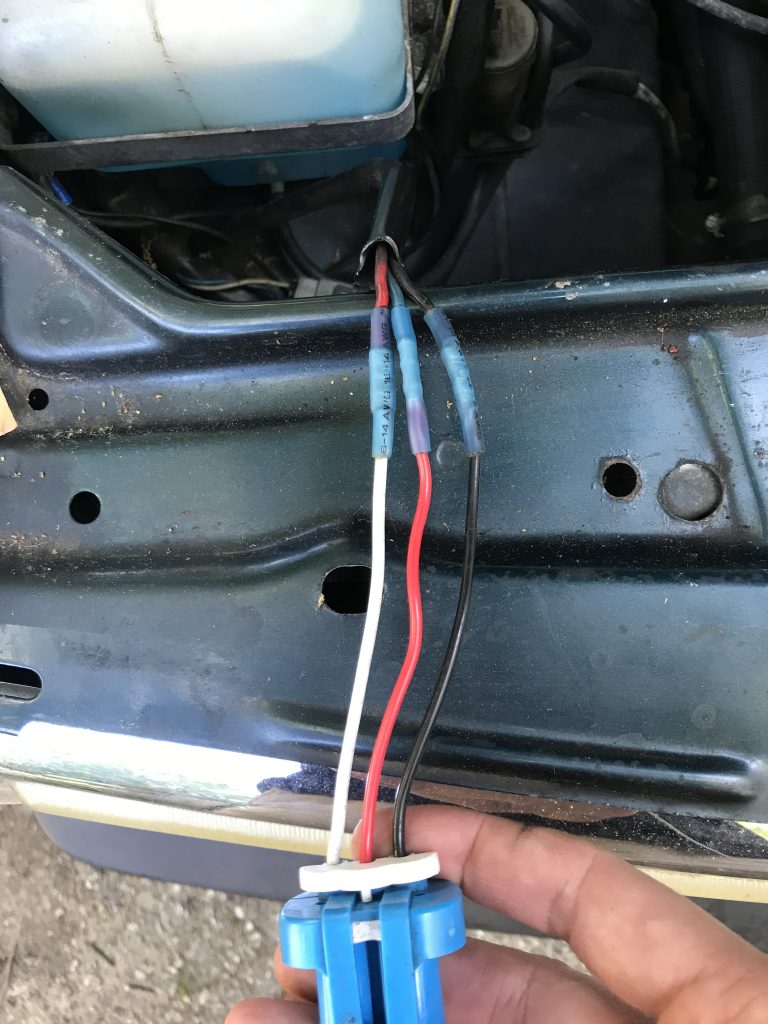
I’m a big fan of modular connectors. Nothing bugs me more than having to desolder or otherwise put in a bunch of extra work to undo a permanent wiring connection before I can even start to fix something. In the case of my headlights, over two years ago I used crimp connectors to wire up the bulb sockets.
This worked pretty well for awhile but I found that perhaps the crimps weren’t 100%. Road vibration would occasionally cause a bulb to loose contact. Obviously this was not ideal, so I decided to ditch the crimps and just solder the wires together. But that brought me back to the whole “I don’t like permanent connections” thing. So I got an idea.
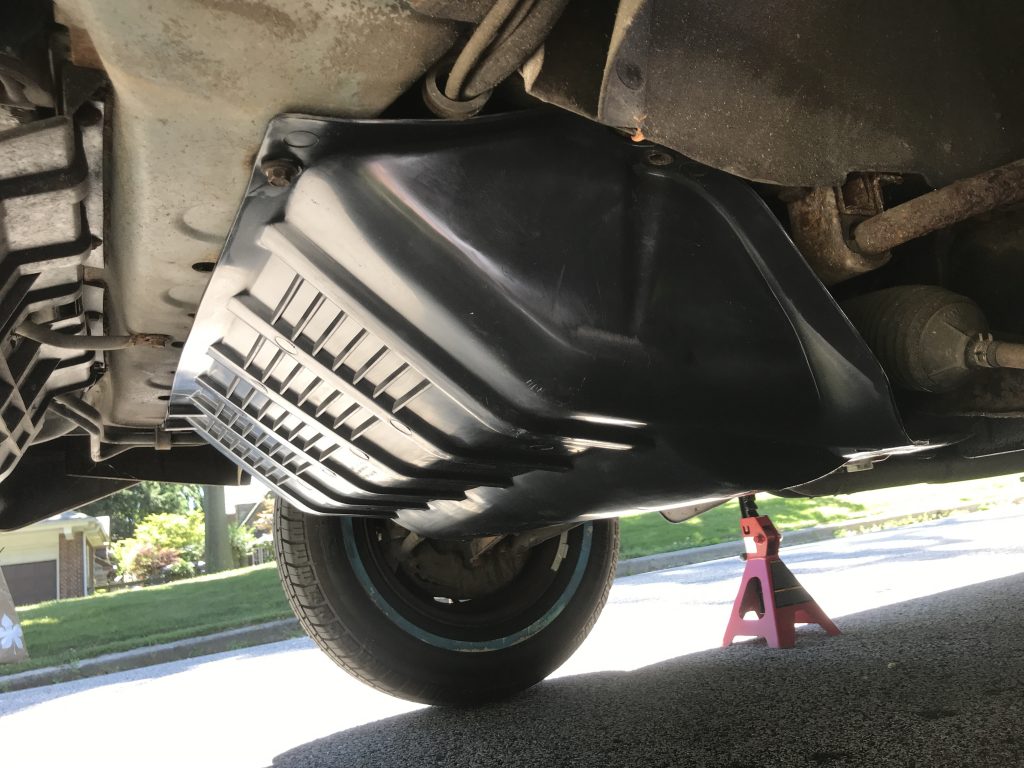
This past weekend was mostly one for yard work, but I did do a couple of smallish things on the car. The most significant one was the replacement of the belly pan. The original pan was long gone with only a couple of small bits still held on by the few remaining original bolts. I reused those and supplemented the rest with new 20mm long M6x1.0 bolts. This pan was a Uro brand replacement part, and like many after market trim the fitment was not perfect. The eagle-eyed amongst you might notice that one of the bolt holes (out of the seven) in the photo below is empty. This is because I just could not get the hole in the plastic to line up sufficiently with the threads to get a bolt to “bite”. Instead of drilling out the hole a little to make this happen I decided that six out of seven bolts was good enough for now and called it done.
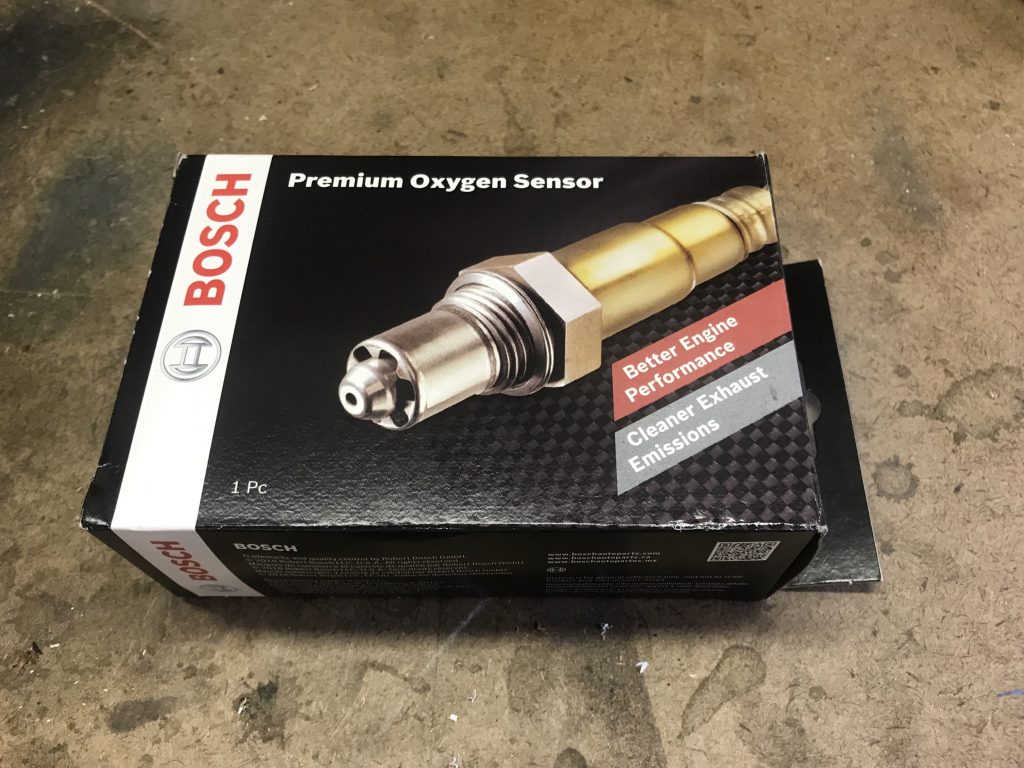
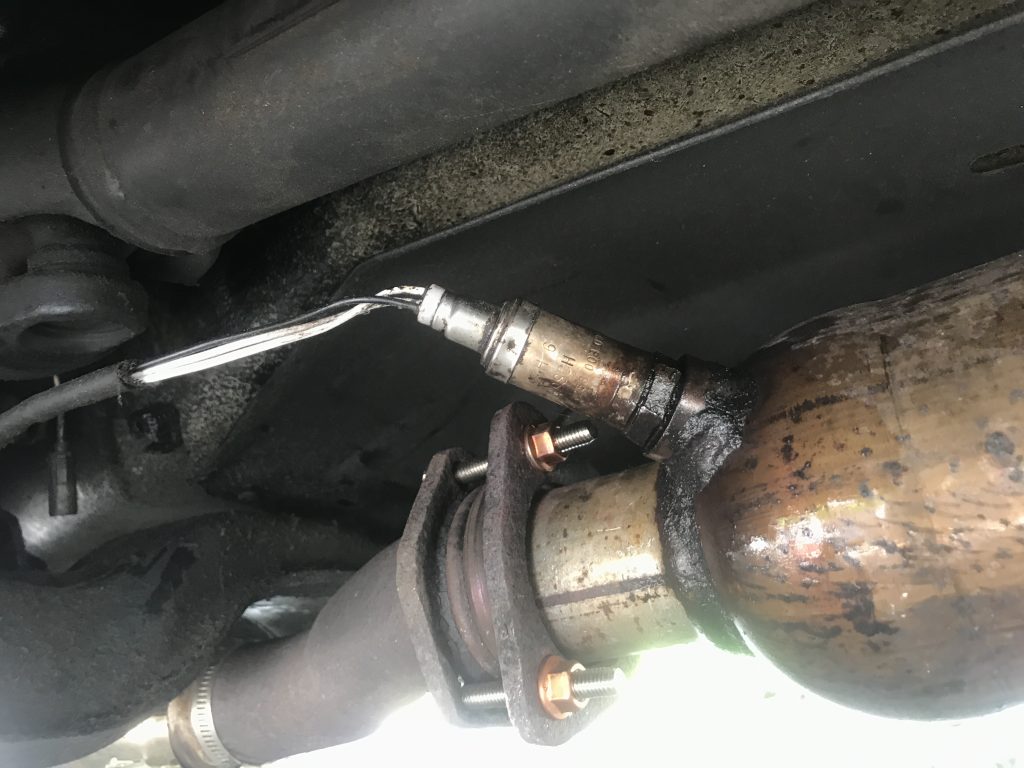
About a week ago I noticed that I was getting a 1-1-3 code from the computer which indicated a rich mixture condition. More recently I got the code 2-1-2 which suggested the computer wasn’t getting readings from the O2 sensor at all. Doing some research on these codes will take one down a rabbit hole of “maybe it’s THIS or perhaps THAT or maybe even THESE!” so I decided to skip all that and just replace the O2 sensor. The model I went with was a Bosch 13034 which I believe is the OEM component.
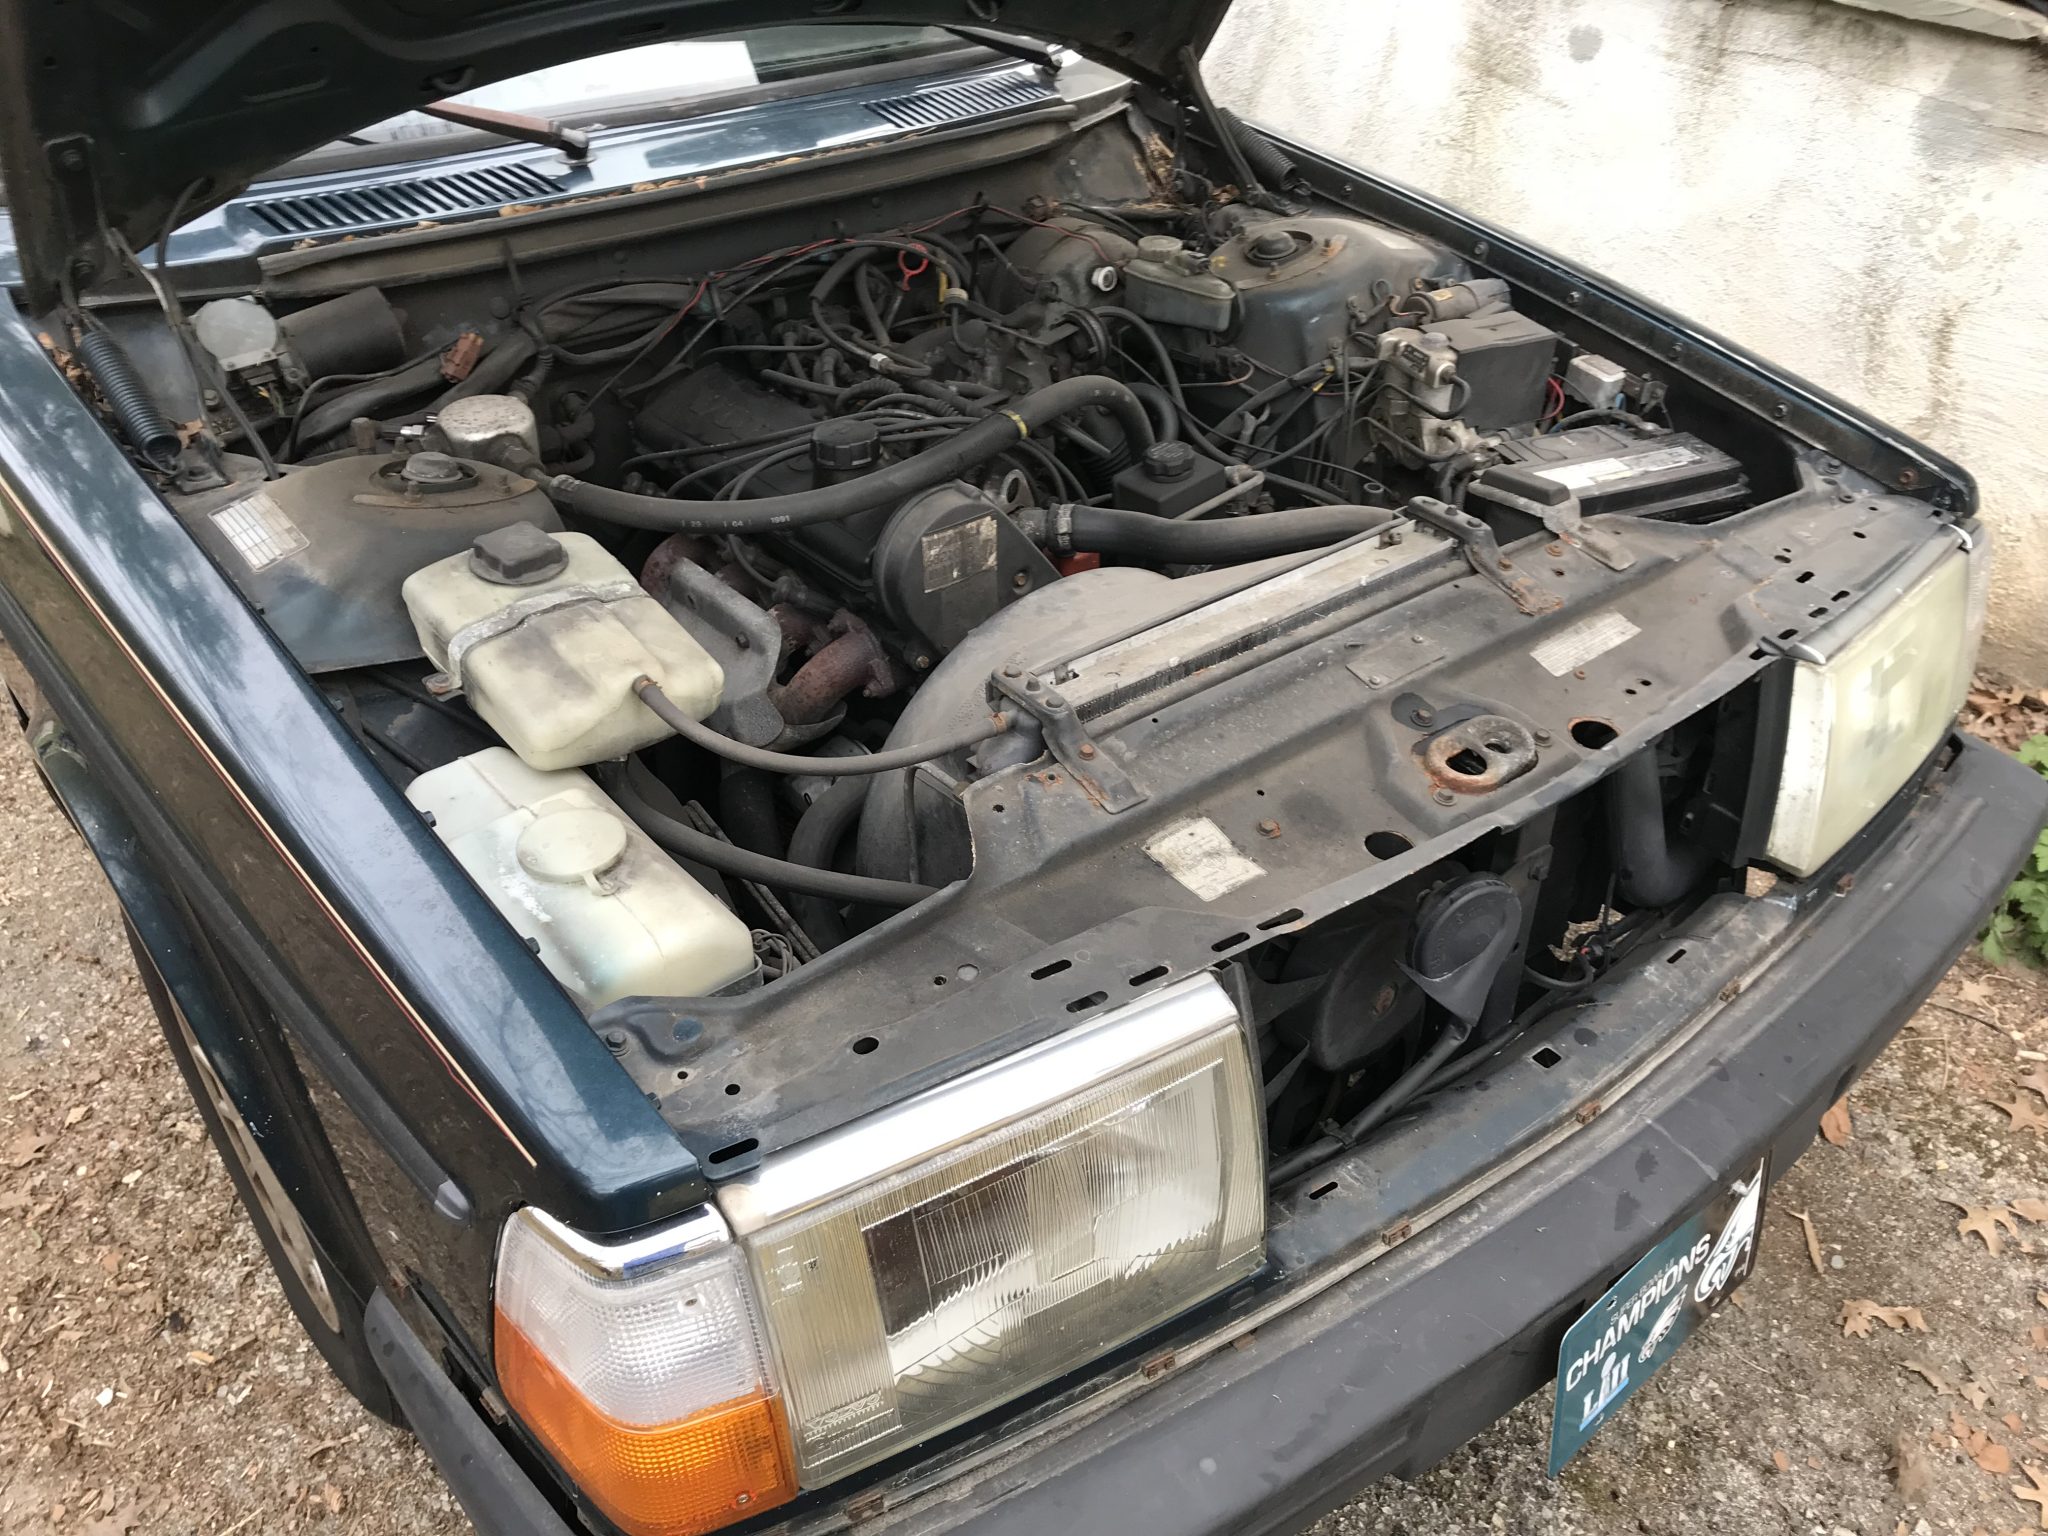
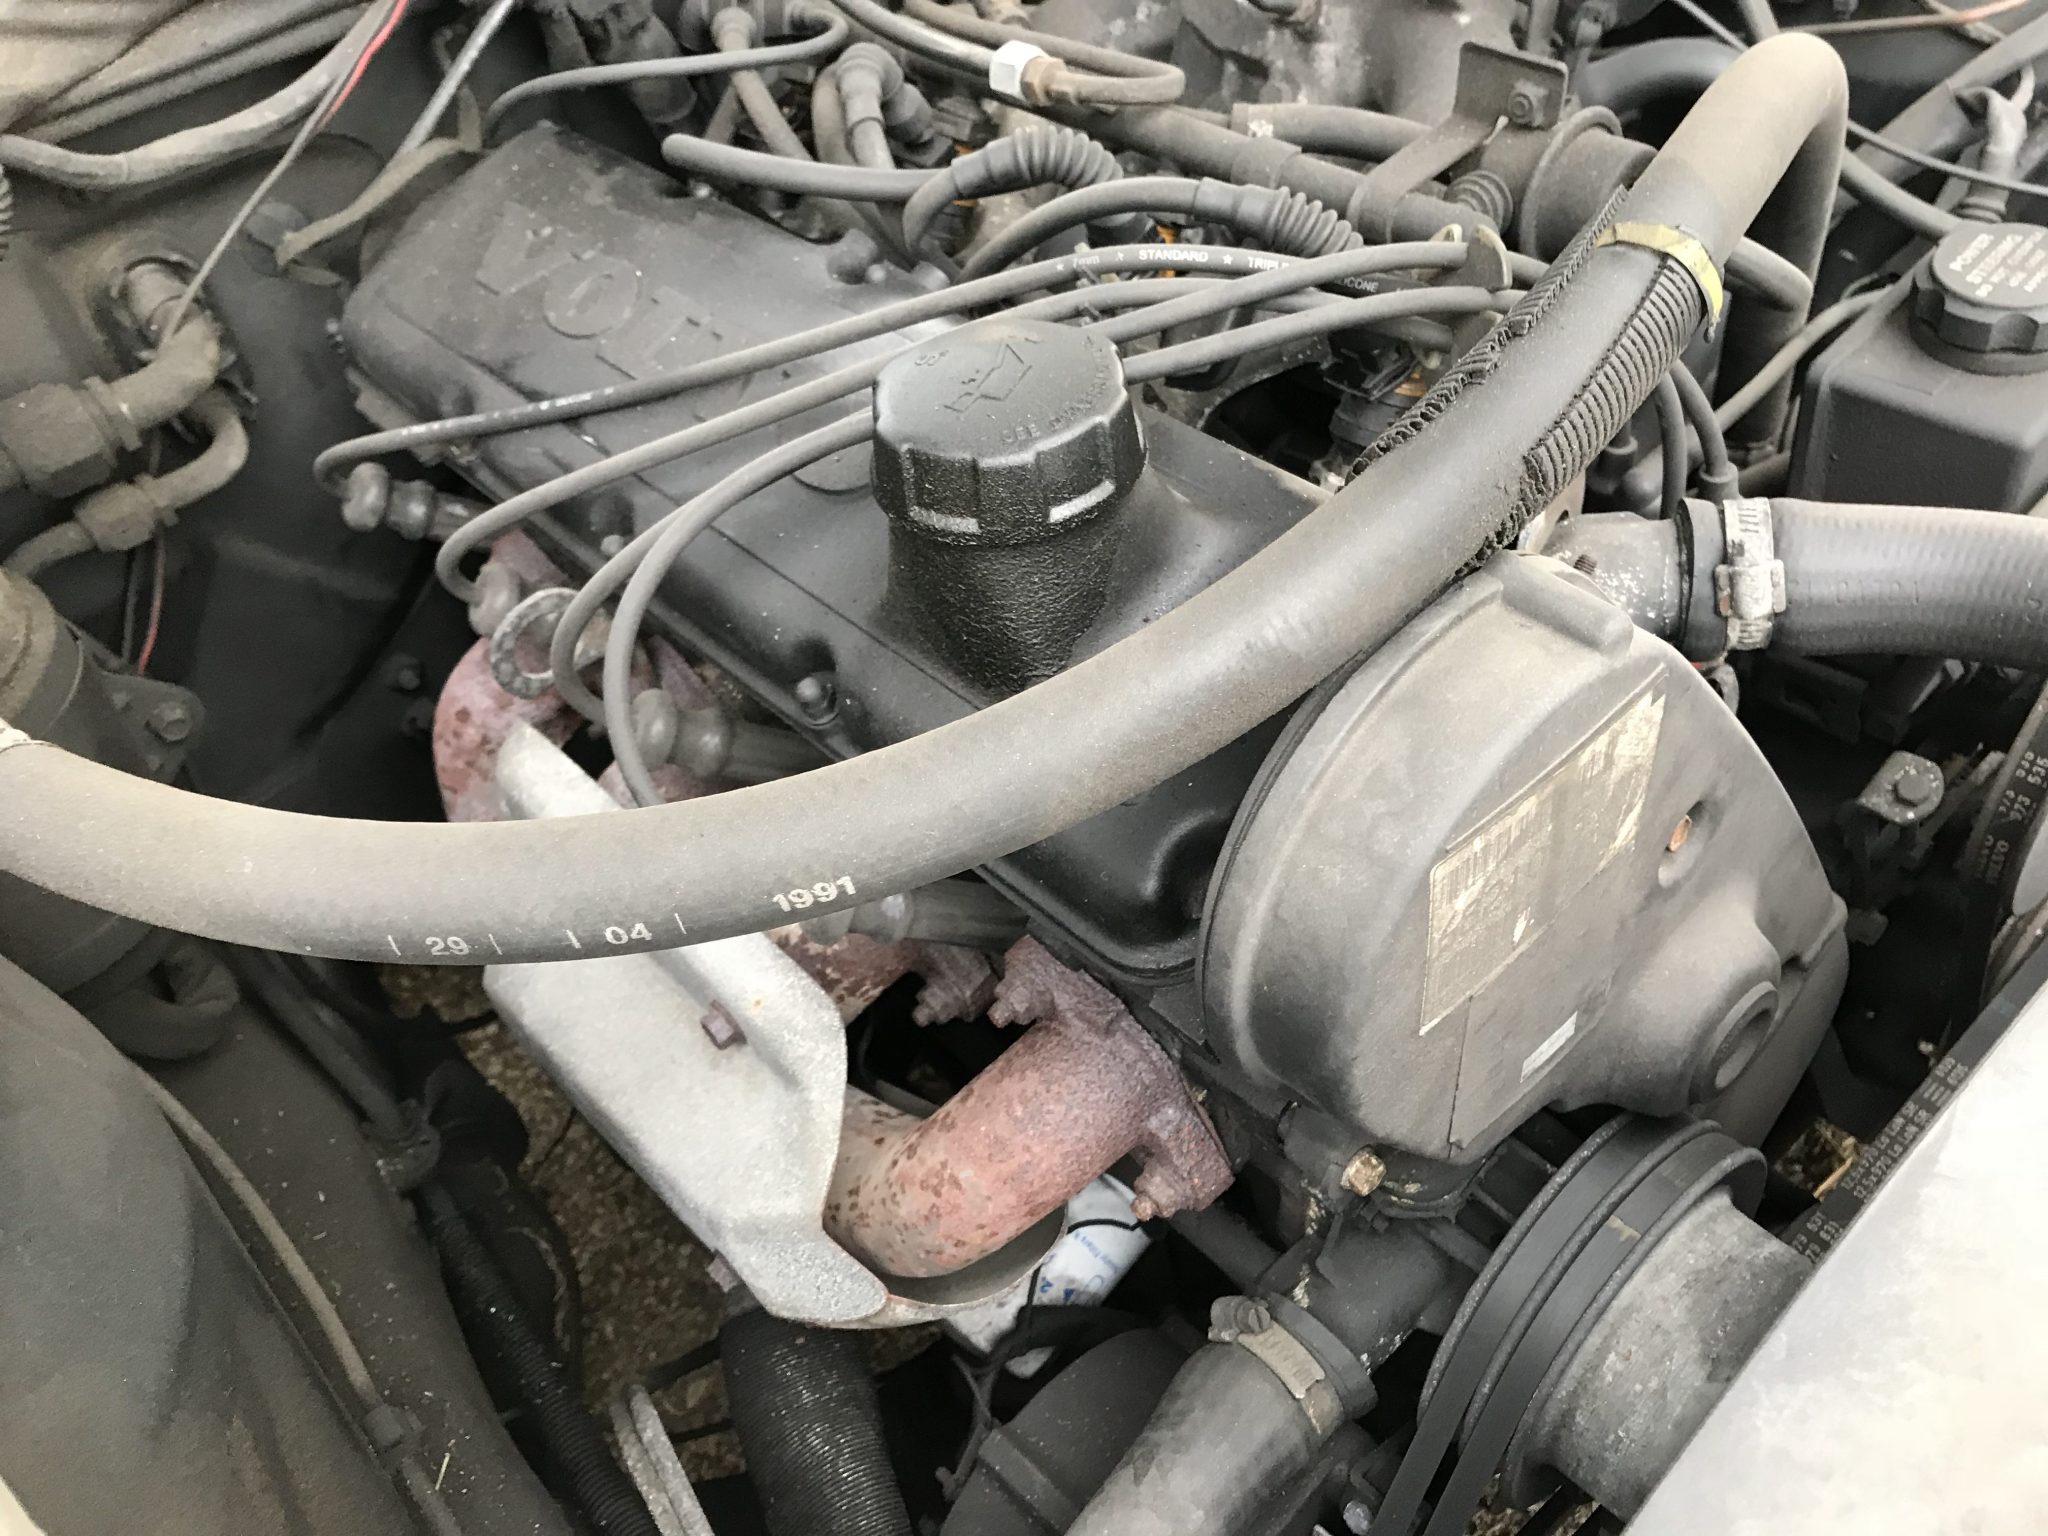
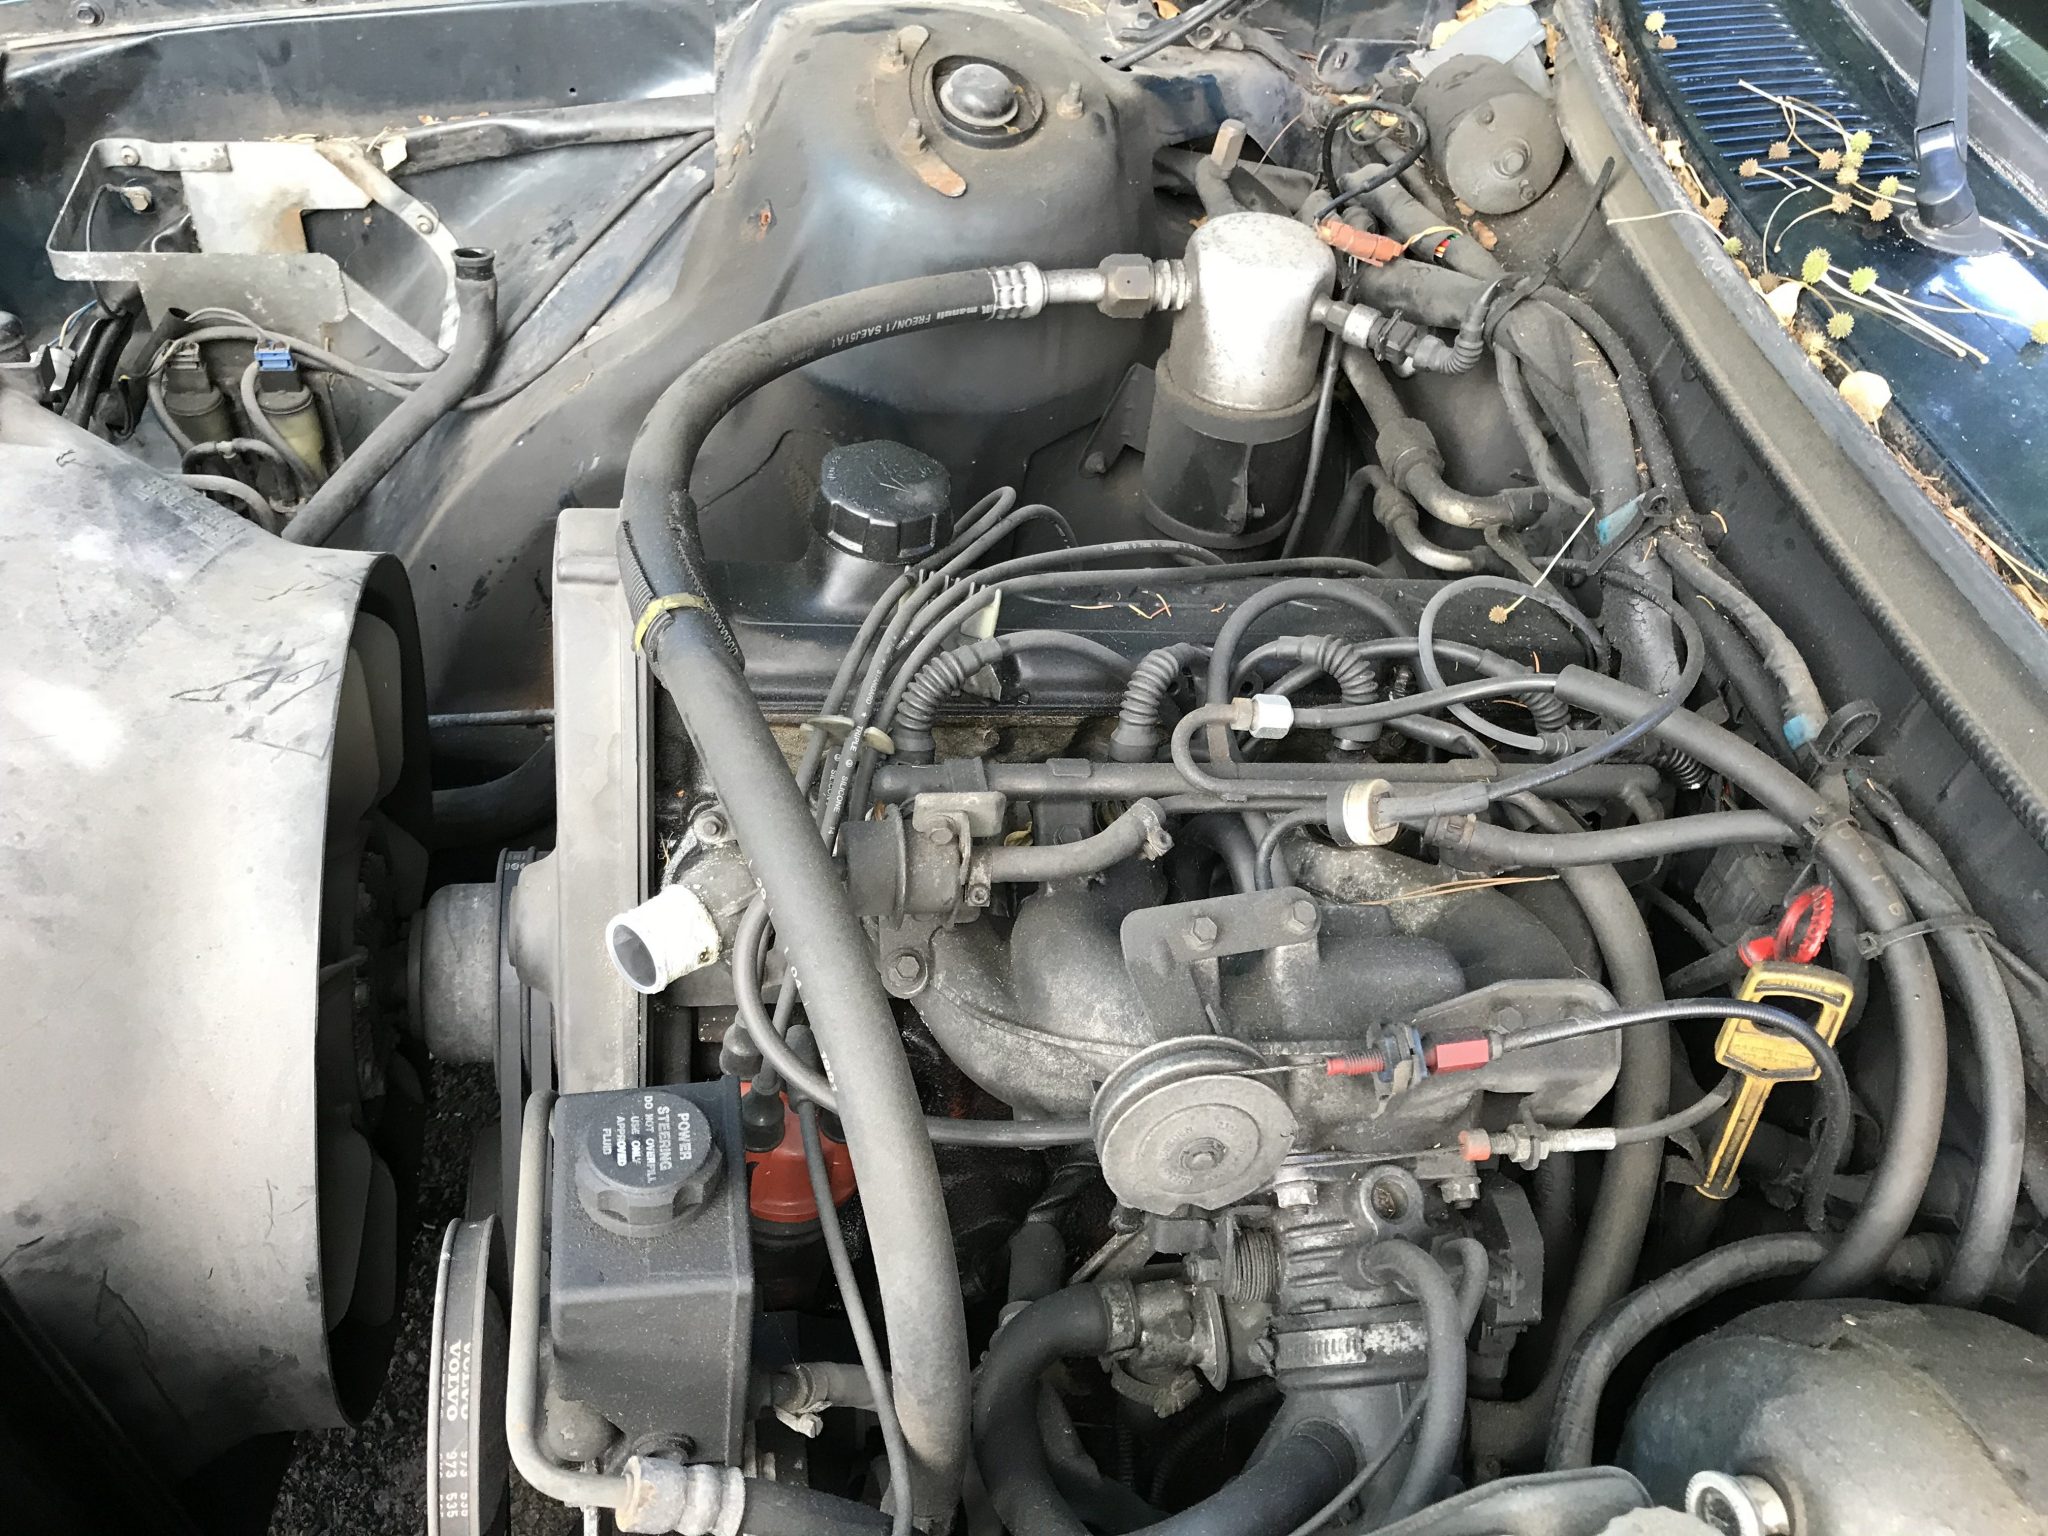
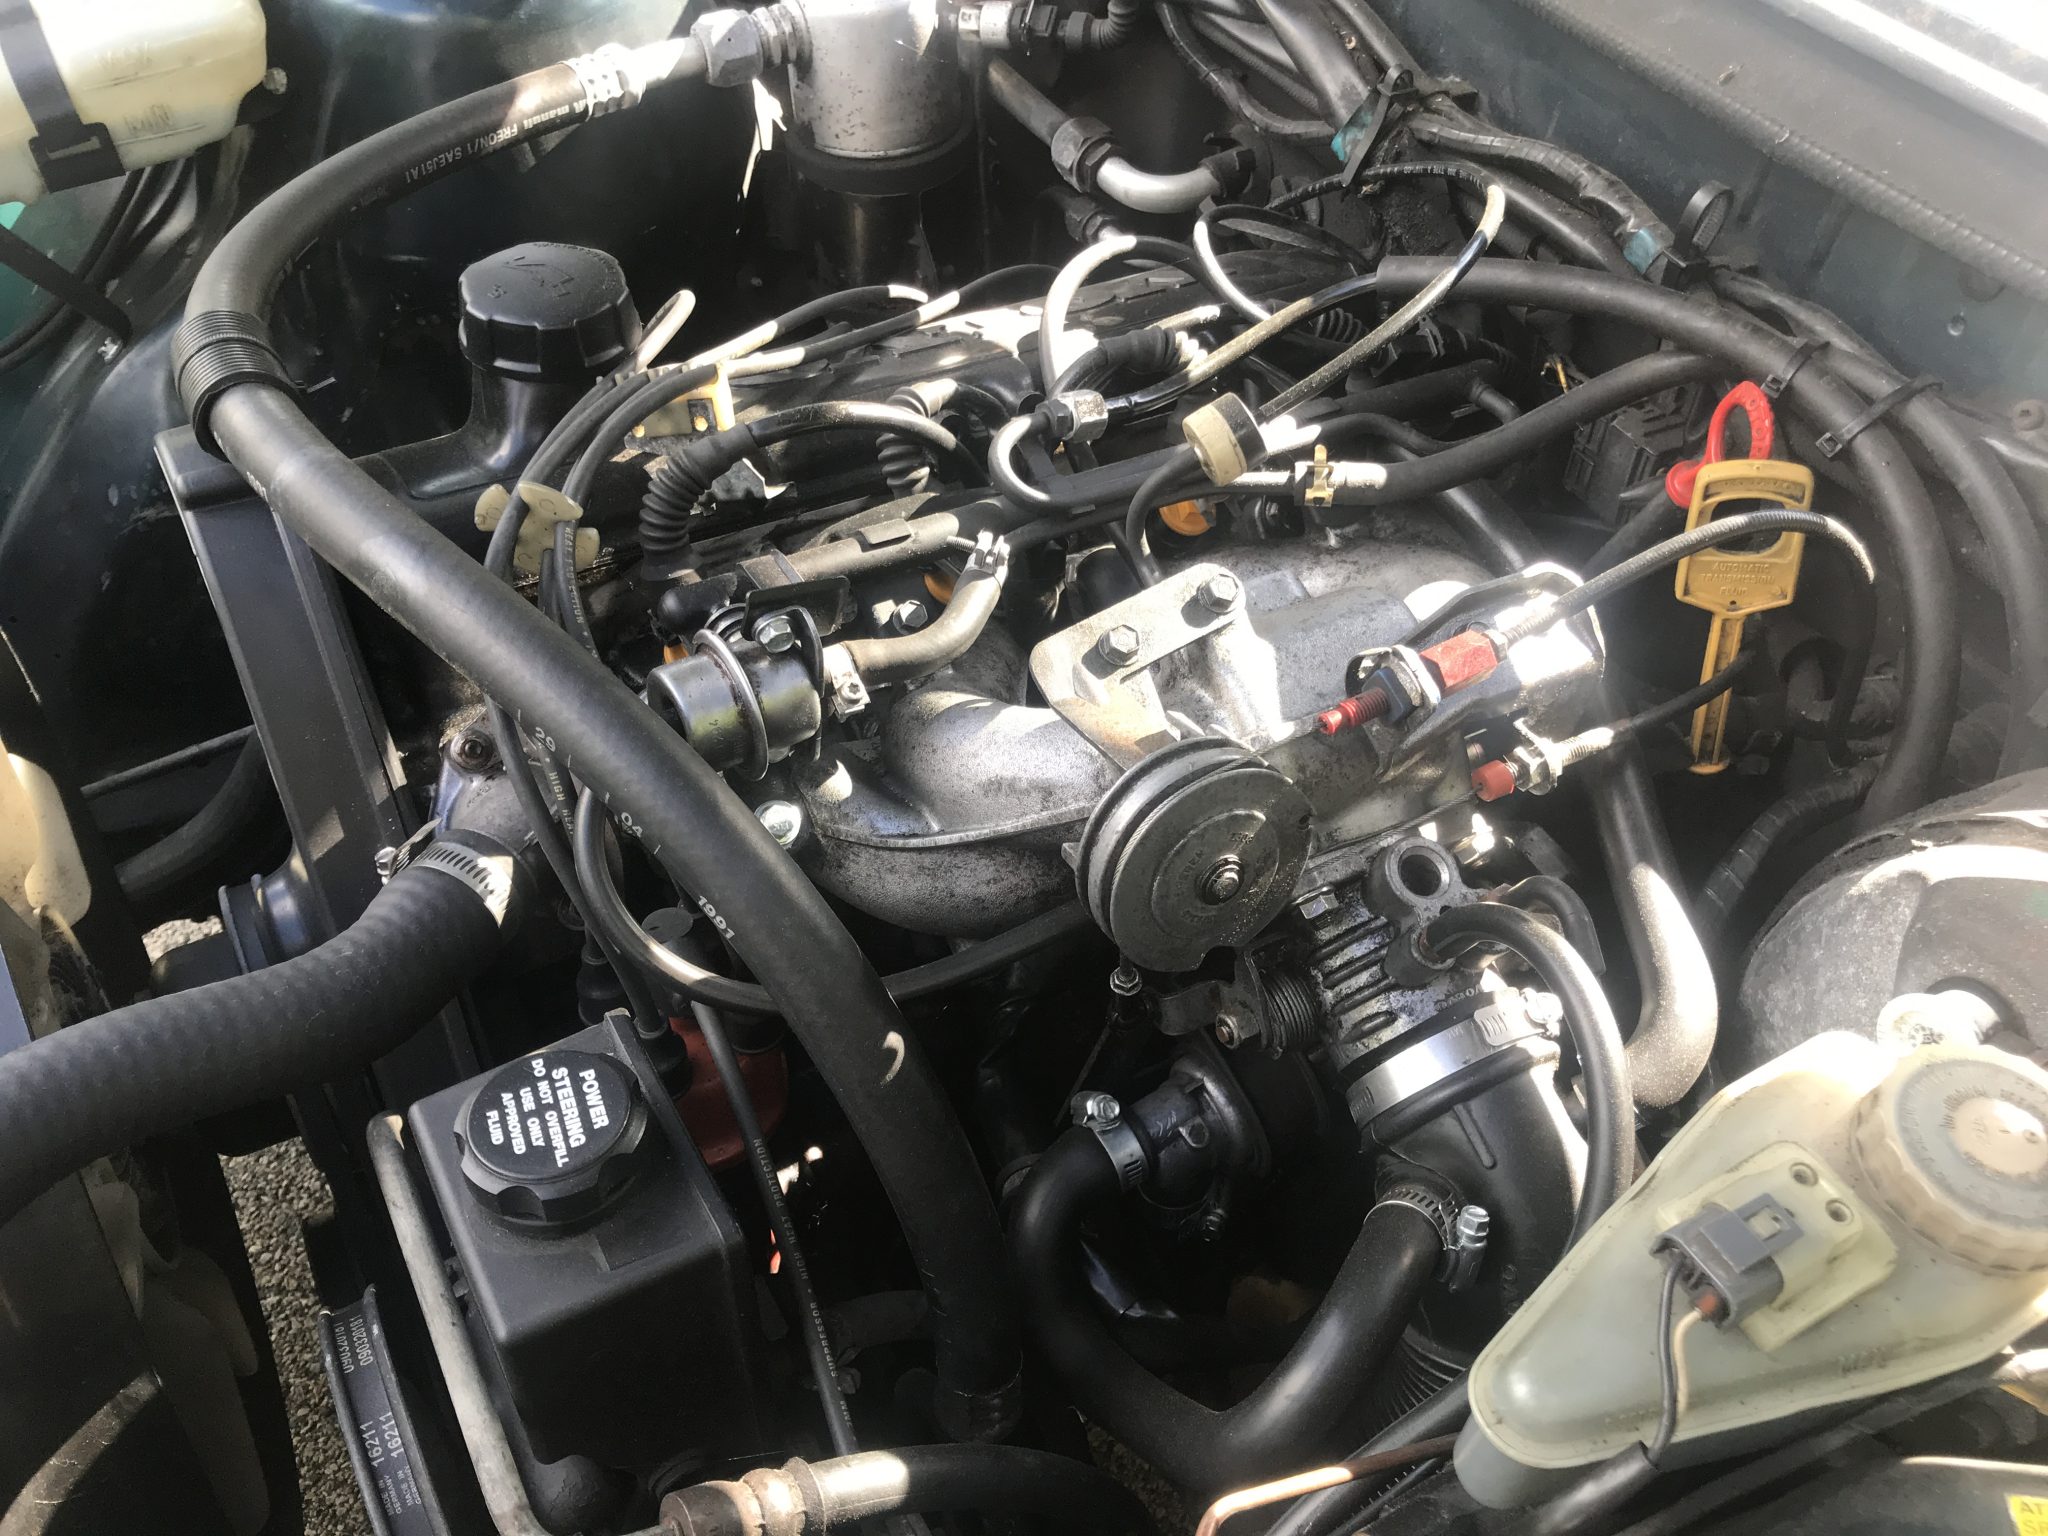
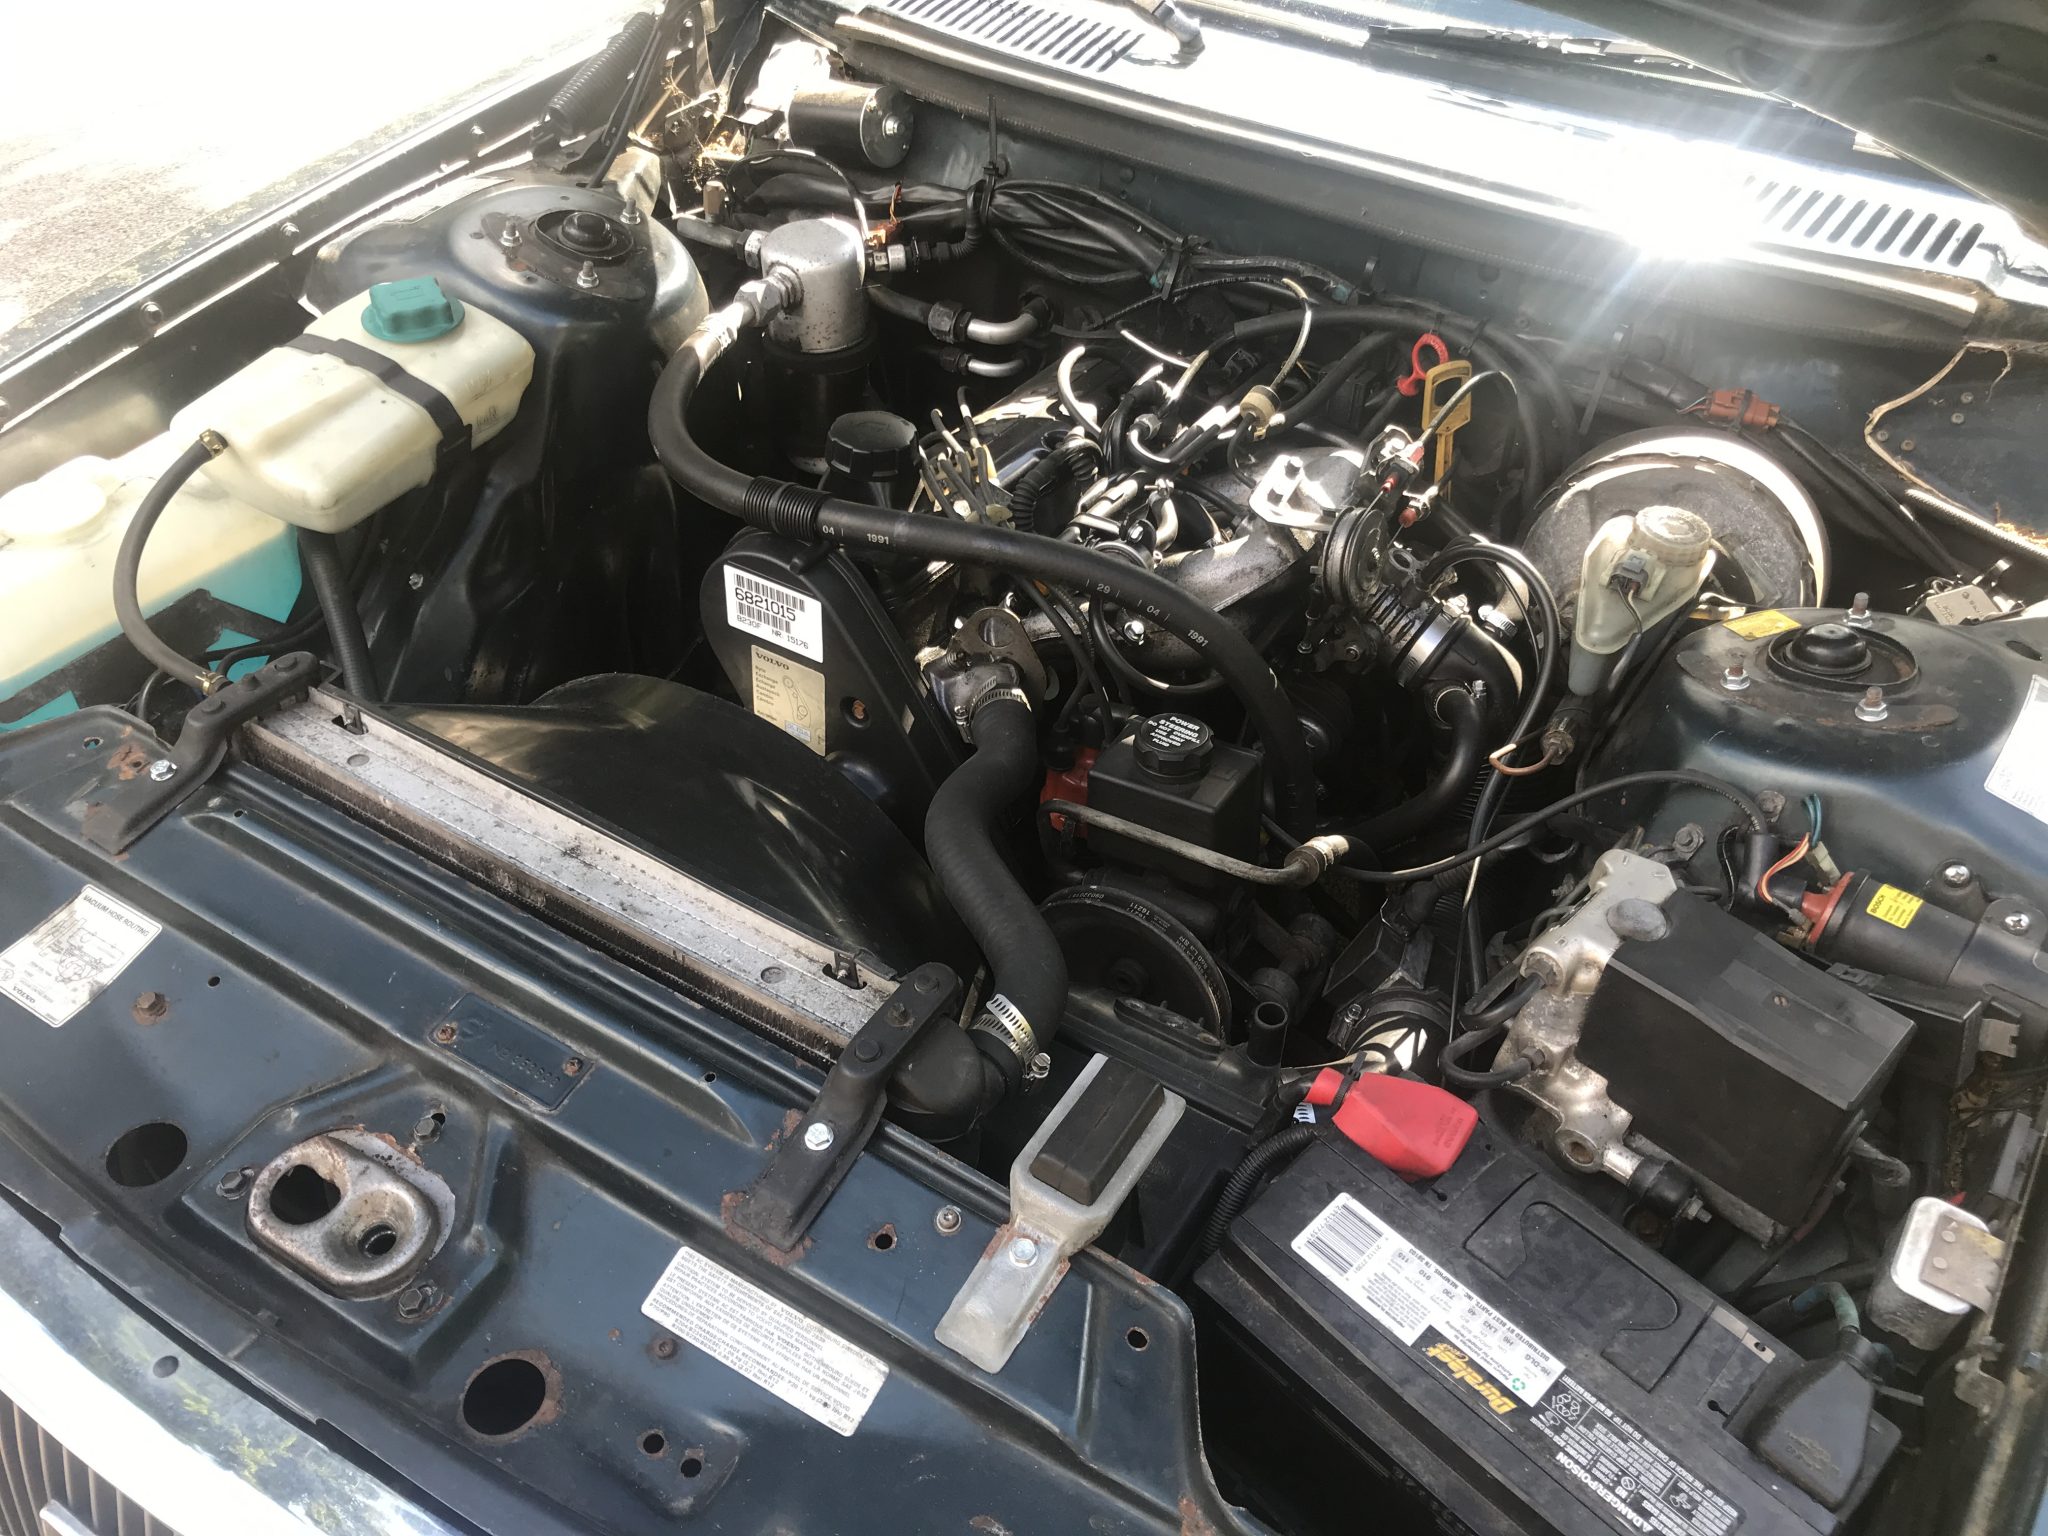
Recently I was inspecting my engine after I had gone for a drive. I wanted to know if any new leaks or other issues had developed. Thankfully there has been nothing like that so far, but my mind was cast back to when I first got the car and just how filthy the engine and bay were. I too a few new photos and present them here in contrast to the initial state to illustrate how far it has come along in both function and cleanliness.
Old
New
Not showroom clean, but I’m quite happy with the results.
Edit: I’m glad I made this post because it helped me realize that I had the check valve between the intake manifold and vacuum tank inside the dash backwards. Remember: it’s black side towards the manifold, white side towards the firewall.
Now that my car can be used it’s tempting to stamp “done” on this project, but that would be supremely premature. There is still a lot to do on this car both in terms of maintenance and improvement. I’ll use this entry to list those out for future reference.
After nearly two years of on-and-off effort, the big day has finally arrived. In the days, weeks, and months leading up to this event I’ve laughed, swore, strained, and cheered. Most importantly, I’ve learned a lot about a subject about which I previously knew almost nothing. I can now proudly says that this car that I have put so much time, effort and not an insignificant amount of money into is now legal to drive the streets.
By last Friday I had all the parts I’d ordered for this final push to get the car registered in hand. This included major components like the rear shocks and also a few extras like new hatch lift supports and a trim piece for the interior hatch handle (one of which I had already broken). Unfortunately I managed to aggravate a pre-existing back issue from a sports related accident I had when I was 13. I could barely walk let alone change car parts. I had to take most of the weekend to recover. Fortunately I was feeling about 90% better by Memorial Day, so I was able to get all my planned work done.
Very soon after posting my last entry I took my car over to a local inspection station to start the process. I’m happy to say that while the car didn’t pass with flying colors, the outstanding issues were few. There were two to b e exact. First, my tires are in terrible shape with significant dry rotting. I suspected something like this would be the case, but I was hoping to squeak by for now. They’ll all have to be replaced and re-balanced. The second issue was with my rear shock absorbers which are apparently quite dead. I didn’t see this myself, but the car was not exactly riding like a cloud so I suppose it’s not surprising. Anyway I’ve ordered some replacements and installation is super simple. Once they arrive I’ll put them on the car, take it back to the garage, and I am set. Very exciting! I should also note that once the car has passed I will be christening her with a name, so stay tuned for that.
Since my Volvo is effectively locked into my driveway by my other cars I don’t worry to much about it being stolen. As such I don’t often both to lock it. Recently after taking the front door panels off in an effort to fix the passenger side door switch and lubricate the window mechanisms I noticed that the driver side central locking switch, part 3540135 which I had previously fixed up, didn’t look right. Specifically the plastic part that connects to the door lock had fallen off. Closer examination showed that not only had it fallen off but it had come apart. Some bad wiring routing on my part had caused that side of the mechanism to get caught on the window as it rolled down, breaking it.
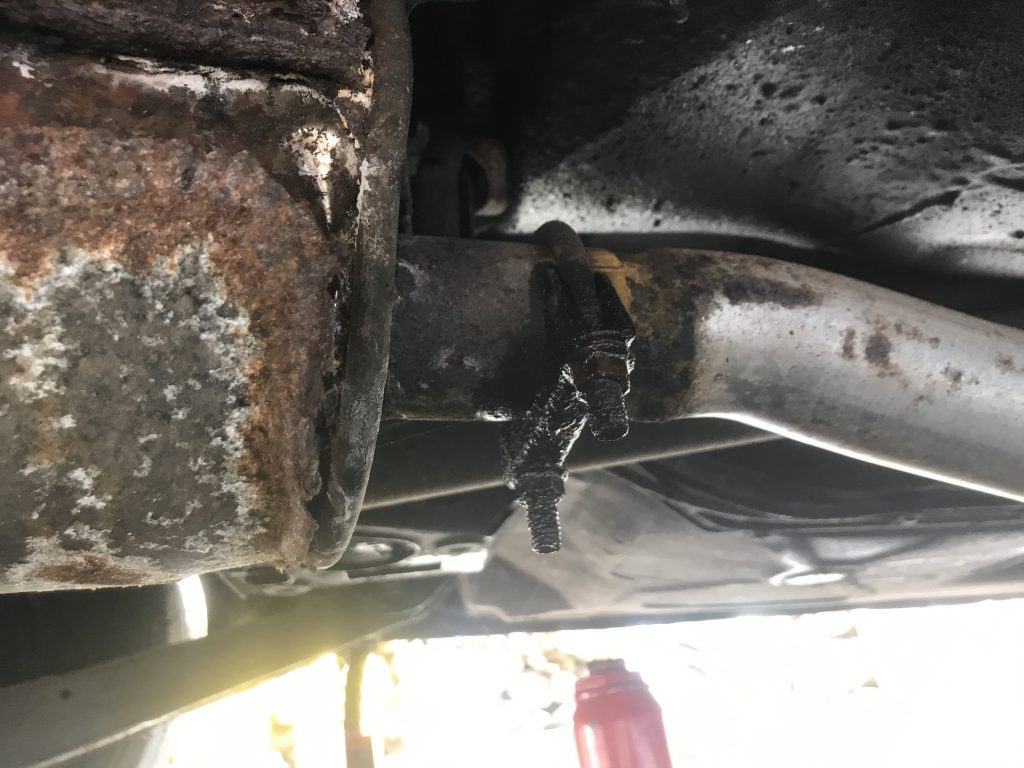
The stainless steel butt joint pipe clamp and donut gasket I ordered arrived in the mail in time for the weekend, so at the earliest opportunity I climbed under the car to put things to rights.
I’m a few episodes into Amazon’s Tales From The Loop, a science fiction series based in part on the art of Swedish painter Simon Stålenhag. It’s surreal and dreamlike and, like Stålenhag’s art, full of 200 series Volvos. I’m enjoying it for the stories, the atmosphere, and, of course, the Volvos. Consider it a BbG official recommendation.
After a few weeks of waiting there was finally an alignment of decent weather and the weekend. That meant as soon as a got done with a few household chores I was able to start the process of taking out the old exhaust and putting in the new one. This system includes the resonator, a muffler, and the various pipes that connect them.
First a quick note of resonators vs mufflers. They are similar to each other in that they are responsible for mitigating exhaust noise. The main difference is that the resonator does not quiet the exhaust sound. Rather it “tunes” the exhaust sound in a way that makes the muffler’s job easier. That way the muffler can be designed to muffle a much narrower set of frequencies which means a quieter ride with less of a hit on performance.
Removal
The whole process starts by jacking up the rear of the car onto jack stands. Next I had to remove the clamp that connects the resonator to the catalytic converter pipe. This clamp was hideously rusted and was almost just a clamp shaped lump of corrosion. I blasted it with WD-40 and used a breaker bar with a 14mm deep socket to get the nut turning. It took some muscle, and boy did that nut scream as it turned, but eventually I got both sides off far enough to be able to move it out of the way. I then got out the rotary tool and used a cut off disc to finish it off. I wasn’t going to reuse them, so this was the much faster and easier method.